Easy PS4 Setup Guide – Everything you need to know

Are you setting up your PS4 for the first time? You want the whole process to be flawless. It’s clear. You don’t want to run into unwanted bugs and incompatibility issues.
This simple guide covers the various aspects of setting up your PS4 console. It tells you how to connect your PS4, set up your PS4, register, etc.
In addition, you will also get information about other parts of the PS4, such as how to set up virtual reality. We’ll also look at a quick guide to the PS4 upgrade and how to use it the right way. Let’s start with the right questions:
What is PS4 setup?
Setting up your PS4 is the process where you connect your PS4 to a TV and the internet and sign in with your ID. This allows you to play games with your preferences and you customize the interface.
When you buy a new PS4, it doesn’t come pre-configured. You have no way to connect and play games. You need to create an ID, download games and more. This is basically what the PS4 setup is.
The whole point of setting up a PS4 is to avoid inconvenience in the future. These can be errors in loading the game, ID, connecting the controller or headset. Even setting up VR headsets with the wrong calibration can lead to problems.
So, this guide will help you mitigate it all. Let’s get down to the first question you might have:
What do I need to set up my PS4?
When you purchase a PS4 console, you will receive:
- Console in the color you bought it.
- Power cable.
- HDMI cable.
- One wireless controller with micro-USB cable for charging.
- Headphone with built-in microphone.
In addition to these, you will also need:
- Active internet connection. Wi-Fi would be preferred.
- You may also need an email ID or PlayStation ID. PS4 may let you create one.
- You will also need a TV screen. A TV compatible with your PlayStation 4’s HDMI cable.
How to set up PS4 for the first time?
- Connect PS4
- Set up your PS4 for the first time
- Connecting to a PlayStation Network account
- Signing up for PlayStation Network
- Activate as Primary PS4
- Play games on PS4
- Putting PS4 into Rest Mode
- To turn off your PS4 completely
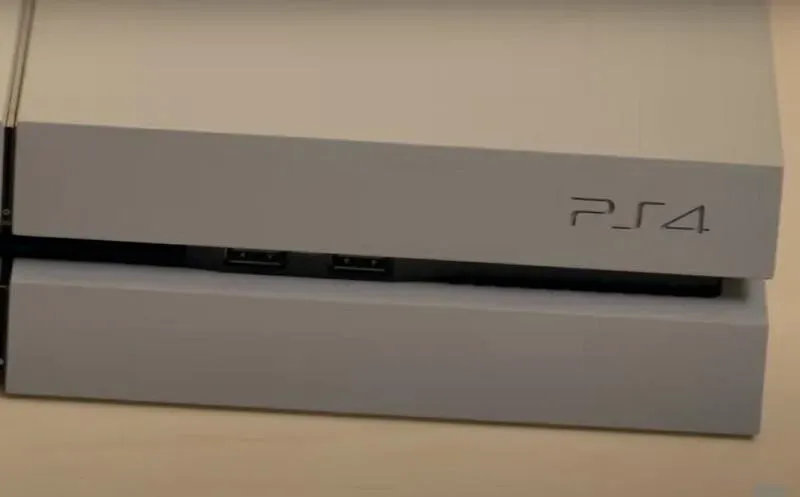
1. Connect PS4
Now that you have your console out of the box, it’s time to plug it in. Connecting PS4 means connecting everything that is physically available.
- First, connect the HDMI cable to a free port on the TV. Connect another cable to the HDMI output port on the PlayStation 4.
- Then connect the power cable to the PlayStation. The plug will enter the outlet, then turn it on to turn on the power.
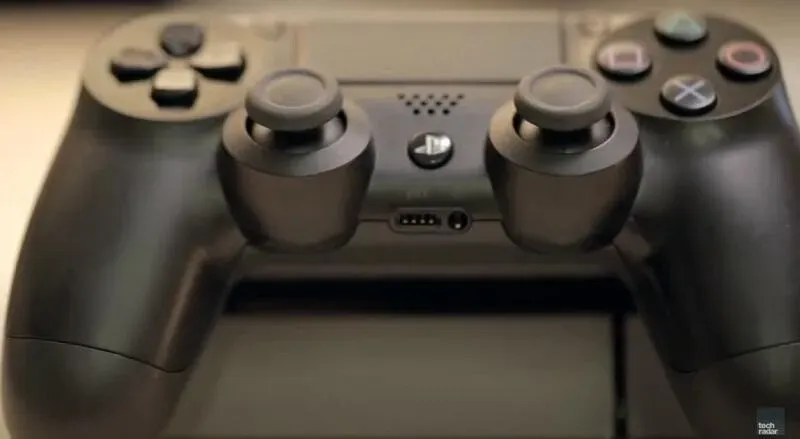
- You will need to charge your PS4 controller first before starting setup.
- To charge the controller, you will have a Micro-USB port located on the top side of the controller.
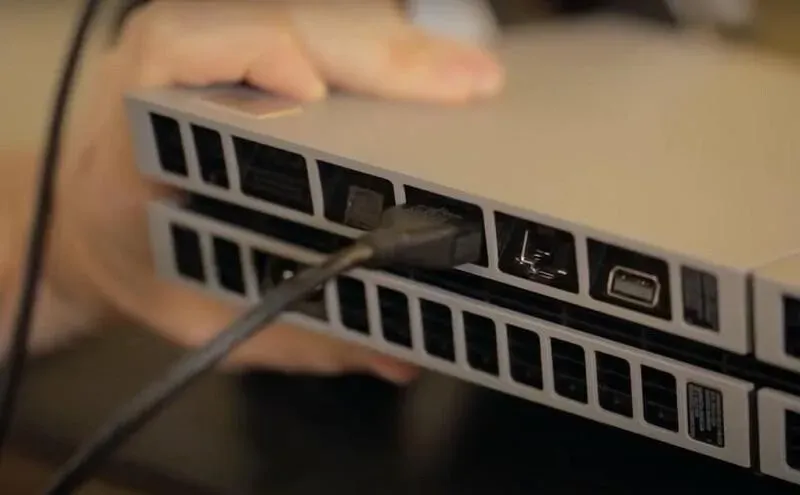
- Connect the micro-USB cable that came with the controller. Then plug the other end into the PlayStation 4’s USB port. The ports are available on the front of the console.
- Be aware that the cable is too short for you to play with an actively connected charger. It is not recommended to play with the charger connected as it may reduce battery life and performance.
2. Set up your PS4 for the first time
Now let’s get started with the actual PS4 setup process:
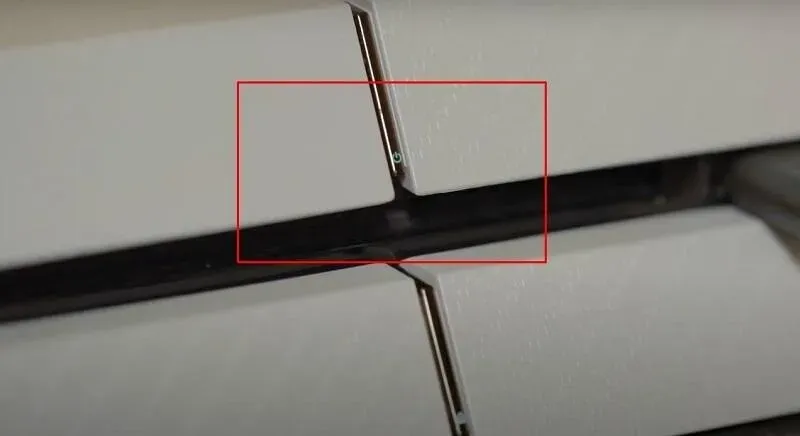
- The PS4 console has some very handy buttons. These are pretty thin. You will need to click on the top one. It has a Power icon on it. This will turn on your console.
- Once enabled, you may see something like “Initializing”. It’s a system that tunes itself for the best experience.
- The PS4 may restart after the initialization process is complete.
- Next, the installer will ask you to press the PlayStation button on your controller. The PS button is in the middle of the Start And Select button (just below). Click once.
- This will connect the controller and you will now go through the setup.
- First, you will choose a language. There are countless languages available. So you can choose your native language or use English.
- Next, you will need to connect it to the Internet. You can use a wireless connection (Wi-Fi) or connect via an Ethernet cable. Both options are available for PS4. You will need a router for cable connection.
- Set up an Internet connection on the modem in advance with a password to access it. If you are using a LAN cable, the process is different.
- Once you’ve completed this, you’ll need to set the date and time. This is not an automatic process. Thus, you will have to insert the date and time manually.
- The PlayStation 4 may download the latest updates after installation is complete. It may even ask you to reboot. You can download updates or install them later.
3. Connecting to a PlayStation Network account
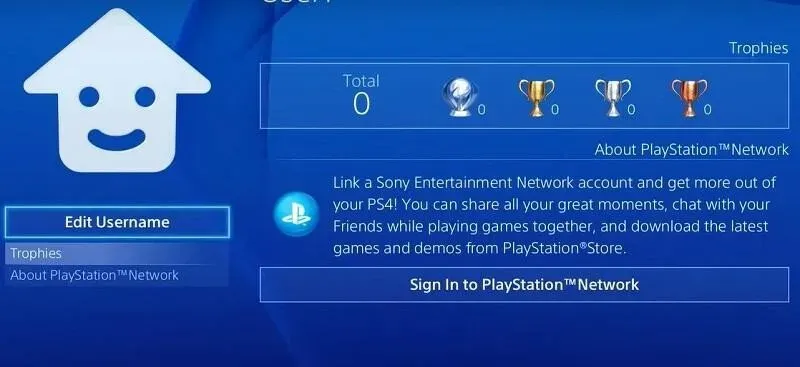
A PlayStation Network account is required in order for you to save your progress. Otherwise, you will not have access to cloud storage and you will lose your saved data.
A free PlayStation Network account will also allow you to access the online store. Thus, you can buy and download games or demos. This will allow you to download apps and more.
It’s the same as logging into the Google PlayStore to access all the features it has to offer.
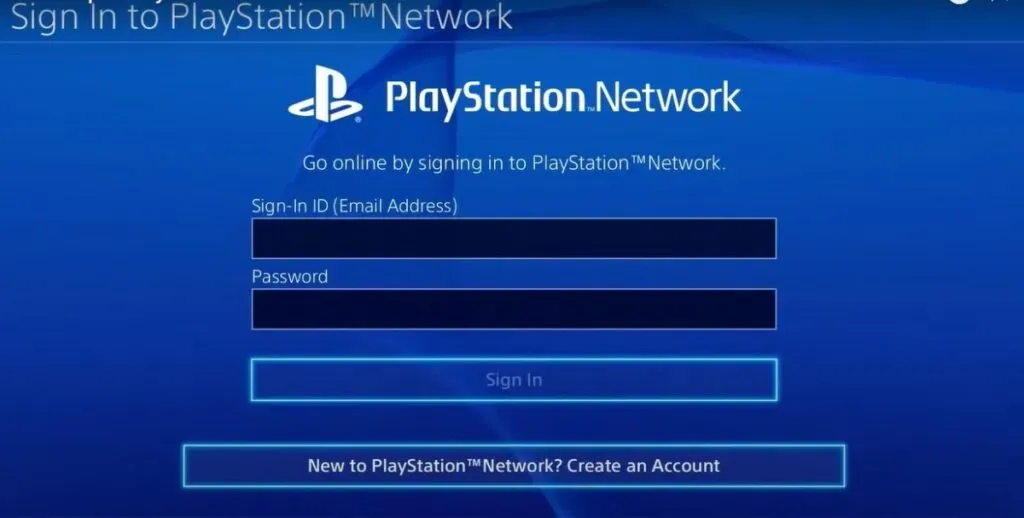
- In the PS4 main menu, you’ll see the “Profile”option. Select it.
- Next, select the user profile, whatever it is. This can be the default username, such as User1. Do not edit the username yet.
- After selecting a profile, you will see the option to “Sign in to PlayStation Network”. Select it.
- You can now provide an email ID and password. If you don’t have an account, select “New to PlayStation Network?”. Create an account.’
If a new update is available, you may need to update your PS4. Otherwise, you will have problems connecting to the PS4 network.
4. Registering with PlayStation Network
If you don’t already have a PlayStation account, you’ll need one. The registration process is simple:
- Choose the option mentioned earlier. Then enter a valid email address.
- The password you enter will be used for your PS4 ID and not for email access.
- You will then need to go to your email address (the one you provided) and verify it to confirm. This will create your PS4 account.
- You may then have to select some settings such as city and location, among others. Follow the instructions on the screen.
- You can also customize your avatar during registration.
- There are also sharing settings for the account. It would be helpful if you edited them according to your preferences.
- You may receive an invitation to sign up for a PlayStation Plus membership. You can skip it if you don’t want to spend money on a membership.
5. Activate as Primary PS4
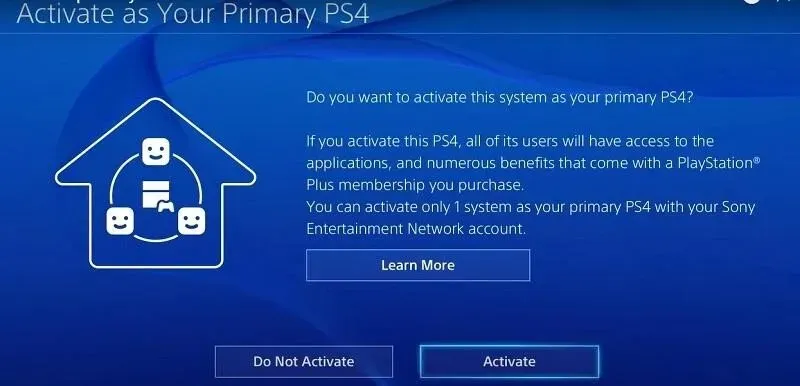
Once you complete the above process, you will receive an invitation. It will ask you to activate or not activate PS4 as primary:
- Select Activate if you don’t have another PlayStation at all.
- Be aware that this will restrict your ID’s access to the assigned console. If you want to access the ID on another PlayStation, you will first need to remove it from that console. This is an extensive process.
- Generally, activating that PS4 as your primary PS4 will allow you to share content. You can access each other’s downloaded games on the same console through profiles. So, that’s a plus.
6. Play games on PS4
Now that you’ve finished setting up your Playstation 4, it’s time to play games. After all, that’s what we’re here for. So here’s how you do it:
- Open the PlayStation Store and find the game you want to play. You can go ahead and buy them to download them.
- If you have a disc for games, you can insert them.
- Inserting a game disc is easy. Remember the power button? The button right below it is the “Eject”button. Press it first to make sure there is no disc inside the PS4 yet.
- Next, you see a thin hole next to the USB ports on the PS4. This is where you will place and insert your CD.
7. Putting PS4 into Rest Mode
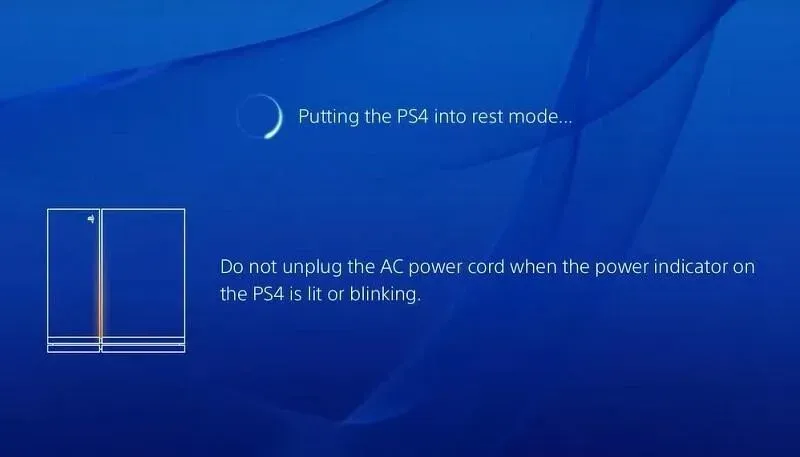
PS4 Rest Mode allows you to keep the operating system running. This is the same as sleep mode on your PC. But this allows you to consume less power and keep the system on.
The purpose of rest mode is to take a break. You can return to resume the game from where you left off. To activate Rest Mode on PS4:
- Press and hold the power button until you hear a beep.
- Stop pressing immediately after the first beep. This will show you that the PS4 is going into rest mode.
- To exit Rest Mode, press the Power button again and the system will start up at full capacity.
8. To turn off your PS4 completely
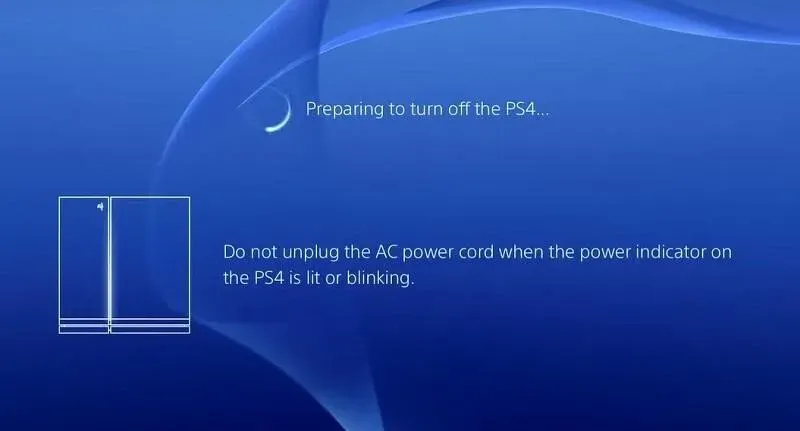
You can also quickly disable the PS4 button. There is no need to use the built-in interface. It’s pretty easy:
- Press and hold the power button as you would in holiday mode. You will hear a beep.
- Continue holding the power button after the first beep without releasing it. You will hear a second beep.
- You will then see a screen showing the system is shutting down.
How to set up PS4 VR?
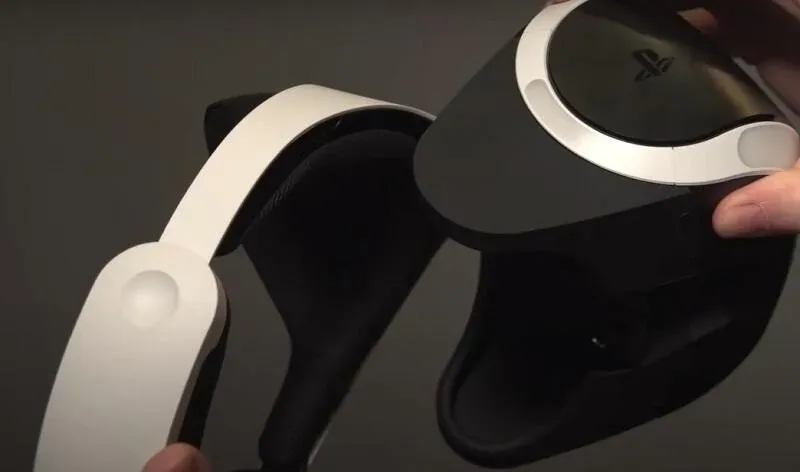
Setting up a VR headset is relatively simple:
- After unpacking the VR headset, connect all cables to the console to the correct port.
- Keep in mind that VR headsets have an HDMI PS4 port, while a TV on a PS4 console is listed as an HDMI TV port. So, use the correct ports.
- Turn on your entire system. If everything is connected correctly, the VR glasses will glow blue.
- It can then request updates. Your PS4 will also be updated to support VR. Allow it.
- After that, you can proceed and enjoy the VR headsets.
How to update the PlayStation 4 firmware?
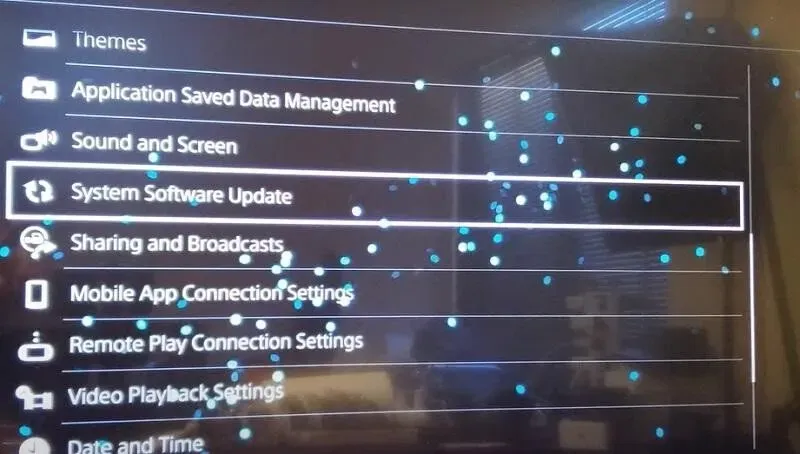
In most cases, your PlayStation will tell you if an update is available. You will receive a notification. If this doesn’t work:
- Go to your PlayStation 4 settings.
- There you will find the “Update System Software”option. Click here.
- PS4 also allows you to download the update to a USB flash drive and install it on your console.
During the update process, it is best not to do anything else. Please do not play games or download anything. This may interfere with the update process.
Conclusion – how to set up PS4?
Now you can enjoy PS4 games without any problems. Remember to use high speed Wi-Fi. If you need zero latency, then a wired connection will be better.
Setting up the sound or headphones is also relatively easy. All you have to do is plug them into the appropriate AUX port. You don’t need an AC jack for Sony PlayStation. Have a PSN account if you want to enjoy uninterrupted gameplay.
With that said, we hope our guide will help you learn everything. So go ahead and have fun.
FAQ
How to set up PS4 Remote Play?
Setting up Remote Play is pretty easy. All you have to do is go to settings. In the list you will find Remote Play Connection Settings. Access it and click Add Device. It will show you an eight-digit code to enter into the device you want to connect via remote play. You may need to download the app if you are using it for Android or iOS devices.
How to set up PS4 controller on PC?
There are three ways to connect a PS4 controller to a PC. The first is through Steam. The other is via Bluetooth, and the last is via the DS4 utility for Windows. These are the only known ways to connect a PS4 controller to a PC. They will have limited functionality.
Do you need internet to set up your new PS4?
You will need an internet connection for various reasons. It allows you to check for updates. You will also need to connect to the PlayStation Network. The latest PS4 consoles work with cloud computing technology. Therefore, it would be better if you have an active Wi-Fi connection to play and enjoy games. It also allows you to save progress.
How to set up PS4 on TV?
After connecting the HDMI cable to PS4 and TV, turn on the TV. You will then need to use your TV’s remote control to access the HDMI channels. It should have a button to access the HDMI display port. Depending on which port you are connected to, the TV will need to access the appropriate channel.
Leave a Reply