SSD not showing up in Windows 11? Here are 5 fixes!
Is your recently updated Windows 11 not showing the SSD containing your important information? Then you are in the right place. This quick guide to possible workarounds for this issue will help you resolve this issue.
Recently, several users reported that Windows 11 does not recognize SSD. Whenever you connect any external device to your personal computers, such as a disk drive, hard drive, or solid state drive, it should automatically show up in File Explorer, Device Manager, and Disk Management.
There are basically two types of problems for this problem:
- When using a new SSD: This scenario occurs when you use a new SSD and connect it to your personal computer for the first time. Possible reasons for this problem are that the drive has not yet been initialized or has not been formatted.
- When using an old SSD: but the problem is different because the SSD is already in use.
Don’t worry. We will focus on both of these issues since Windows 11 does not recognize SSD, this article will provide solutions for both issues.
Fix Windows 11 not recognizing SSD 2022
Check your SSD connections
If you’re using an external SSD, the connection is most likely the problem. Remove the SSD, clean the port and both sides of the USB cable, and reconnect the SSD to your system. This solution should solve the problem.
If the problem persists, try connecting to a different port. If the SSD starts to work, the problem is with the port, which needs to be checked and fixed by a hardware technician.
Despite this, Windows 11 still does not show the SSD, try connecting it to another computer. If it is not detected on the other system, reconnect it to the first system and use the methods listed below to resolve the issue.
Initialize SSD
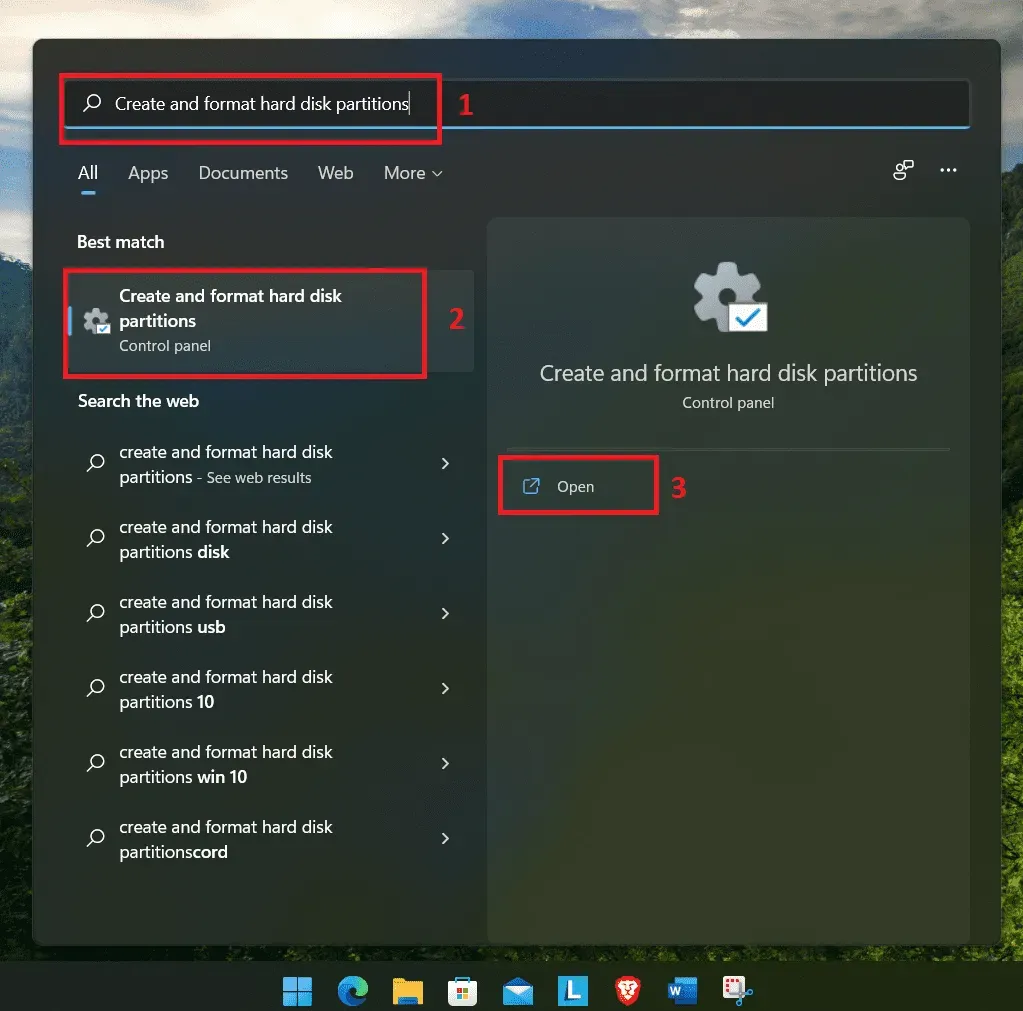
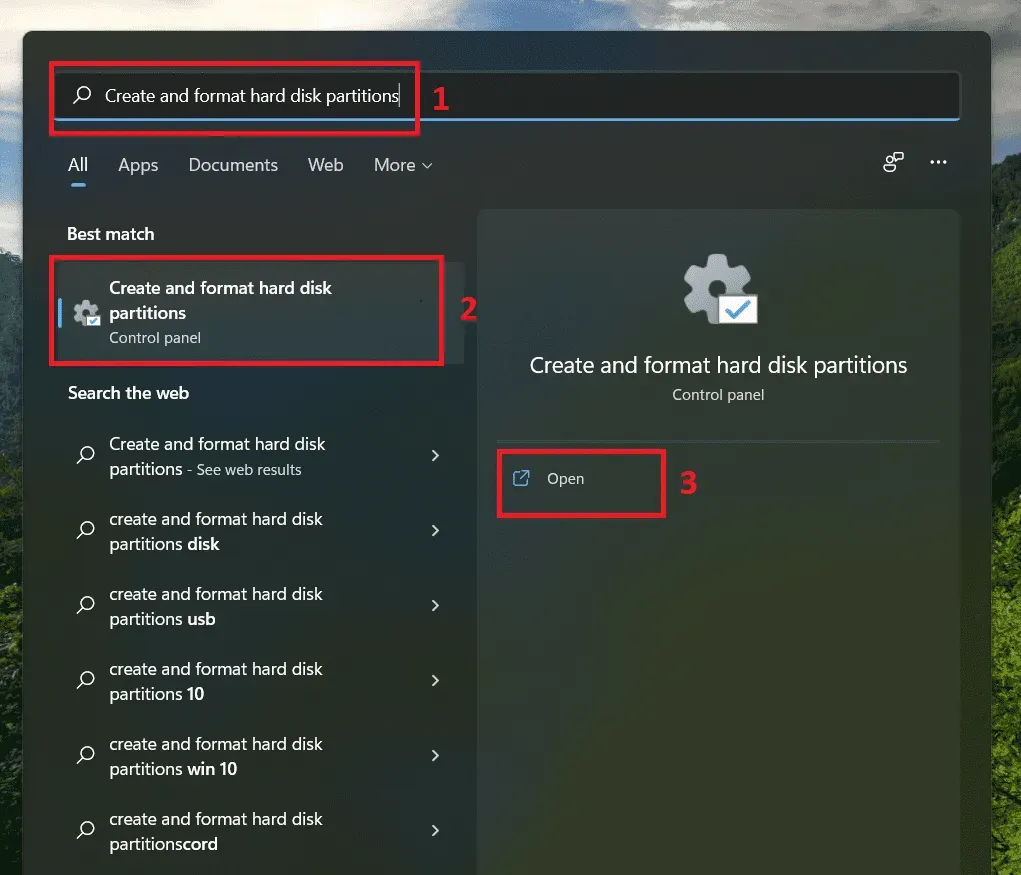
- Launch the Search menu by pressing Windows + S, enter “Create and format hard disk partitions”in the text field, and click on the resulting search result.
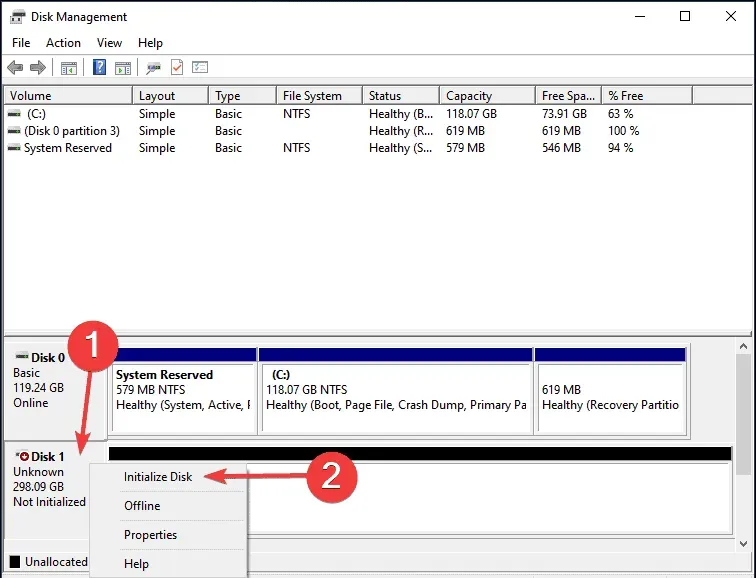
- Suppose the SSD says “Not Initialized”and has a black bar at the top. Then right-click it and select “Initialize Disk”from the menu options.
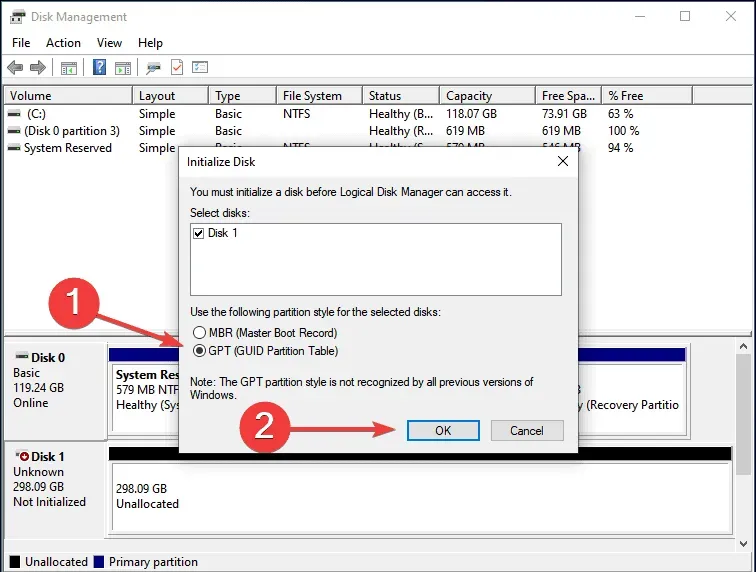
- Select the desired partition style from the suggested options: MBR or GPT. We suggest choosing GPT as it allows you to create more partitions, but there is a downside. Windows 8 and earlier do not recognize GPT partitions.
- Once the SSD is initialized, right-click it and choose New Simple Volume from the context menu.
- Click Next to continue.
- Enter the volume size in MB. Leave the default entry as this is the maximum volume size and click Next.

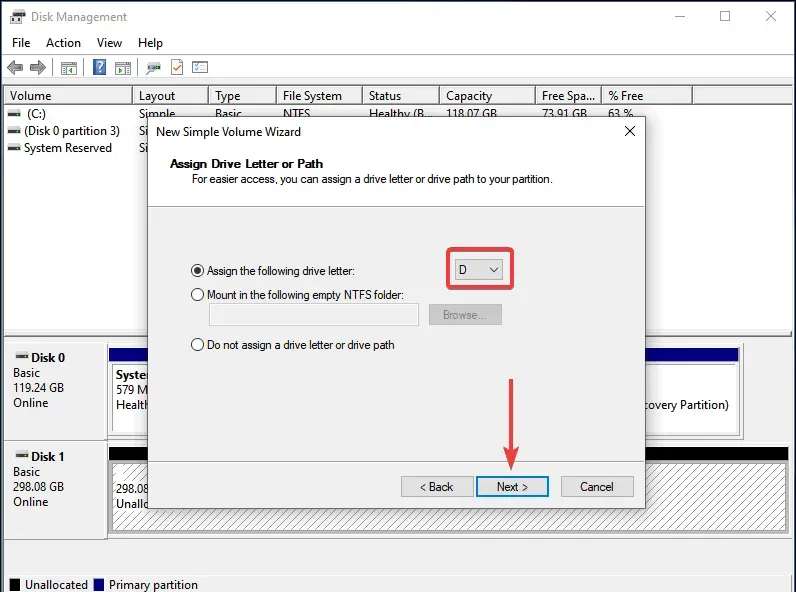
- Select a drive letter from the drop-down menu and click Next.
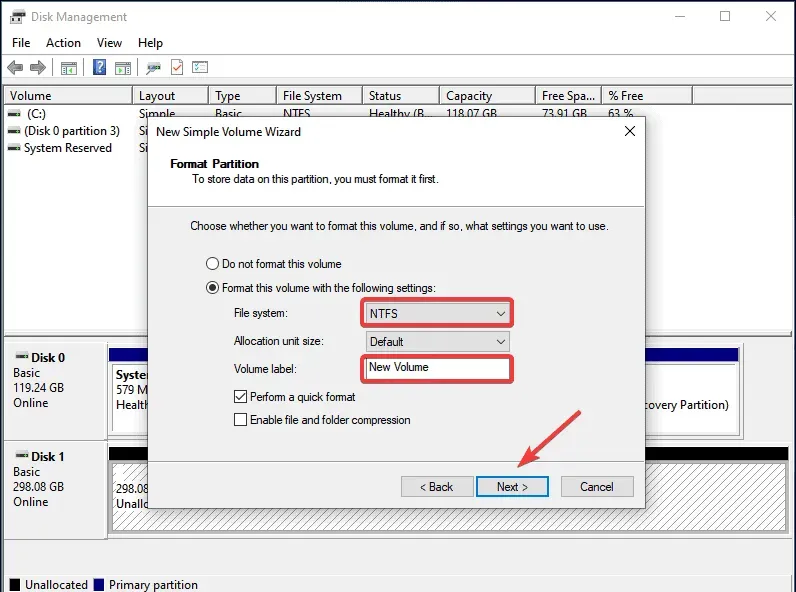
- Then select the volume label and file system for the SSD and click Next. If you are creating a volume for the first time, we recommend that you use the default entries at every step.
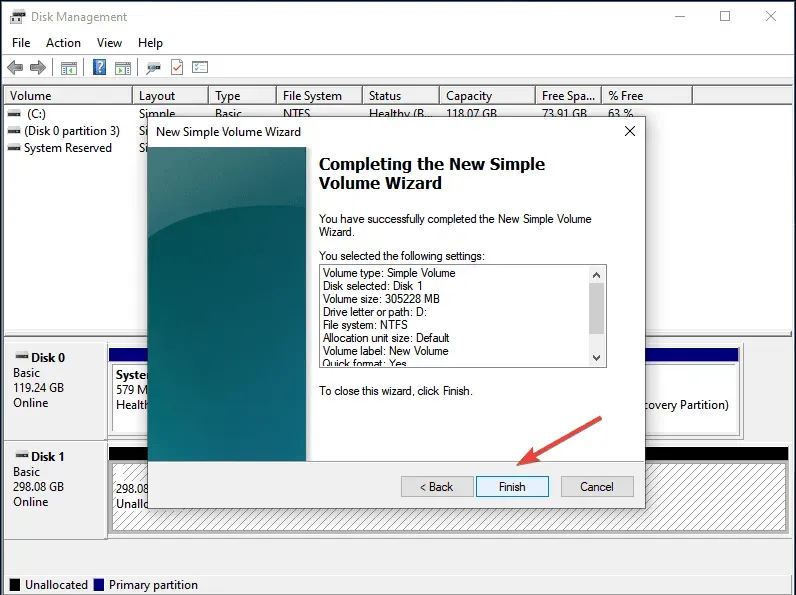
- After checking the details, click Finish.
If the SSD data is corrupted for any reason or the SSD has not been initialized. In this case, initializing the disk and creating a new volume will solve the problem.
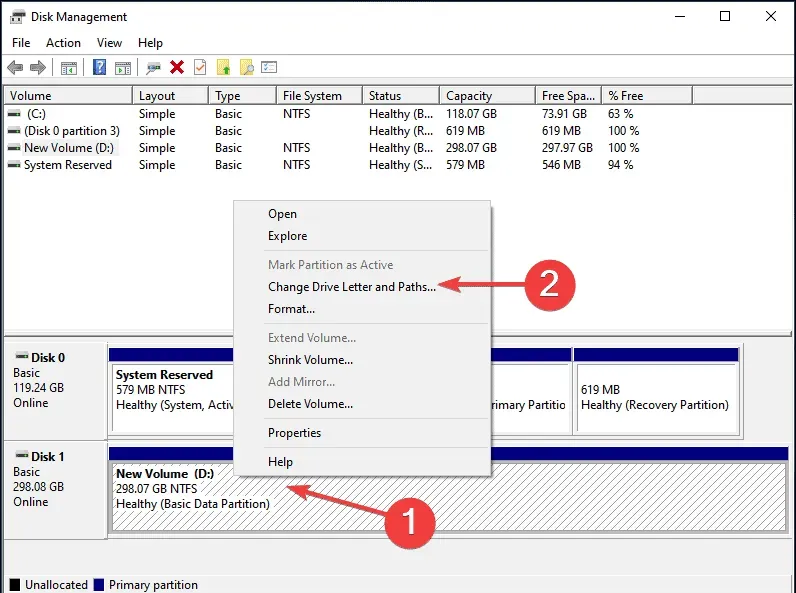
Change/assign drive letter
- Launch the Search menu by pressing Windows + S, enter “Create and format hard disk partitions”in the text box, and click the “Open”button.
- Right-click on the SSD volume and select “Change Drive Letter and Paths”from the options.
- Then click Add. If a drive letter is already assigned, click Change.
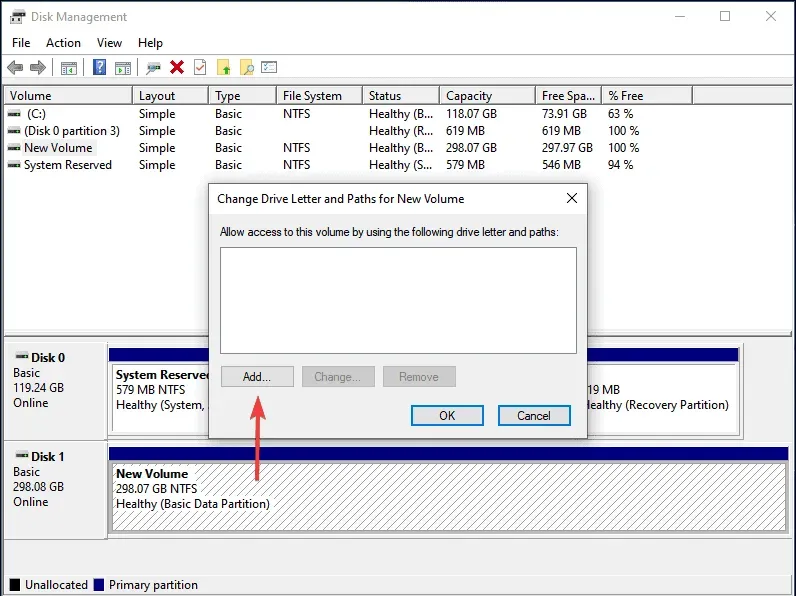
- Select the “Assign the following drive letter”option, select the desired letter for the SSD from the drop-down menu, click “OK”to assign it.
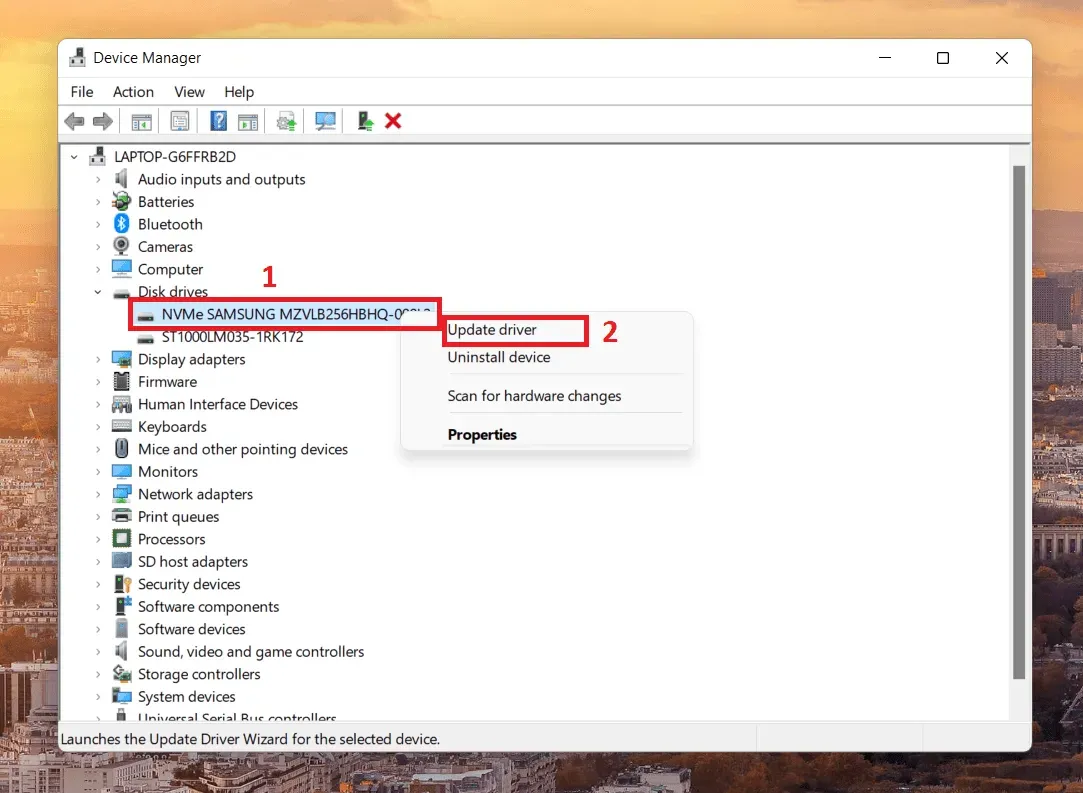
Update your SSD driver
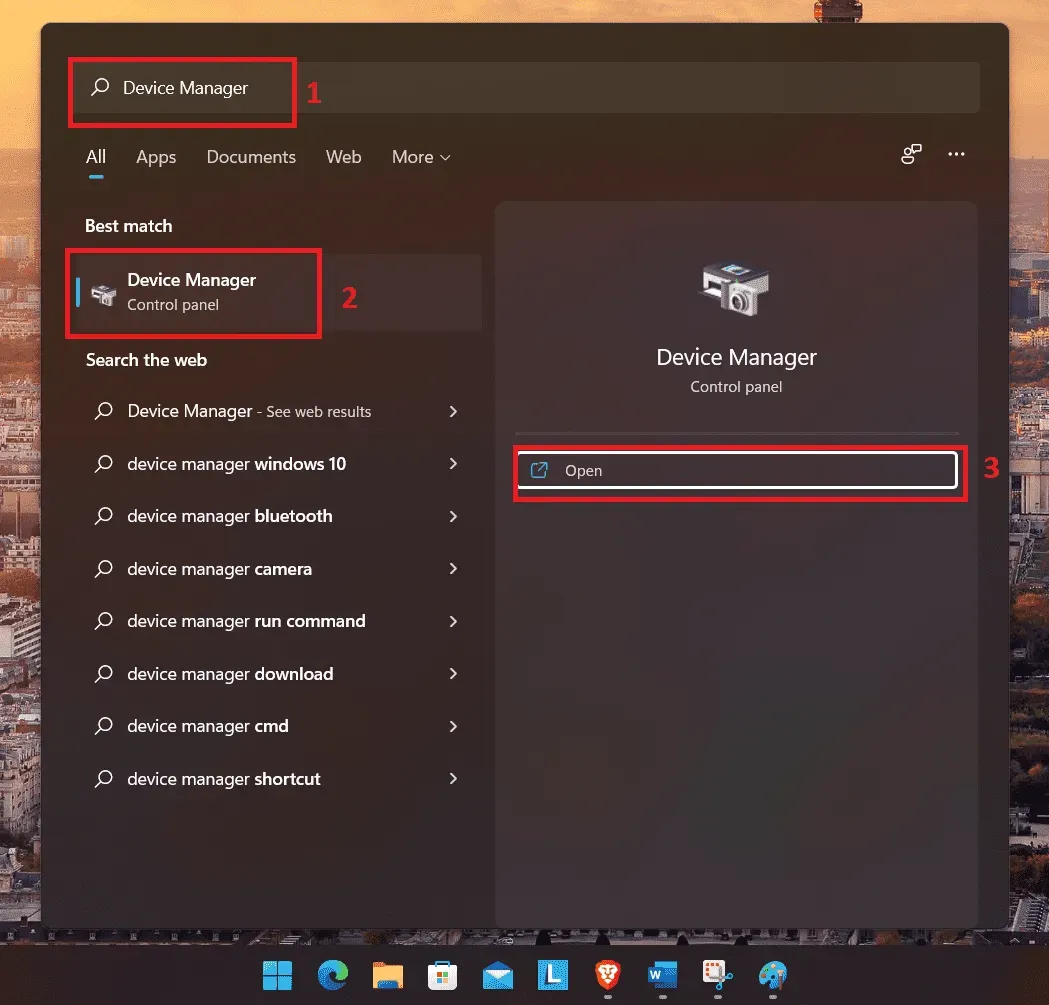
- Launch the Search menu by pressing Windows + S, type “Device Manager”in the text field, and click the “Open”button.
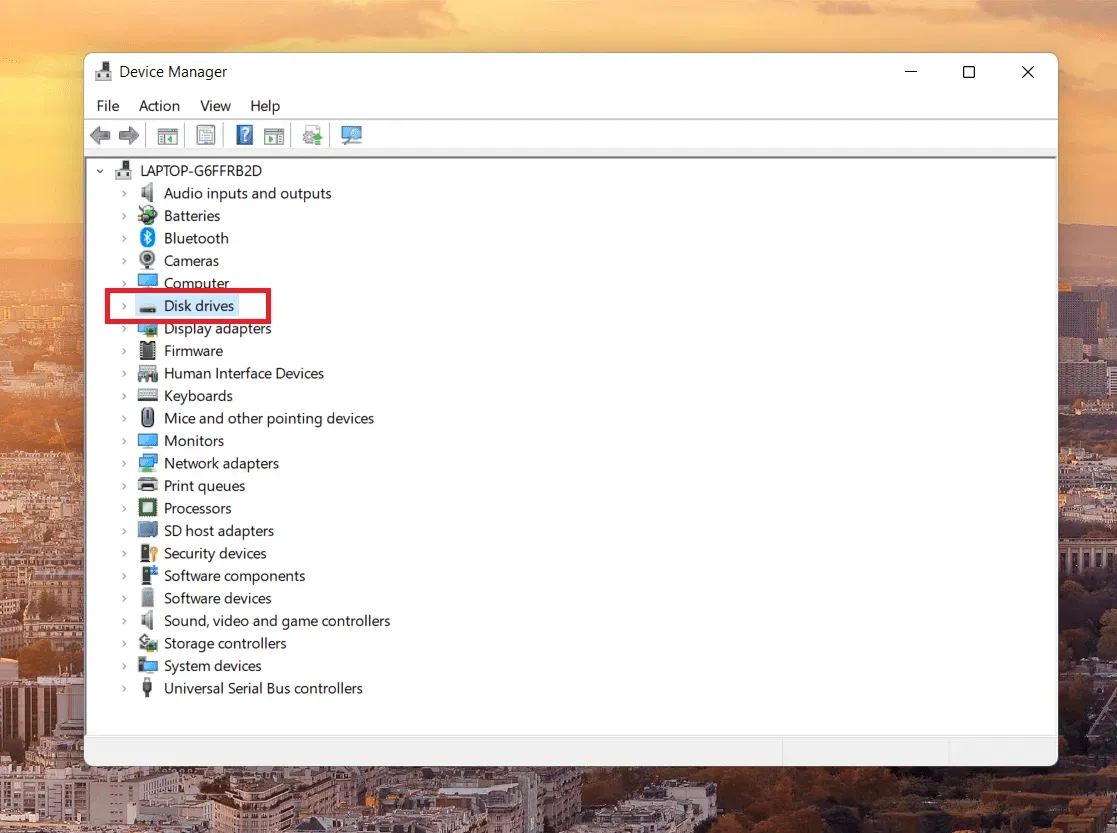
- Locate the disk driver and double click it to view all disk drivers connected to the system.
- Right-click on the problematic SSD and select “Update Driver”from the options.
- Then select the “Search for Drivers Automatically”option to update the problematic SSD’s drivers.
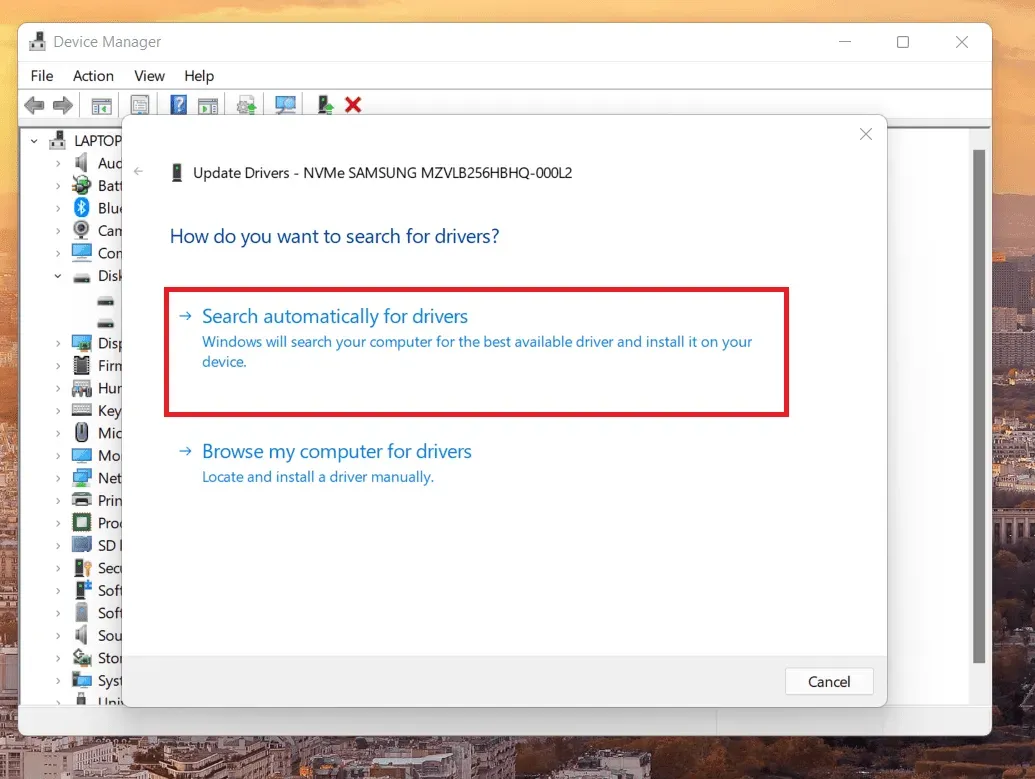
- Your computer will now search for the best driver available and install it.
Conclusion
So, that was a simple guide on possible ways to fix the problem of Windows 11 not recognizing SSD. Share with us, did these tricks work for you? Or do you have something else to offer? Feel free to share with us in the comments section below.
Leave a Reply