TikTok Pixel: How to Set Up in 2 Easy Steps
A TikTok pixel is a piece of code that you can install on your site to track conversions. But not just any conversions – we’re talking about specific TikTok conversions. So, if you’re running a TikTok ad campaign and want to see which of your ads are generating the most sales, you need to jump on the pixel train.
Don’t worry, I’m here to walk you through the process step by step. In just a few minutes, your TikTok pixel will be up and running. Let’s start!
What is a TikTok Pixel?
A TikTok pixel is a small piece of code that you can install on your website. Once installed, the pixel will track certain events, such as when someone views a TikTok ad or clicks on a link to your site. These events are then recorded to your TikTok Ads account so you can see which ads are generating the most sales.
Why Use the TikTok Pixel? Well, first off, it’s a handy measurement tool that can help you track the return on investment (ROI) for your TikTok ad campaigns. Second, it can help you create more targeted ad campaigns by understanding which ads perform well and which don’t. Finally, the TikTok pixel can help you redirect your website visitors with personalized ads.
How to Set Up a TikTok Pixel
If you’re ready to start using the TikTok Pixel, follow these simple steps.
Step One: Create Your Pixel
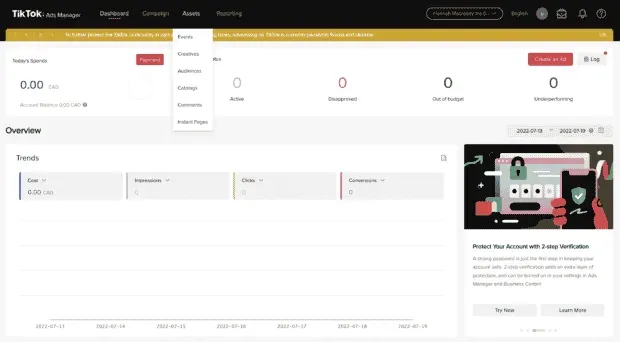
To do this, you will need a TikTok business account. Sign in to your account and go to TikTok Ads Manager > Assets > Events.
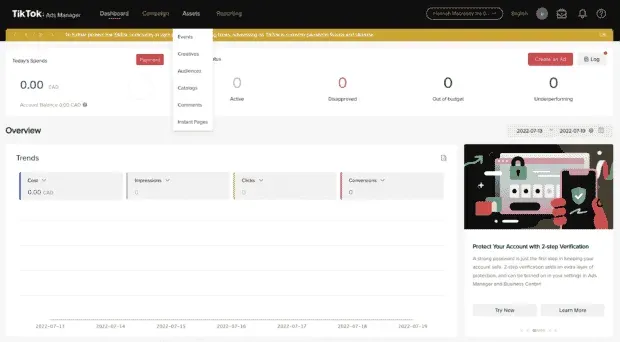
Then choose whether you want to track app events or web events.

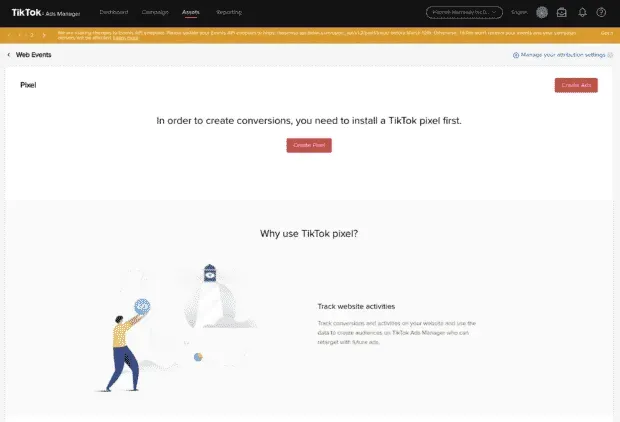
Then click Create Pixel.
This is where you will need to name your pixel. It’s a good idea to give your pixel a name that will help you remember what it’s for. For example, if you’re using it to track conversions on your website, you might name it “Conversion Pixel”. If you use it on your online store, name it “Ecommerce Pixel”.
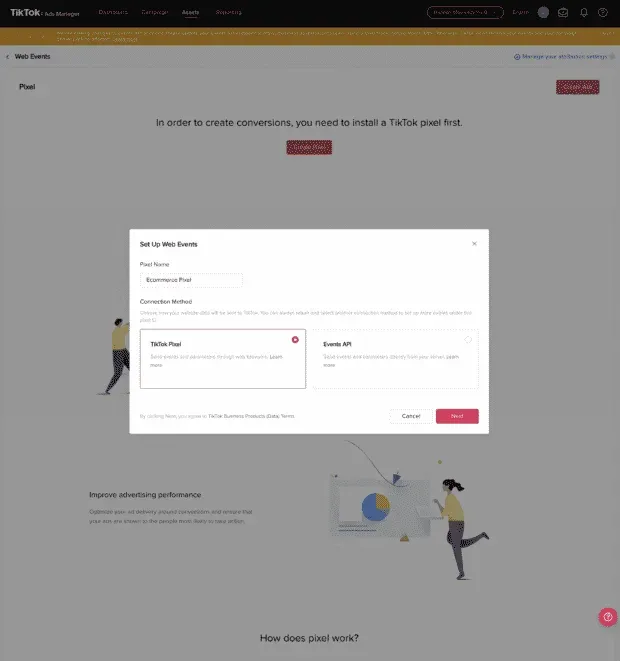
Then, in the “Connection Method”section, select TikTok Pixel. Then click Next.
Step 2: Install the pixel code on your website or app.
The next screen you will see is the “Set up Web Events with TikTok Pixel”screen. Here you will have the option to manually install the pixel or set it up automatically through a third party provider.
If you choose to install the pixel manually, click Install Pixel Code Manually and click Next. Copy the JavaScript code of the pixel and then paste it into the header section of your website. Find the piece of code that starts with <head> and ends with </head> – your pixel should come right after the <head> tag.

Make sure you only paste your code once!
If you are using WordPress or Woocommerce there are plugins to help you install the code. Be sure to read the plugin reviews before installing as some plugins can negatively impact your site speed.
You can also use a number of third-party apps to install your pixel, such as Google Tag Manager, Square, or BigCommerce. To do this, select “Automatically configure web events through partner platforms”on the pixel setup screen. Then click Next.
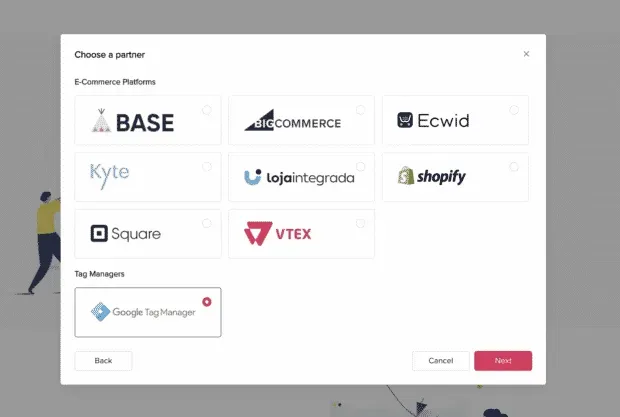
Connect your TikTok pixel to a third party account. Now everything is ready!
How to Add a TikTok Pixel to Shopify
If you’re using Shopify, you can add the TikTok pixel through the Shopify app or by selecting “Automatically set up web events via partner platforms”as described above.
If you want to set up a TikTok pixel with the Shopify app, follow these steps.
First, add the TikTok app to your Shopify store by going to the Shopify app store and installing it.

Then connect your TikTok for Business account and your TikTok Ads Manager account.
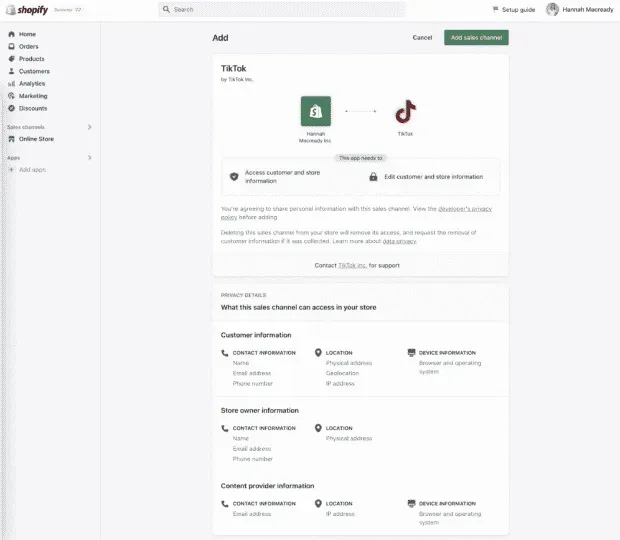
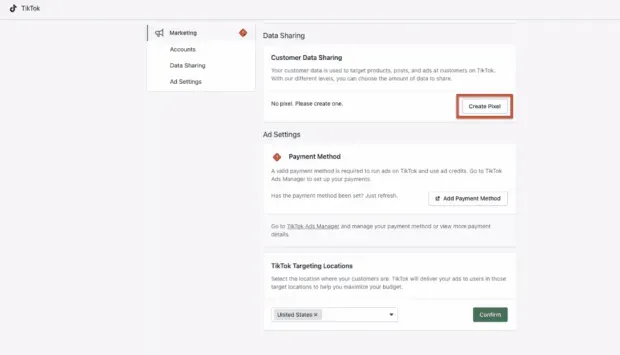
In the Sales Channels section, click TikTok. Then click Marketing > Data Sharing. Connect an existing pixel or click “Create Pixel”to create one with Shopify.
To make sure your pixel is up and running, go to your TikTok Ads Manager account and click on Assets. Then click Events. If you see your pixel listed, you’re done.
What are TikTok Pixel Events?
TikTok pixel events are specific actions that people take on your site or app.
There are fourteen types of TikTok pixel events. This:
- Add payment information
- Add to Basket
- Add to Wishlist
- Click the button
- Complete payment
- Complete registration
- Contact
- Download
- Start Checkout
- Place an order
- Search
- Submit Form
- subscribe
- View content
Each event type corresponds to a different action that someone can take on your website or app. For example, if someone views a product on your site, this is a content view event.
You can use TikTok pixel events to track user actions (how people interact with your site or app). Or some advertisers create custom audiences based on event actions for new ads.
What is TikTok Pixel Helper and Do You Need It?
TikTok has a tool called TikTok Pixel Helper that can help you check if your pixel is working properly.
After installing the code, install the TikTok Pixel Helper extension for Chrome.
Then open a new browser tab and paste the tracking link and then? dbgrmrktng.
For example: https://clickthis.blog/alias?dbgrmrktng
TikTok Pixel Helper will then provide information about the state of your pixels. It can also show you if your events are running and receiving data.
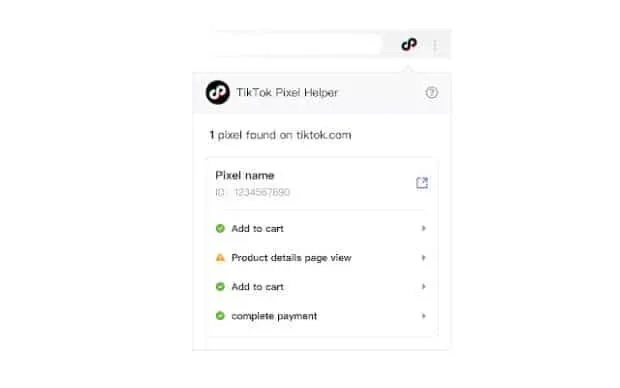
Source: Google Chrome Web Store
How to remove a TikTok pixel
Once you’ve installed your pixel, there may come a day when you want to remove it. To remove a TikTok pixel, follow these steps:
- Go to your TikTok ad manager.
- Go to Assets > Events and select either Web Events or App Events.
- Click on the three dots next to the name of the pixel you want to remove.
- Click Remove
Note. You can only remove a pixel if it is inactive. When you delete a pixel, all data associated with that pixel is also deleted. This includes historical data and any unsent events. You will not be able to recover this data once it has been deleted.
Interested in learning more about how to get your TikTok ads to the moon? Check out our recent TikTok Spark Ads experiment where we tested different ad types and objectives to find the best ROI.
Leave a Reply