Your iPhone has an important new privacy and security feature – and you should definitely use it
You are probably sharing tons of information on your iPhone with other people, apps, and services without even realizing it. Now there’s a new tool that will show you how much, and it can be a revelation as well as a quick way to manage sharing permissions and check your account’s security.
To use the new security tool, which is currently only available for iPhones and not for any other Apple products, your iPhone must be running iOS 16. You must also have a personal Apple ID, not one that managed by a job, school, or other organization, and you need to sign in with it on your iPhone.
How to use the new iOS 16 security check feature
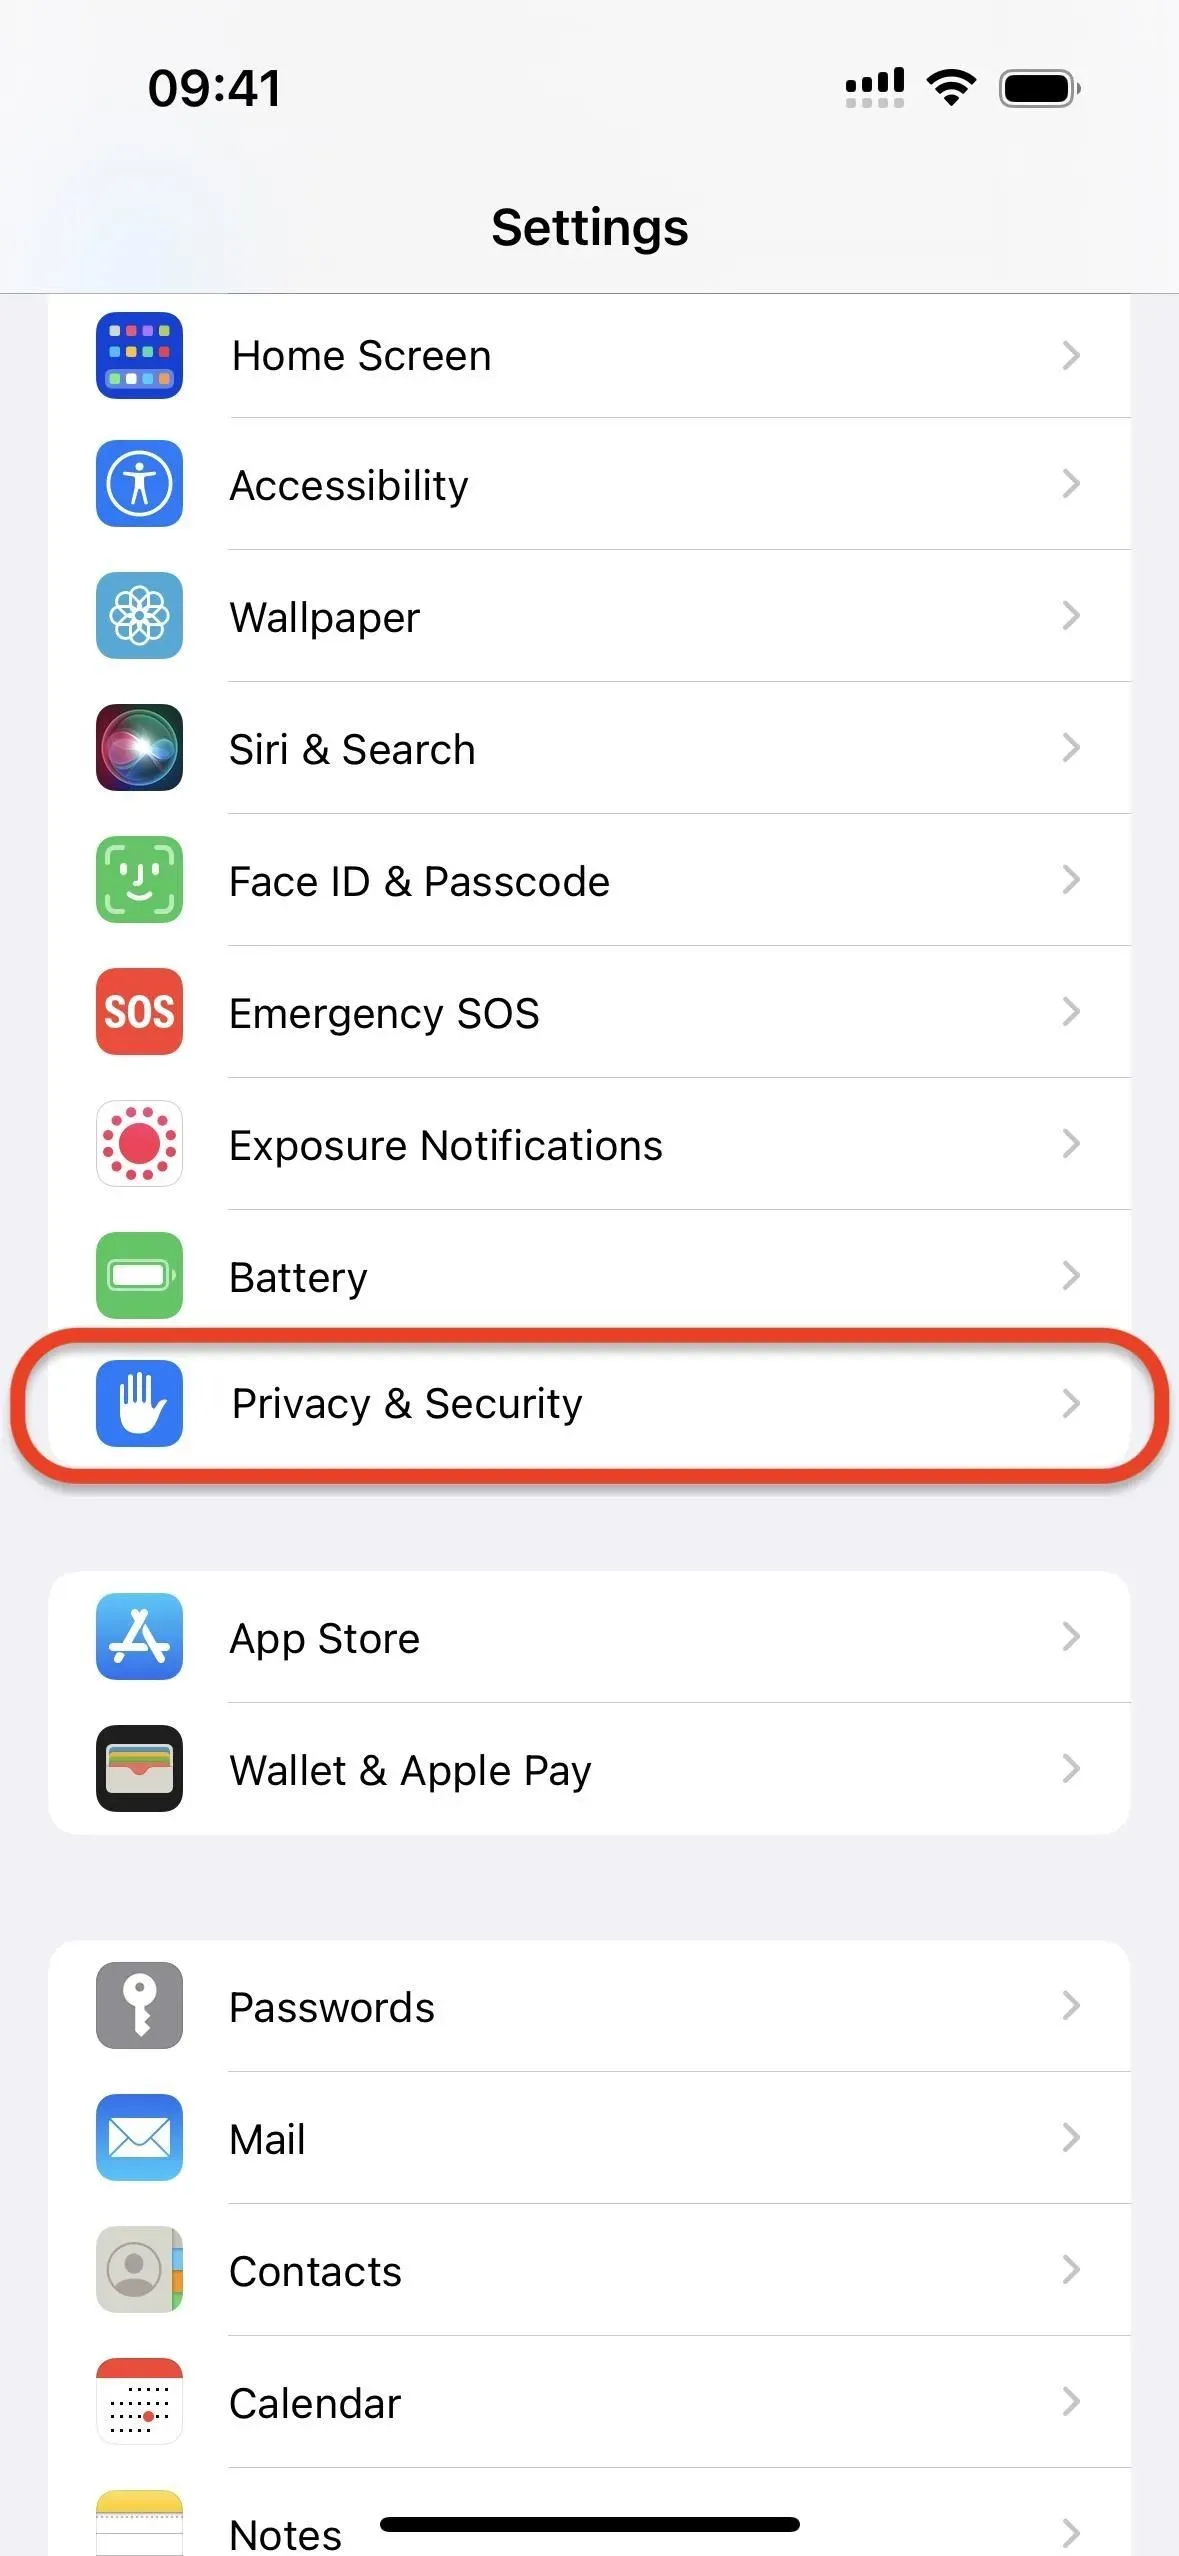
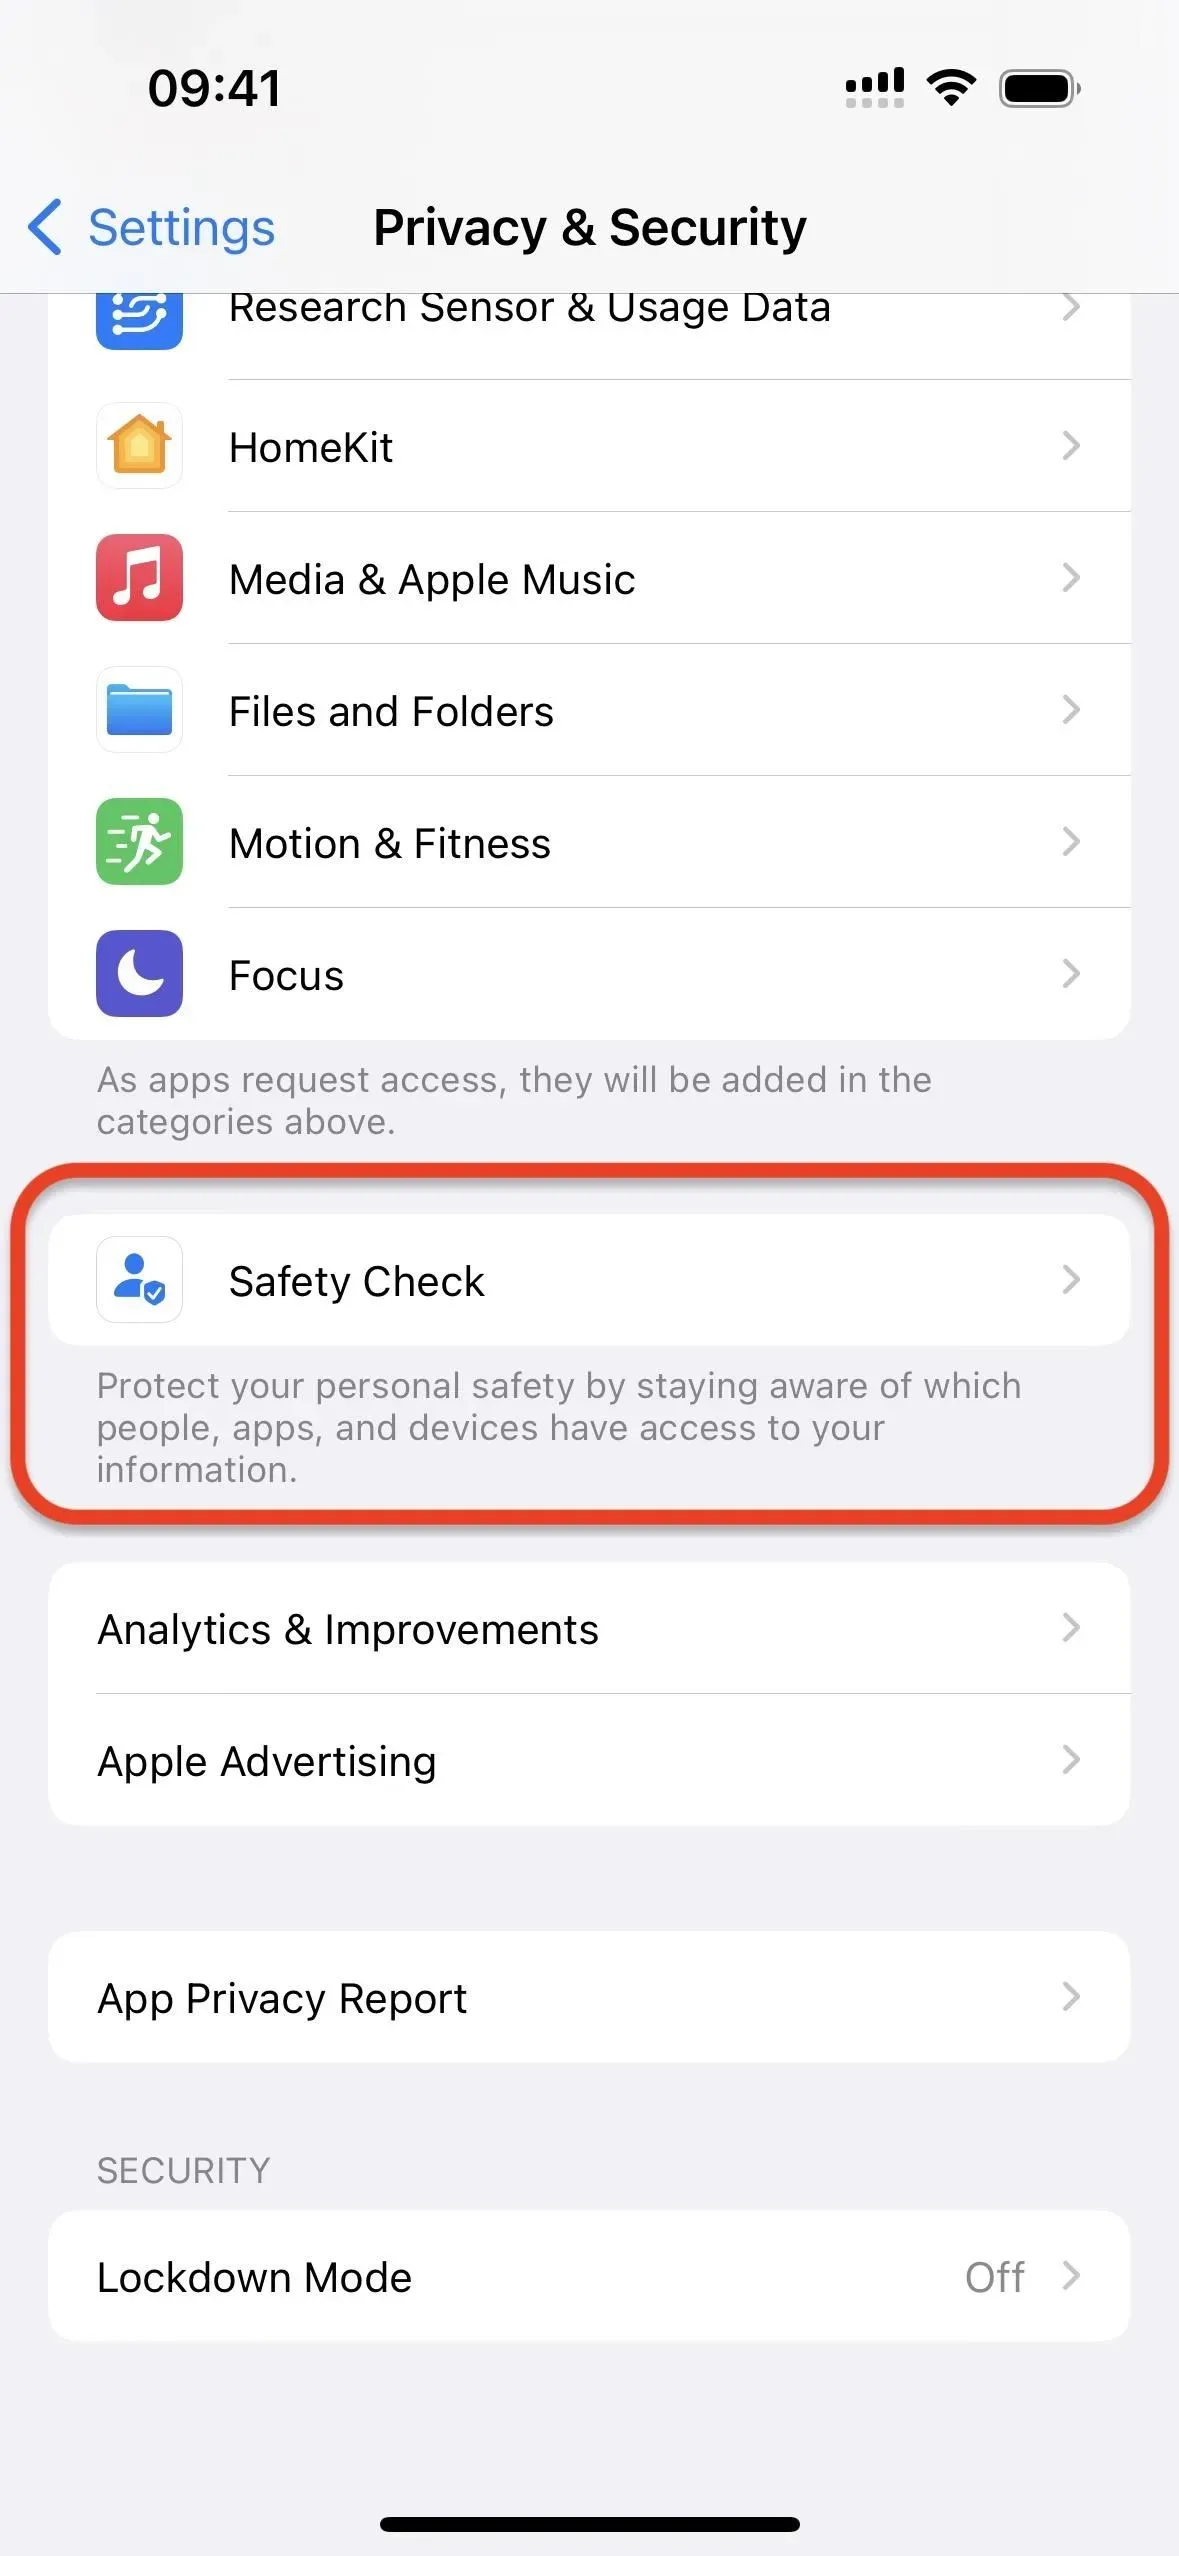
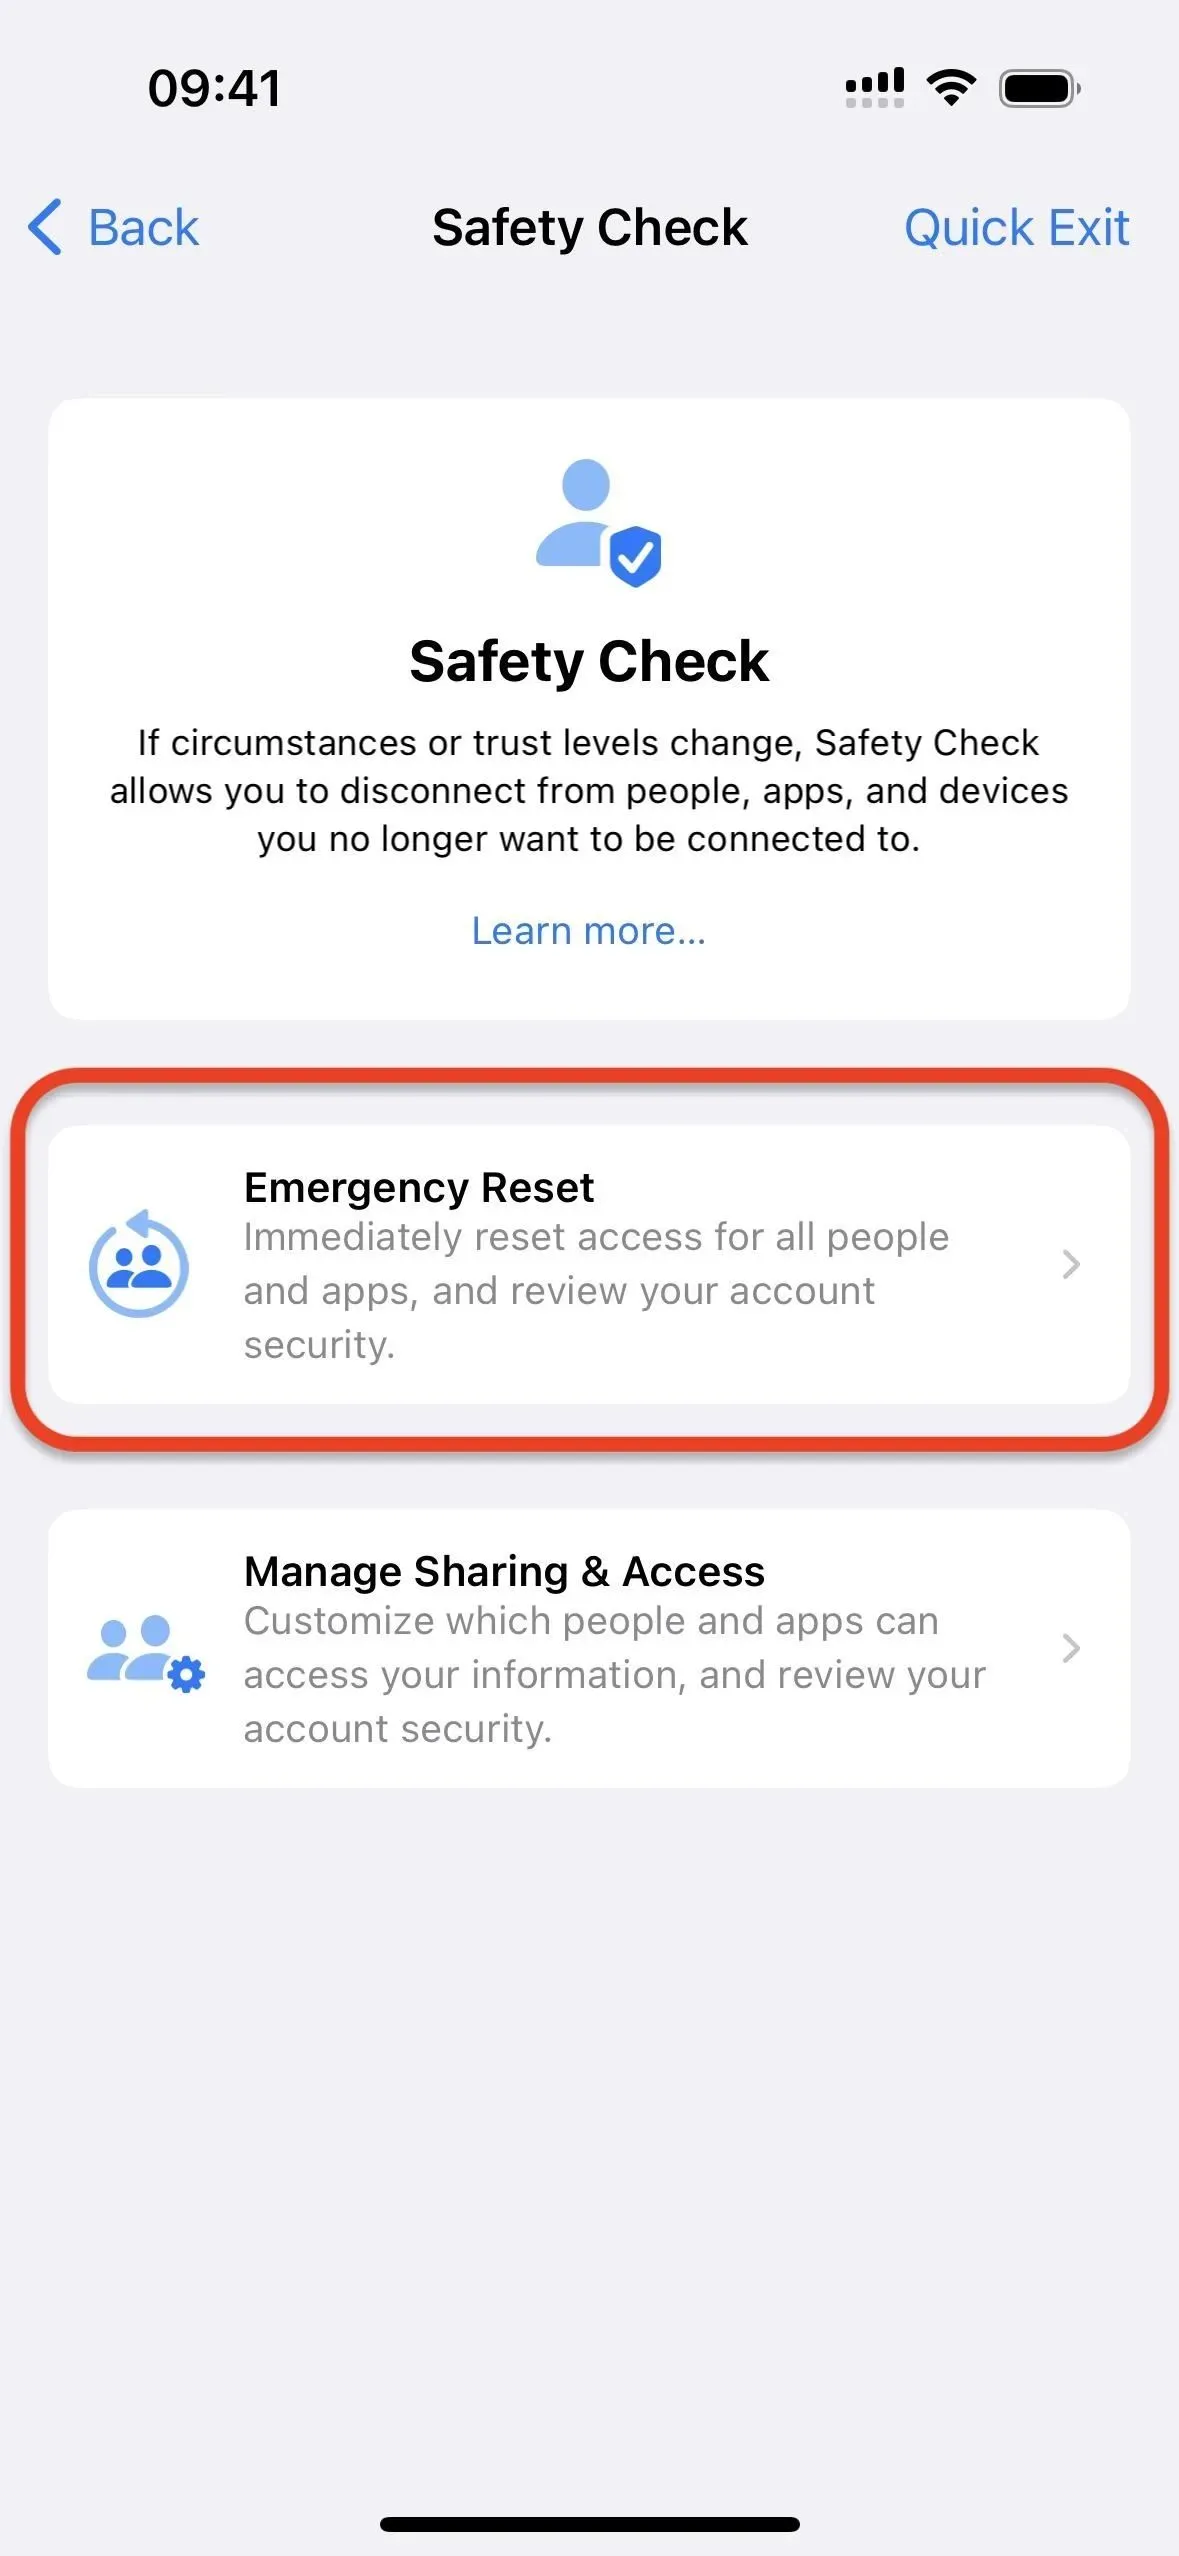
To find it, go to Settings -> Privacy & Security -> Security Check.
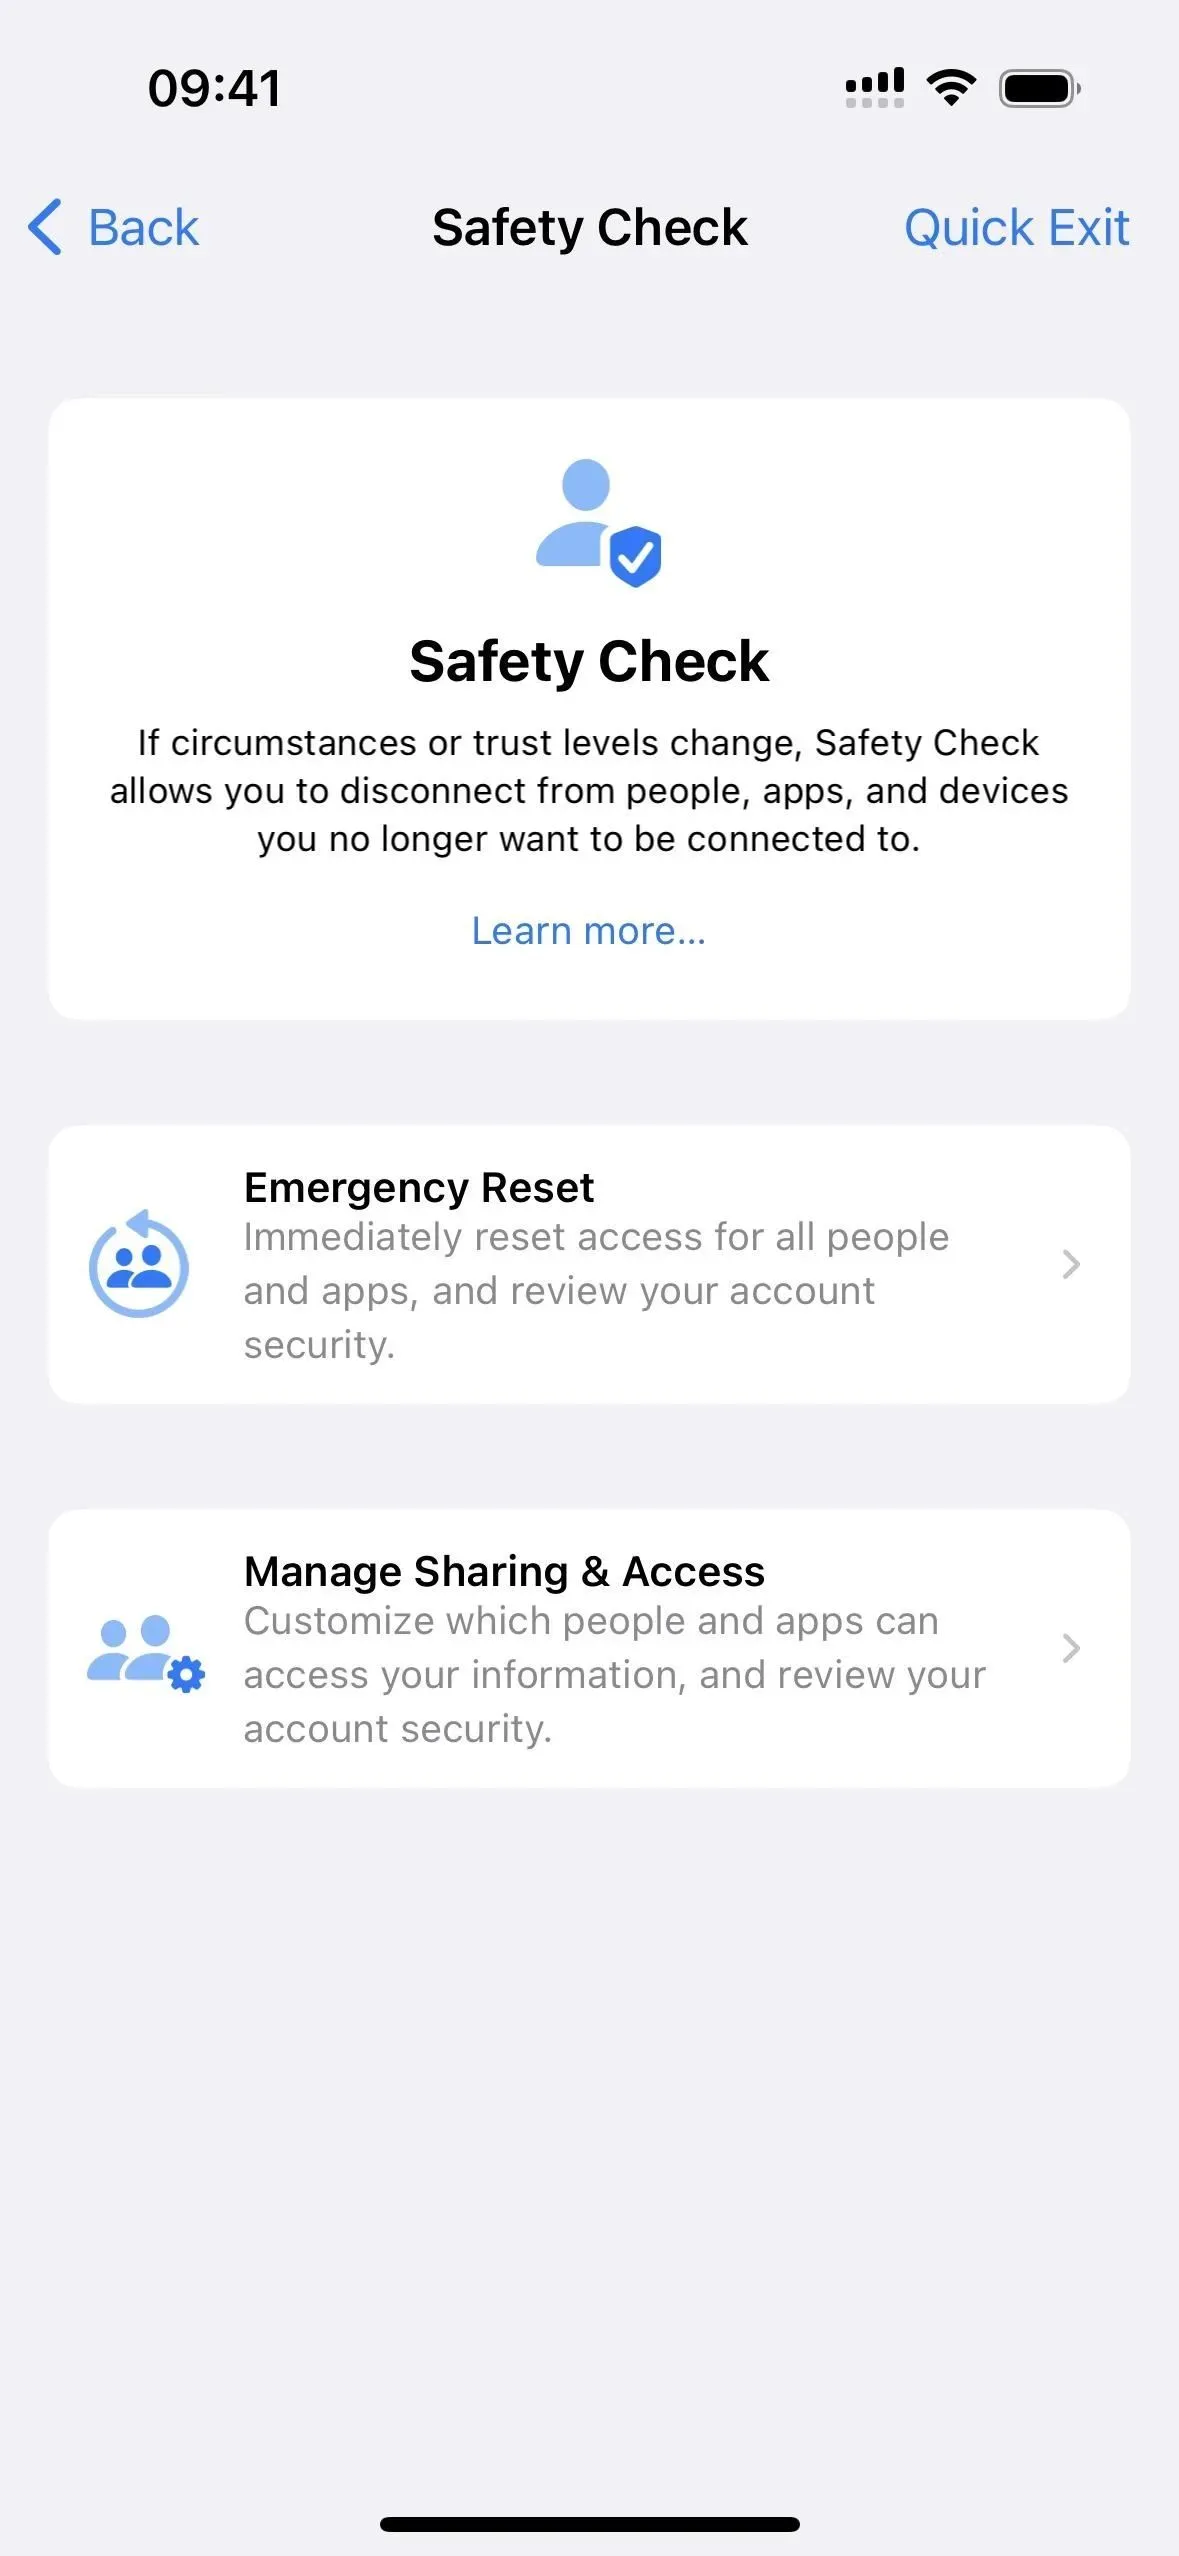
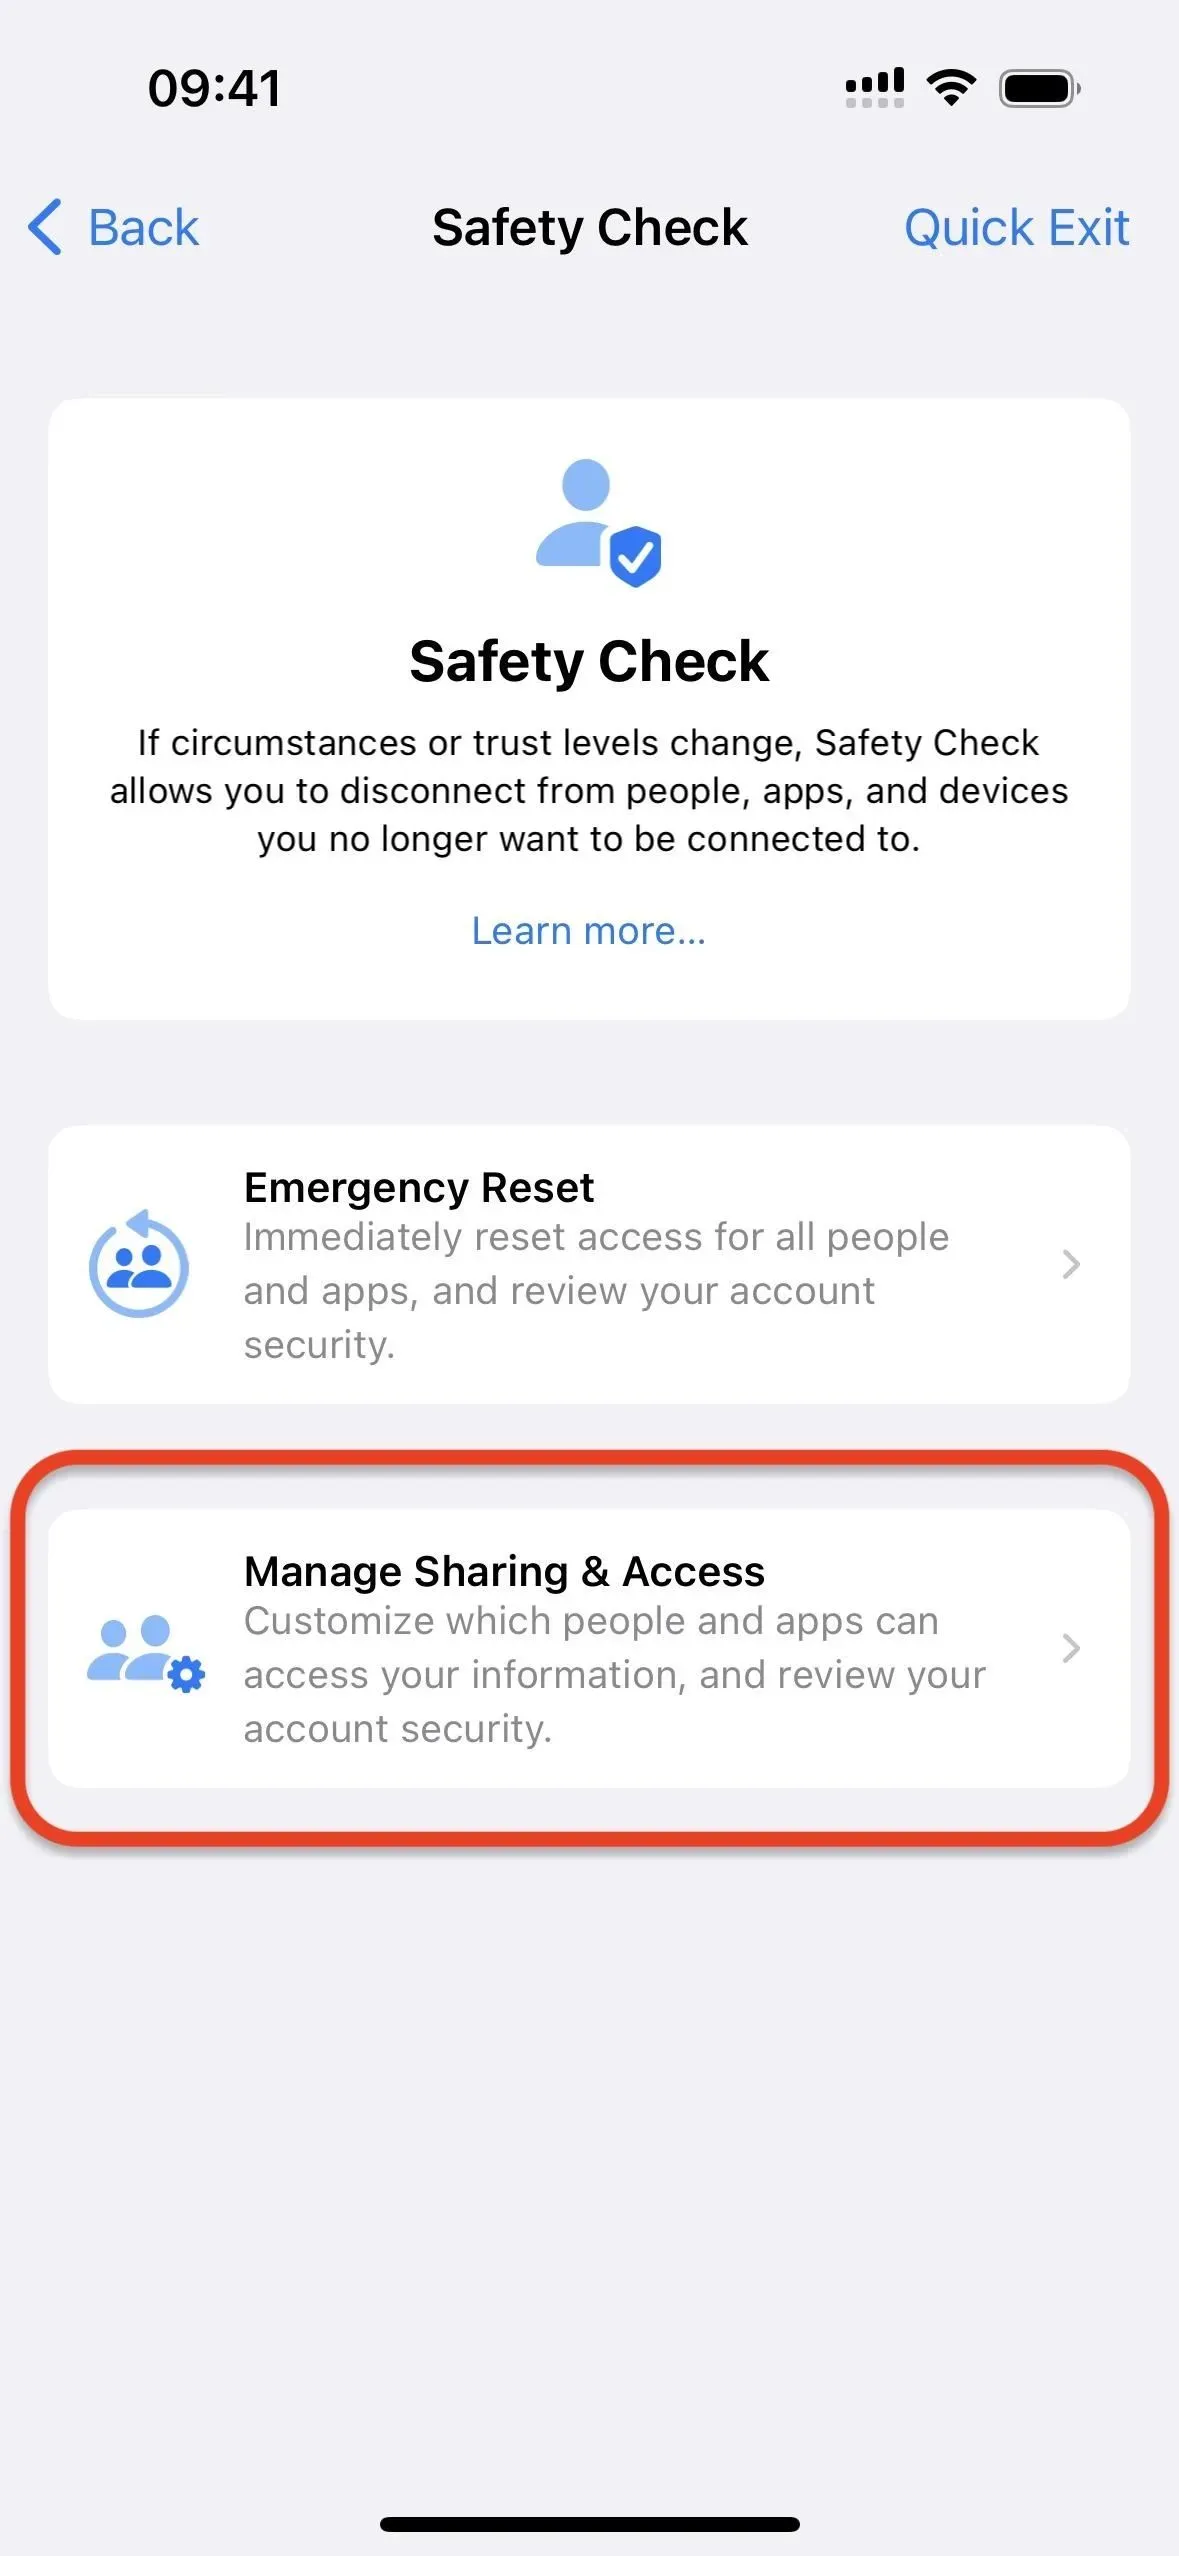
On the Security Review page, the Manage Sharing and Access link allows you to configure the people and apps that access your information, while the Emergency Reset link simply revokes all of their permissions. Both options include checking the security of your Apple ID account and iPhone.
Whether you’re using one or the other, or none of them, there’s a “Quick Exit”link in the top right corner that lets you exit the process at any time.
Option 1: Manage sharing and access
Select Manage Sharing & Access and you can control which people and apps have access to certain documents and permissions. It’s important to note that any changes you make in the process will be saved, so the Quick Exit button won’t do you any good if you’ve already saved the change.
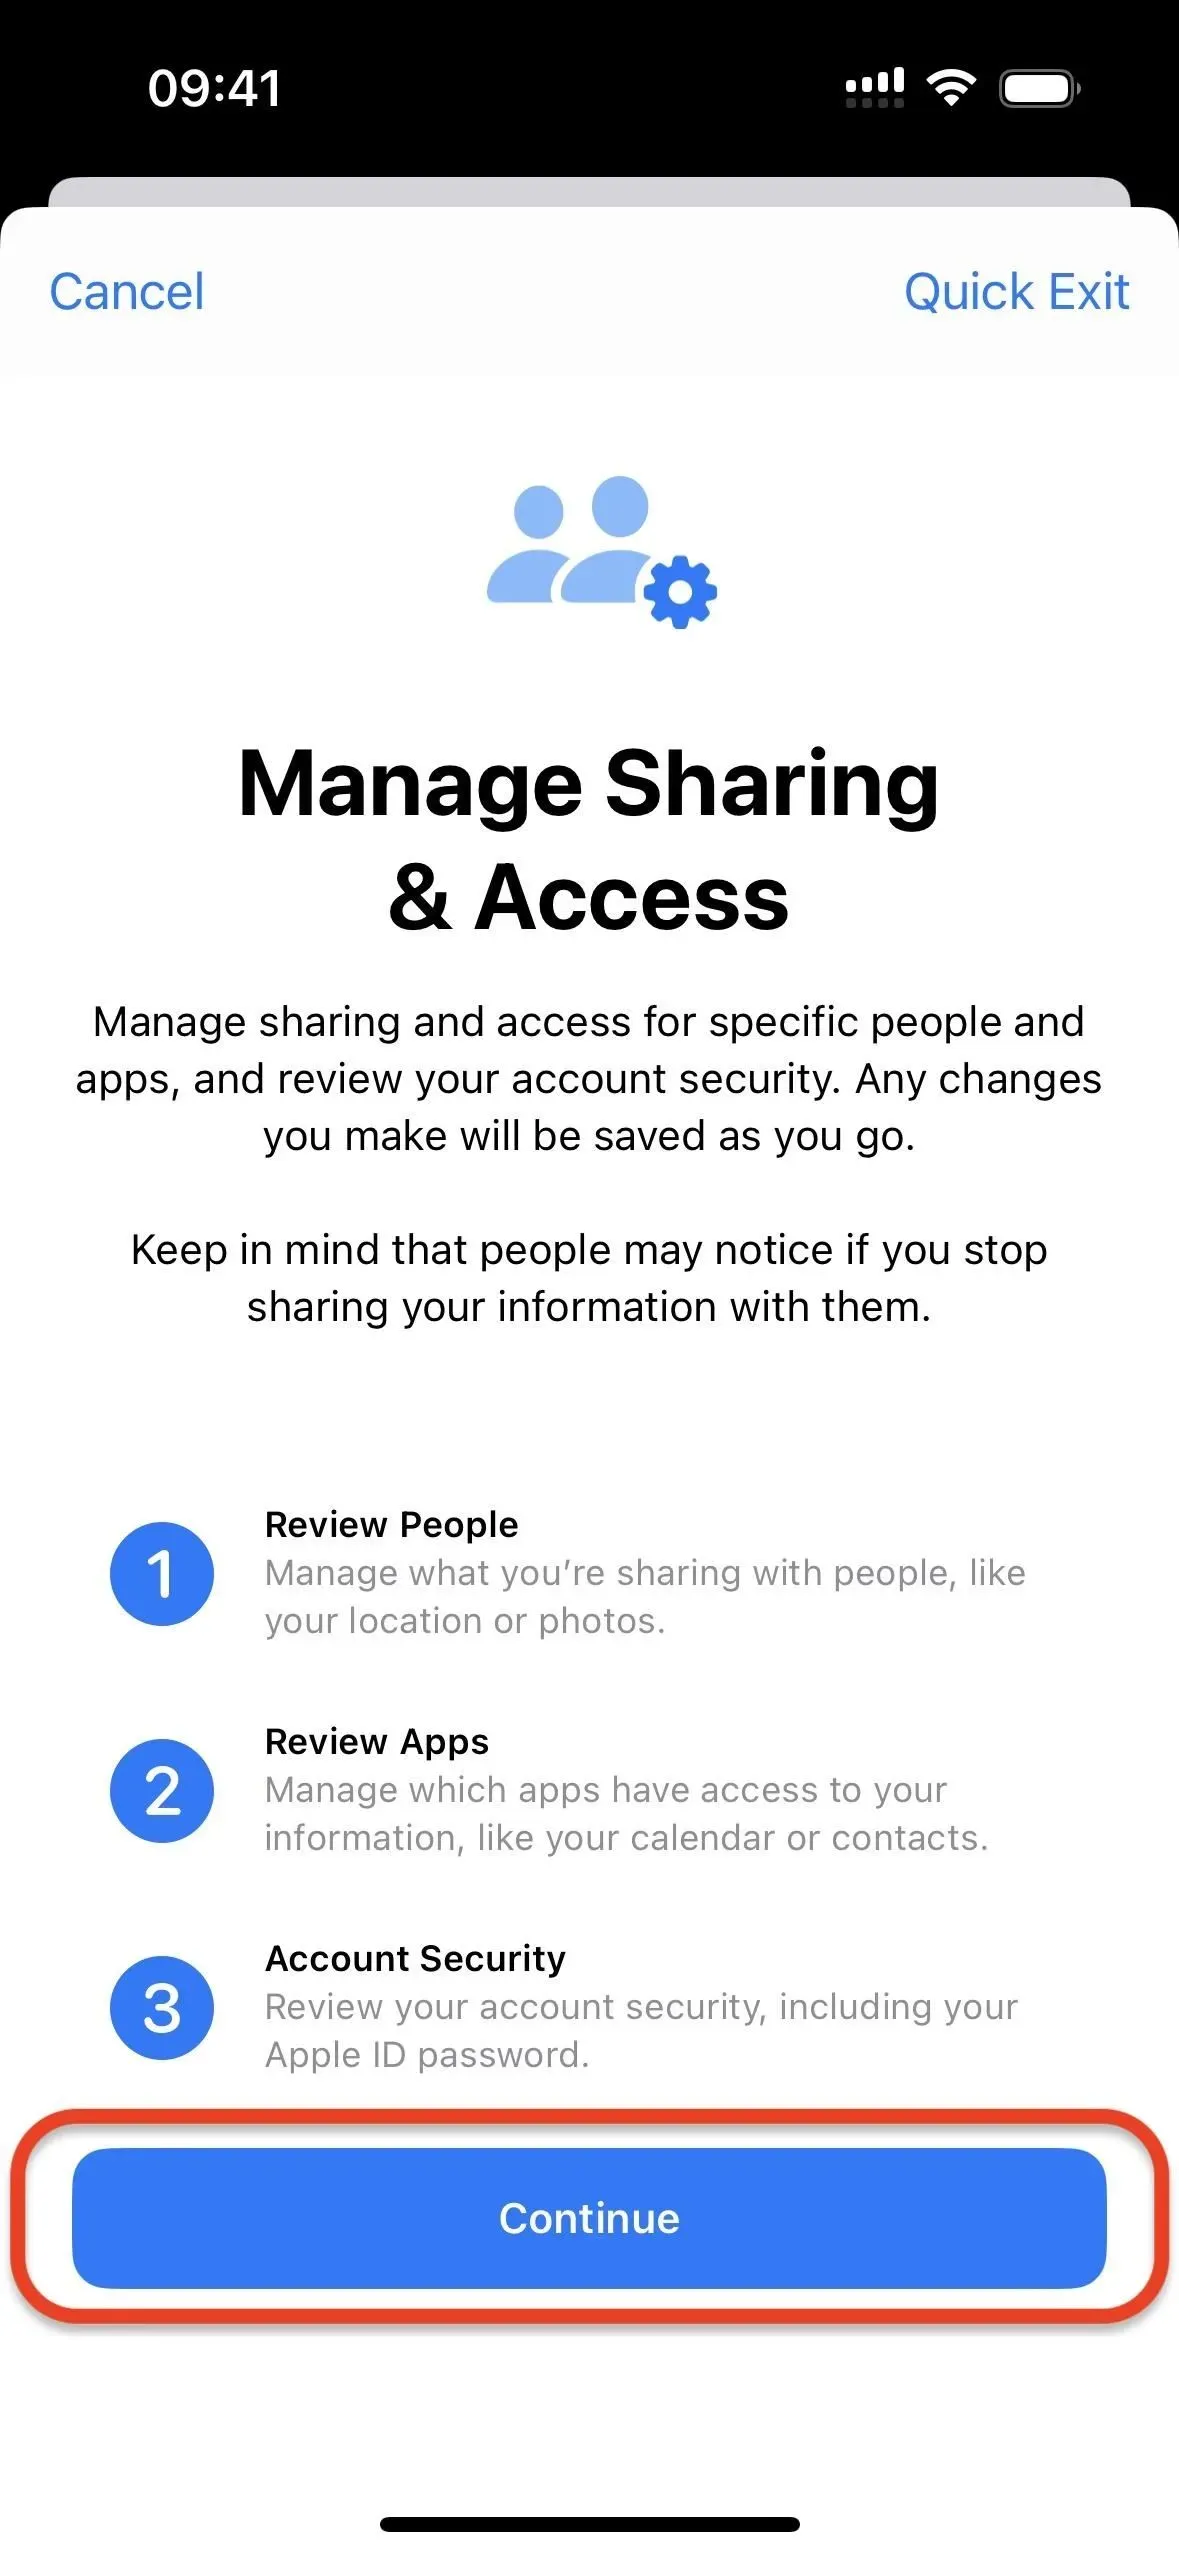
According to Apple, “People might notice if you stop sharing your information with them,”which makes sense since some of the data includes shared calendars, photos, notes, and more. If people share information with you and you end that shared relationship, you will lose access to shared data other than their location or health data.
Click Continue to begin managing information sharing and access.
Step 1: Manage the content you share with people
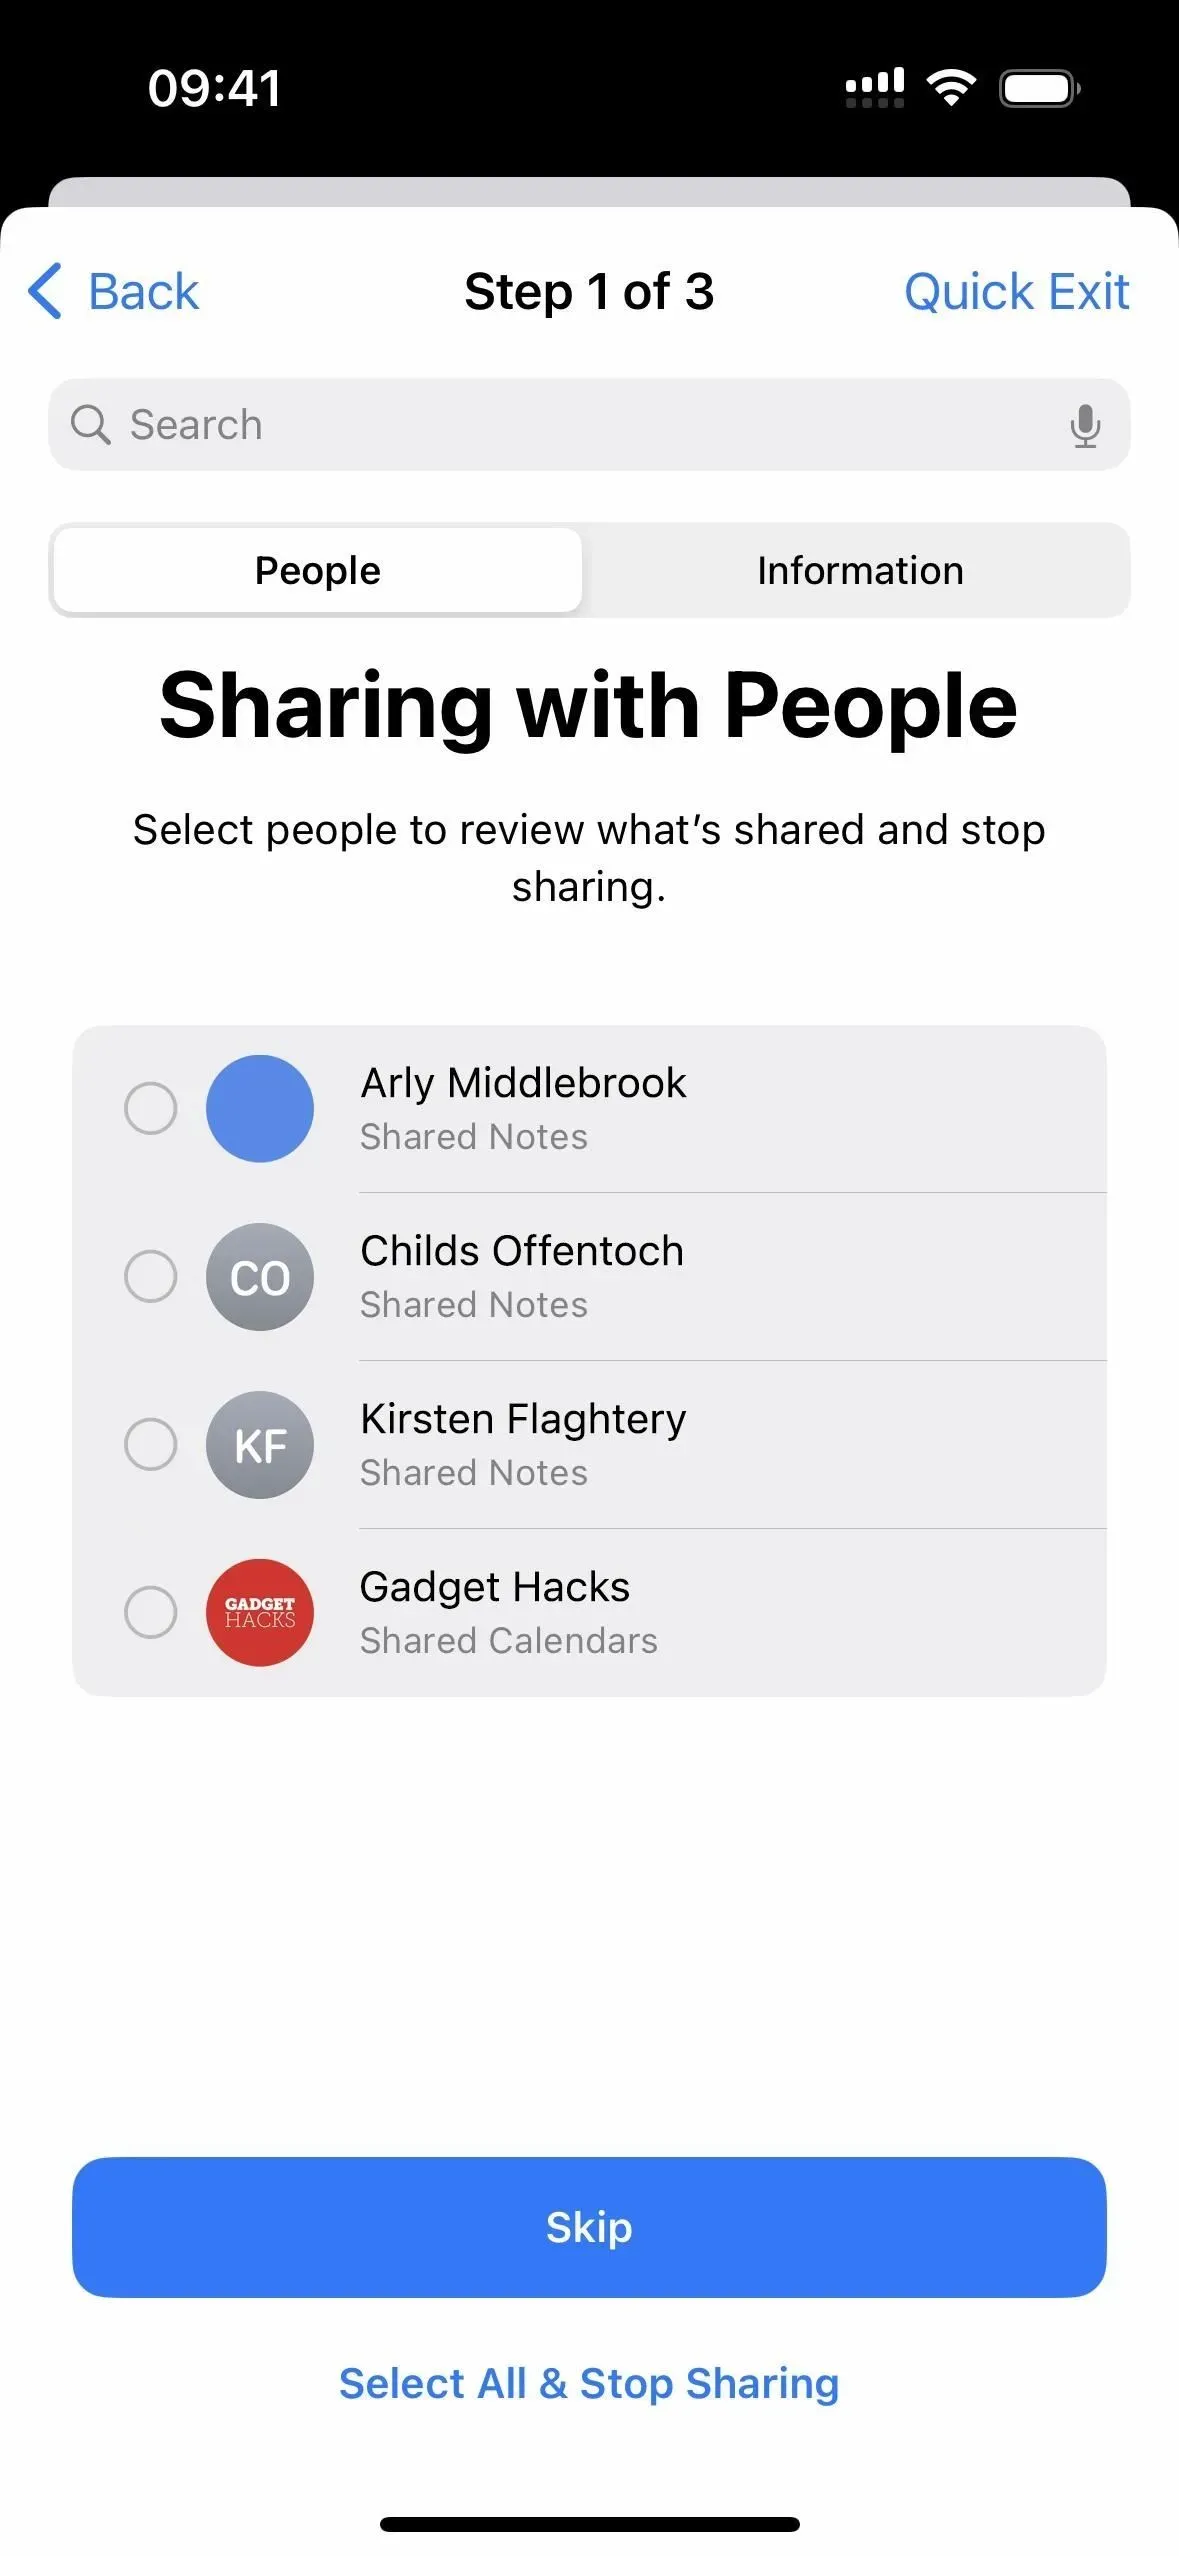
The security check will show you all the people you share content and data with. Health, Home, Calendar, Latitude, Notes, and Photos (including Shared Library and Shared Albums) are all features you’ll see at this stage.
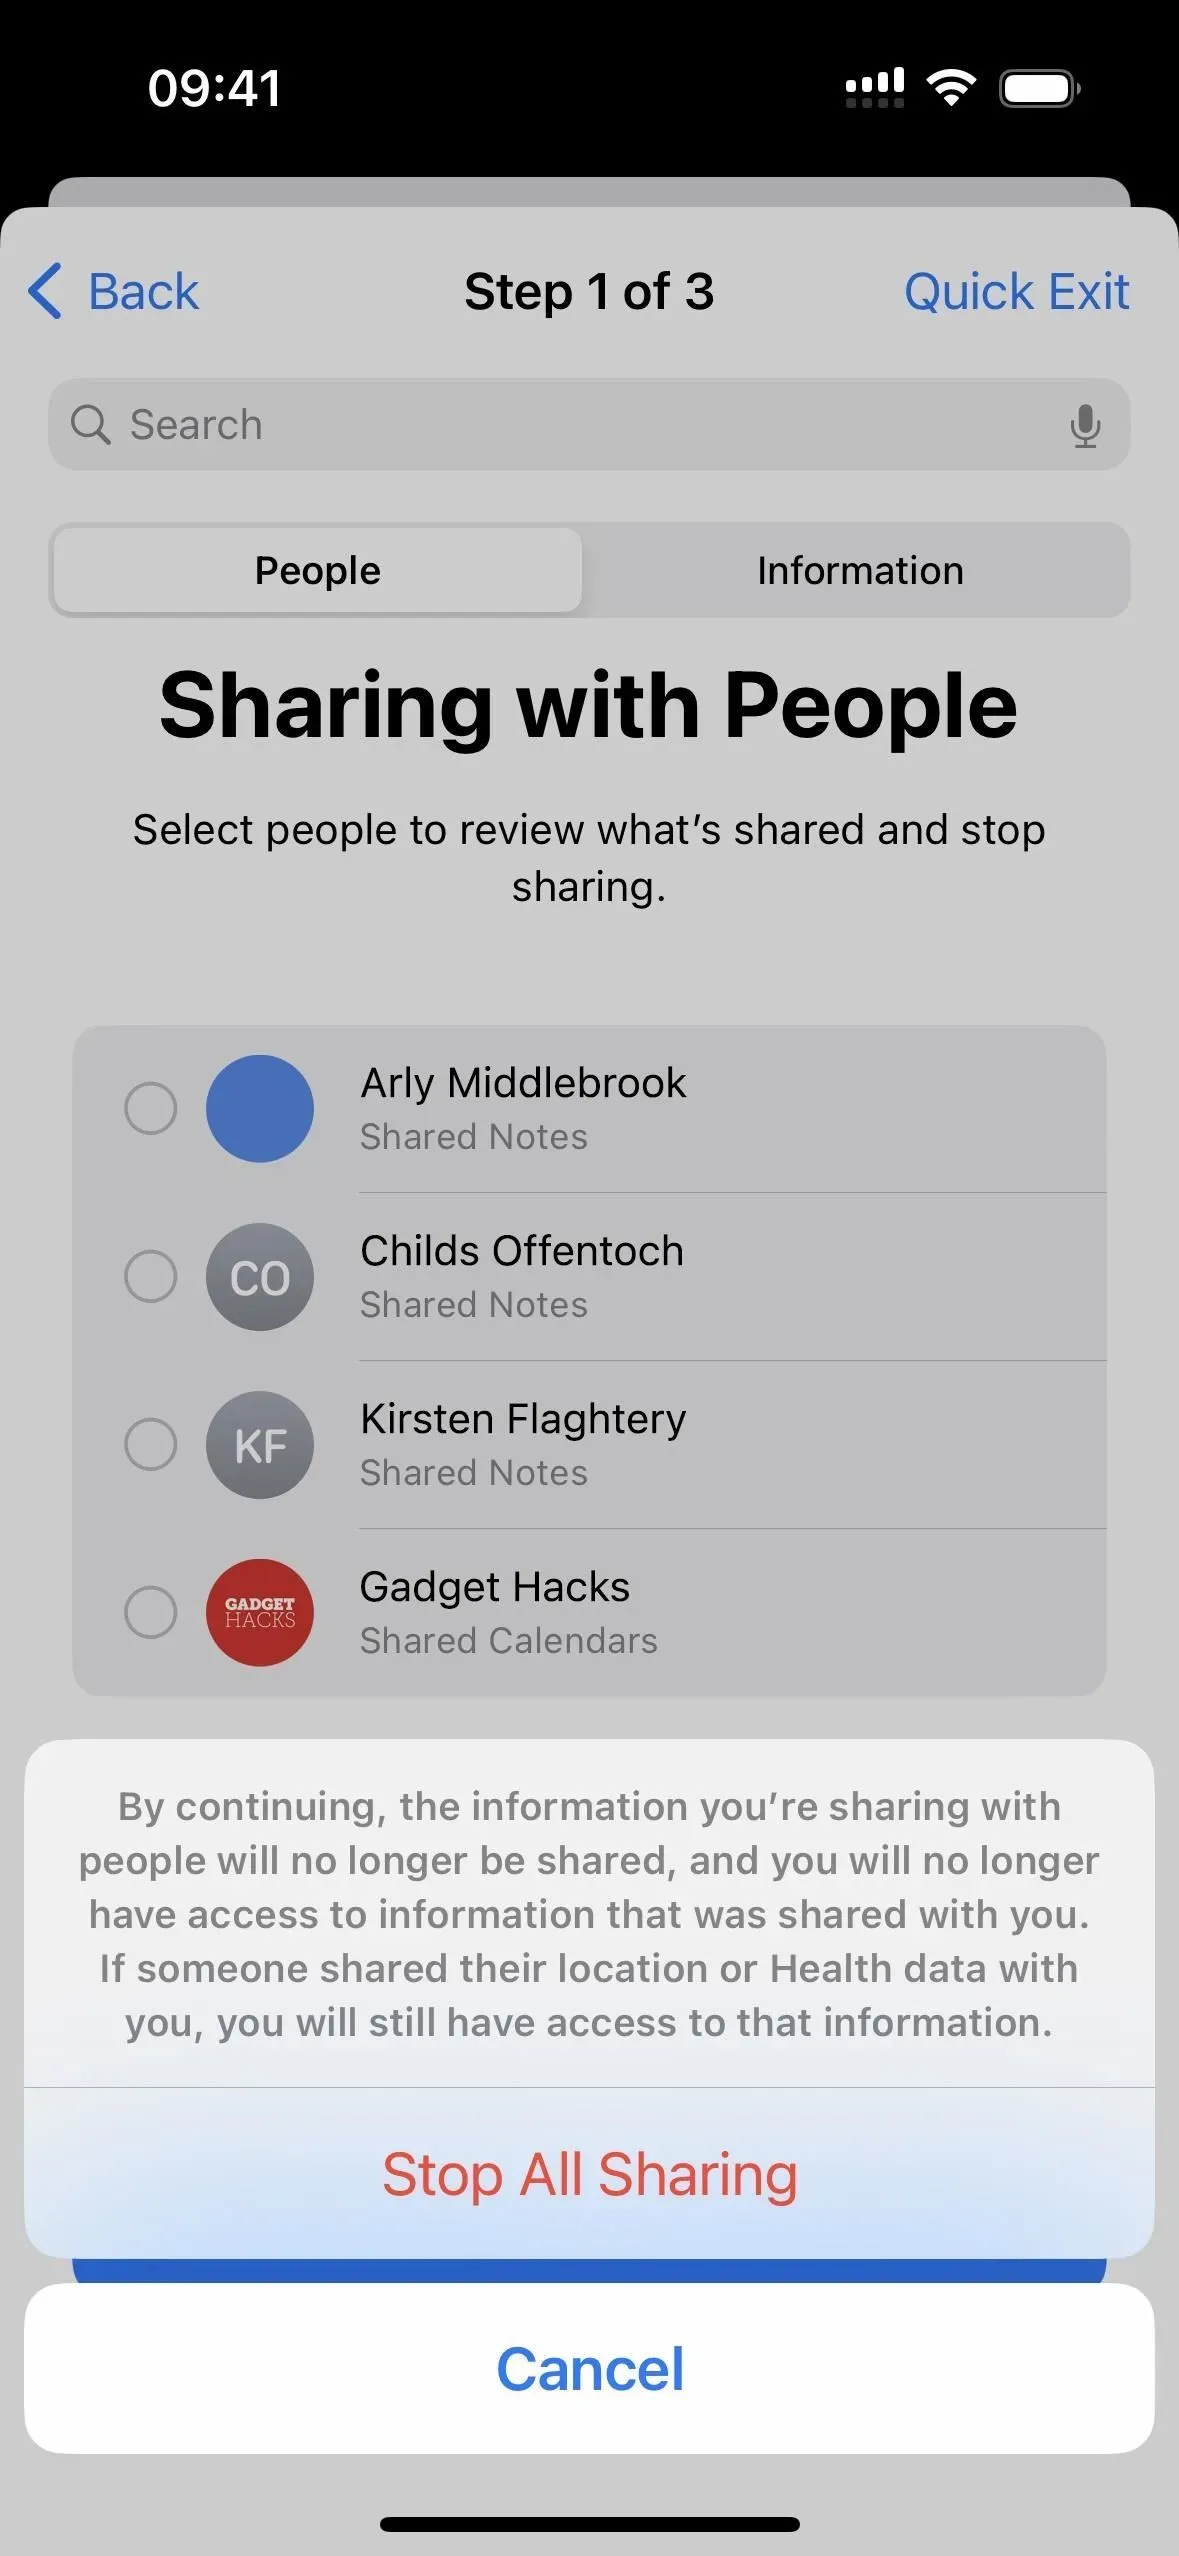
You can click Skip if you don’t want to change anything. If you want to remove all shares with all people, click “Select All and Stop Sharing”, read the warning and click “Stop Sharing”.
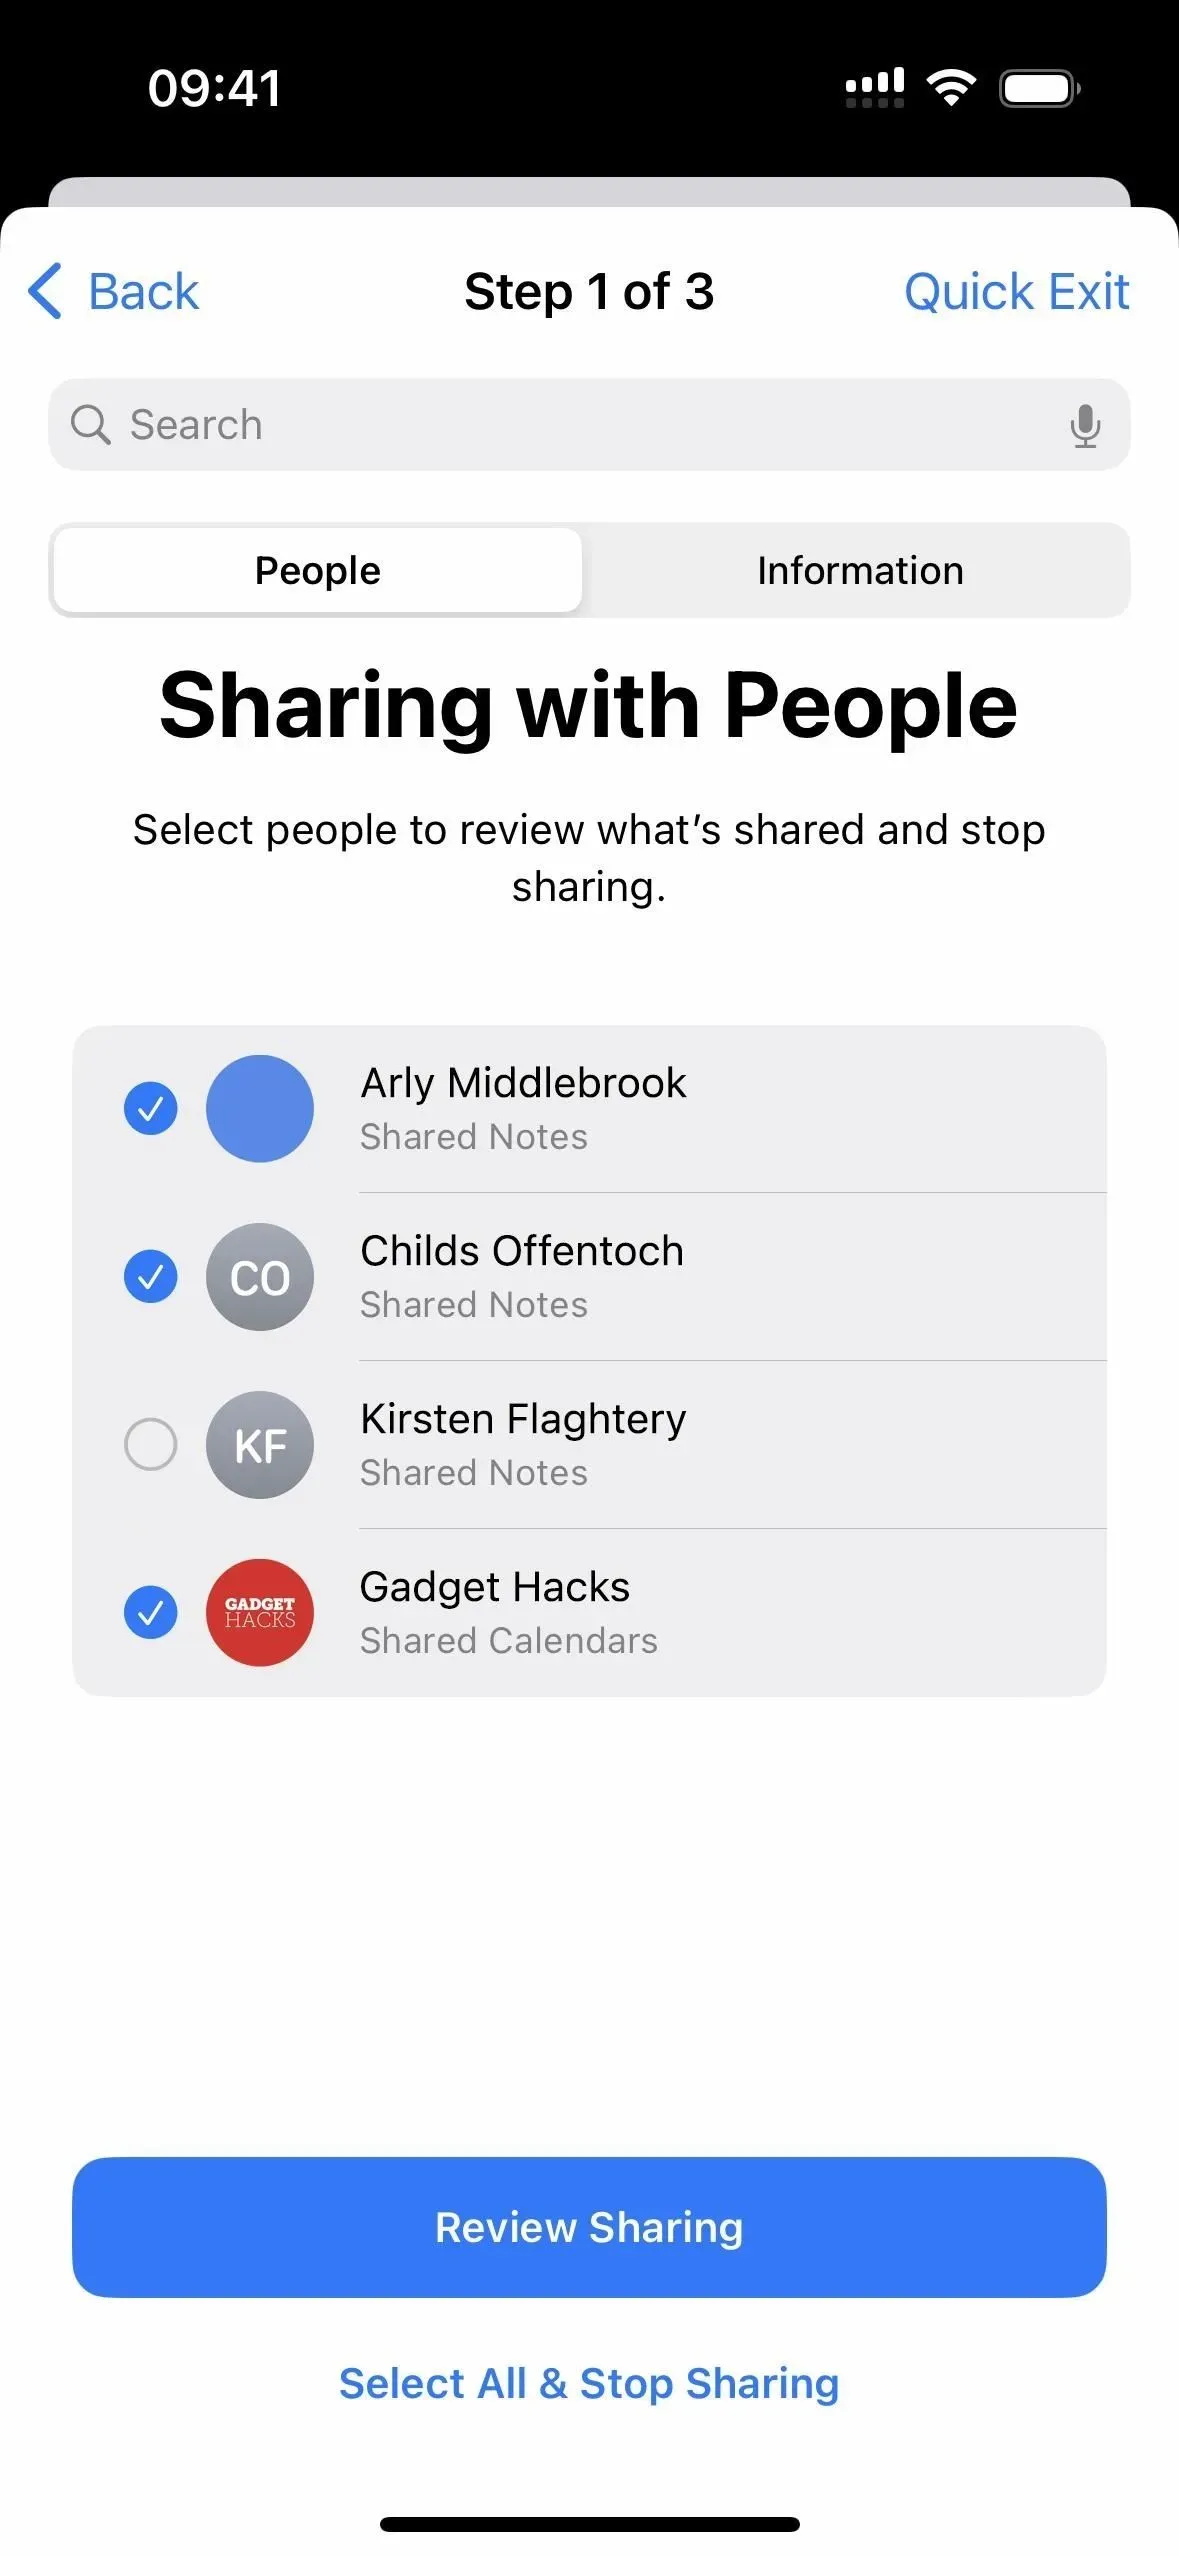
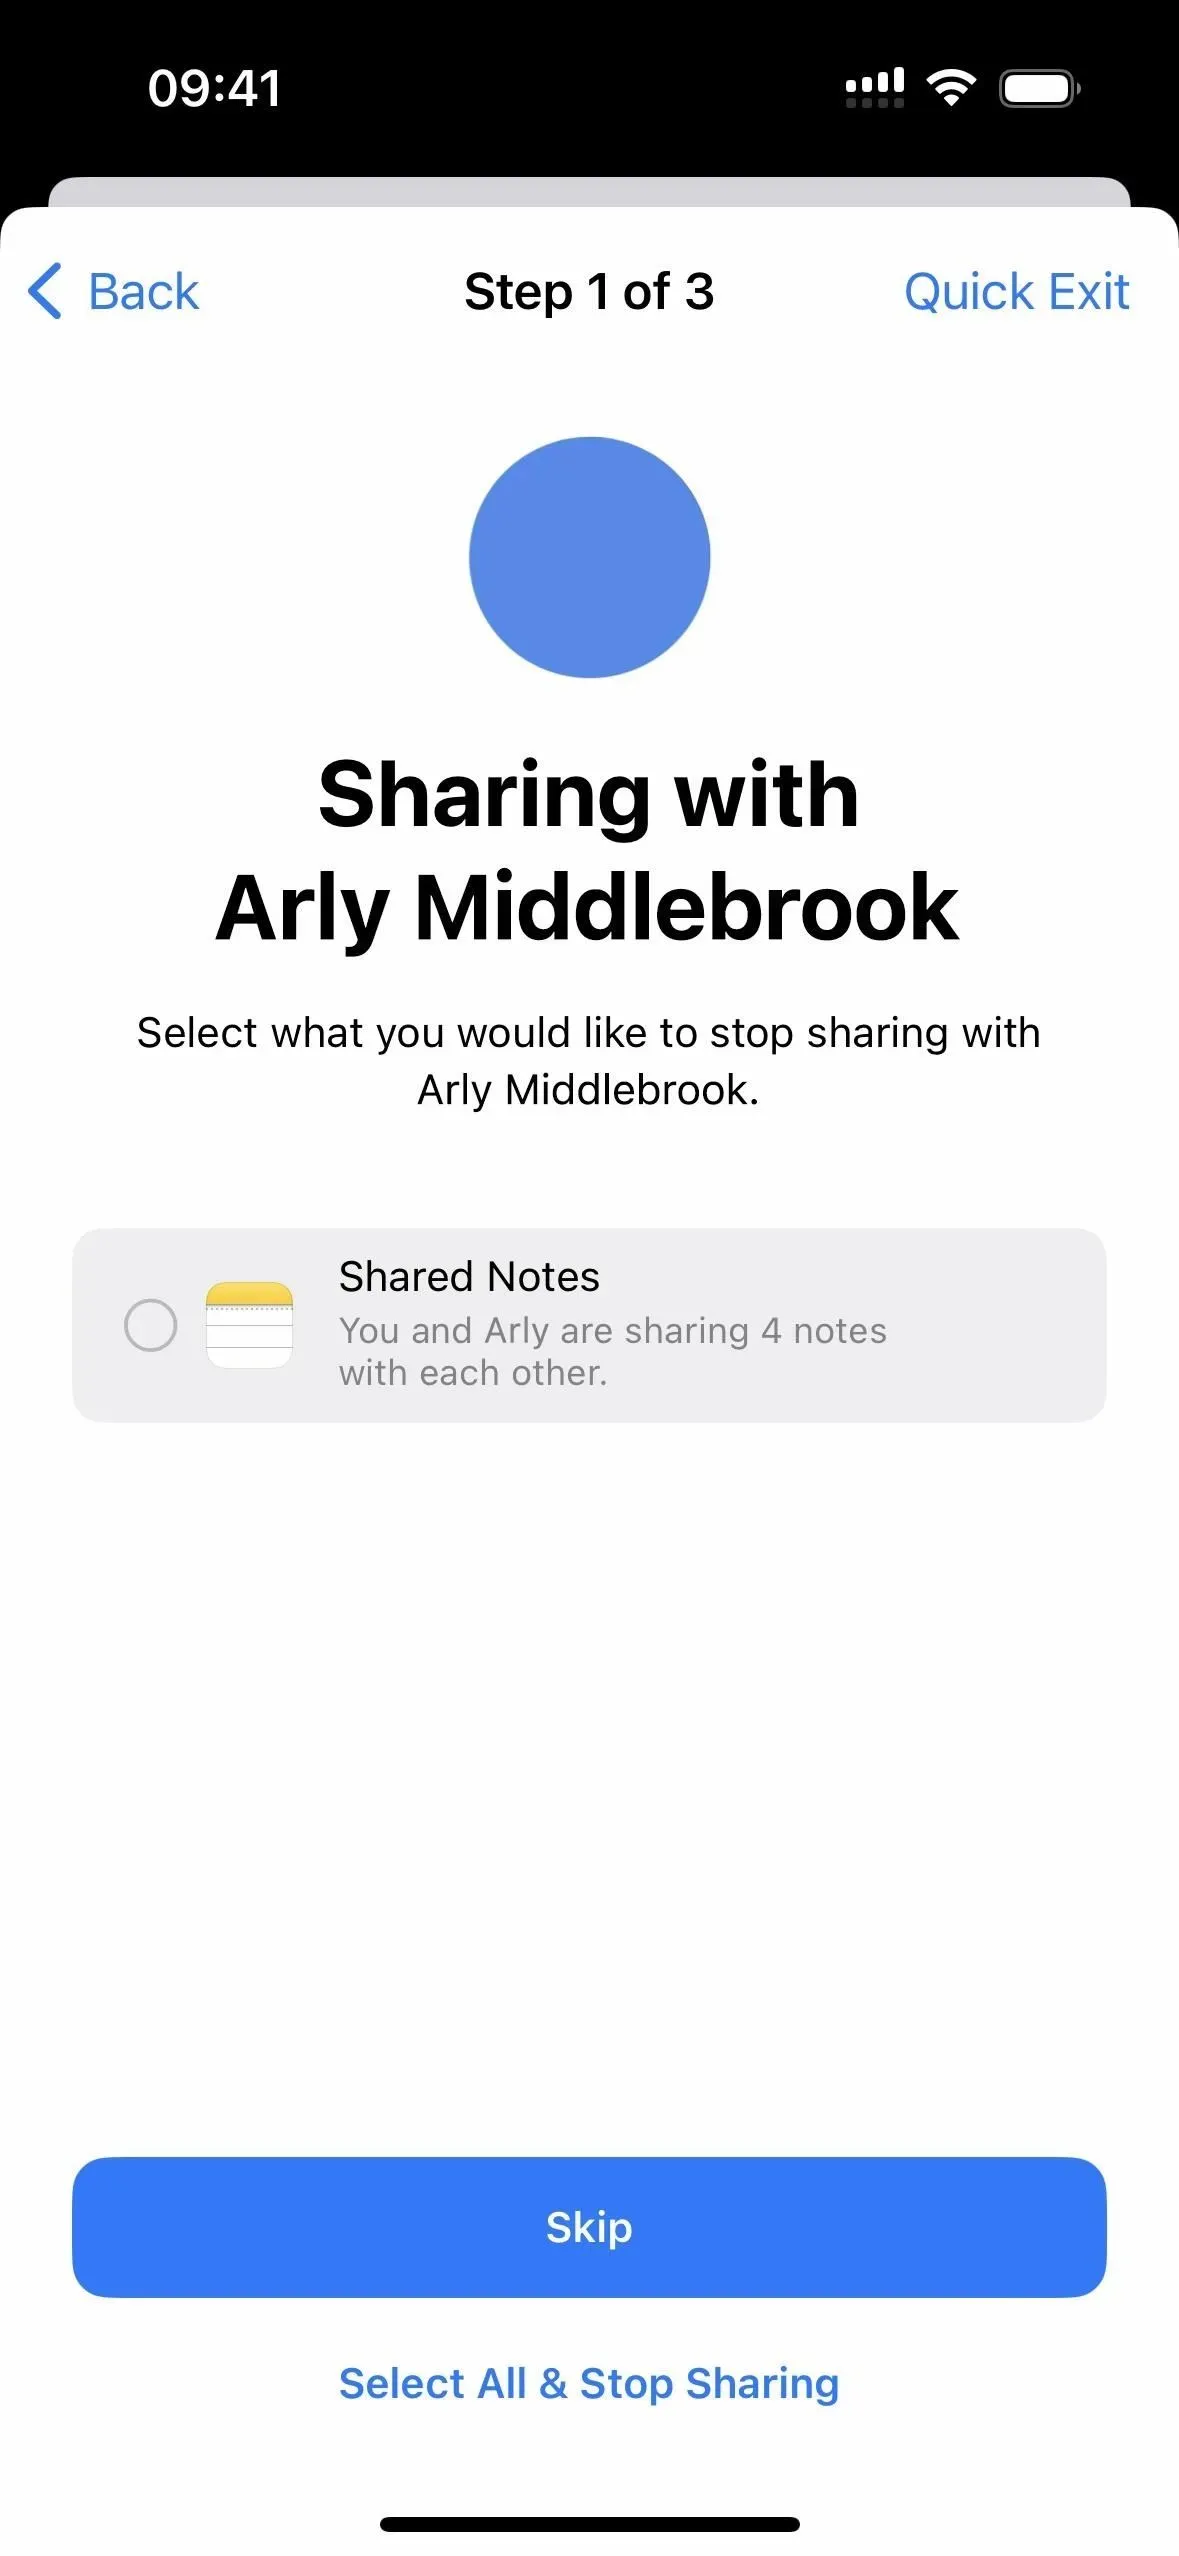
If you want to stop sharing certain data with certain people, check each of their names and click the Check Sharing button. The security check will walk you through each contact, showing you the categories of data they share. If you don’t want to do anything, click “Skip”to view the next person. You can also click Select All and Stop Sharing to revoke all data. Or you can check certain items and click “Stop Sharing”.
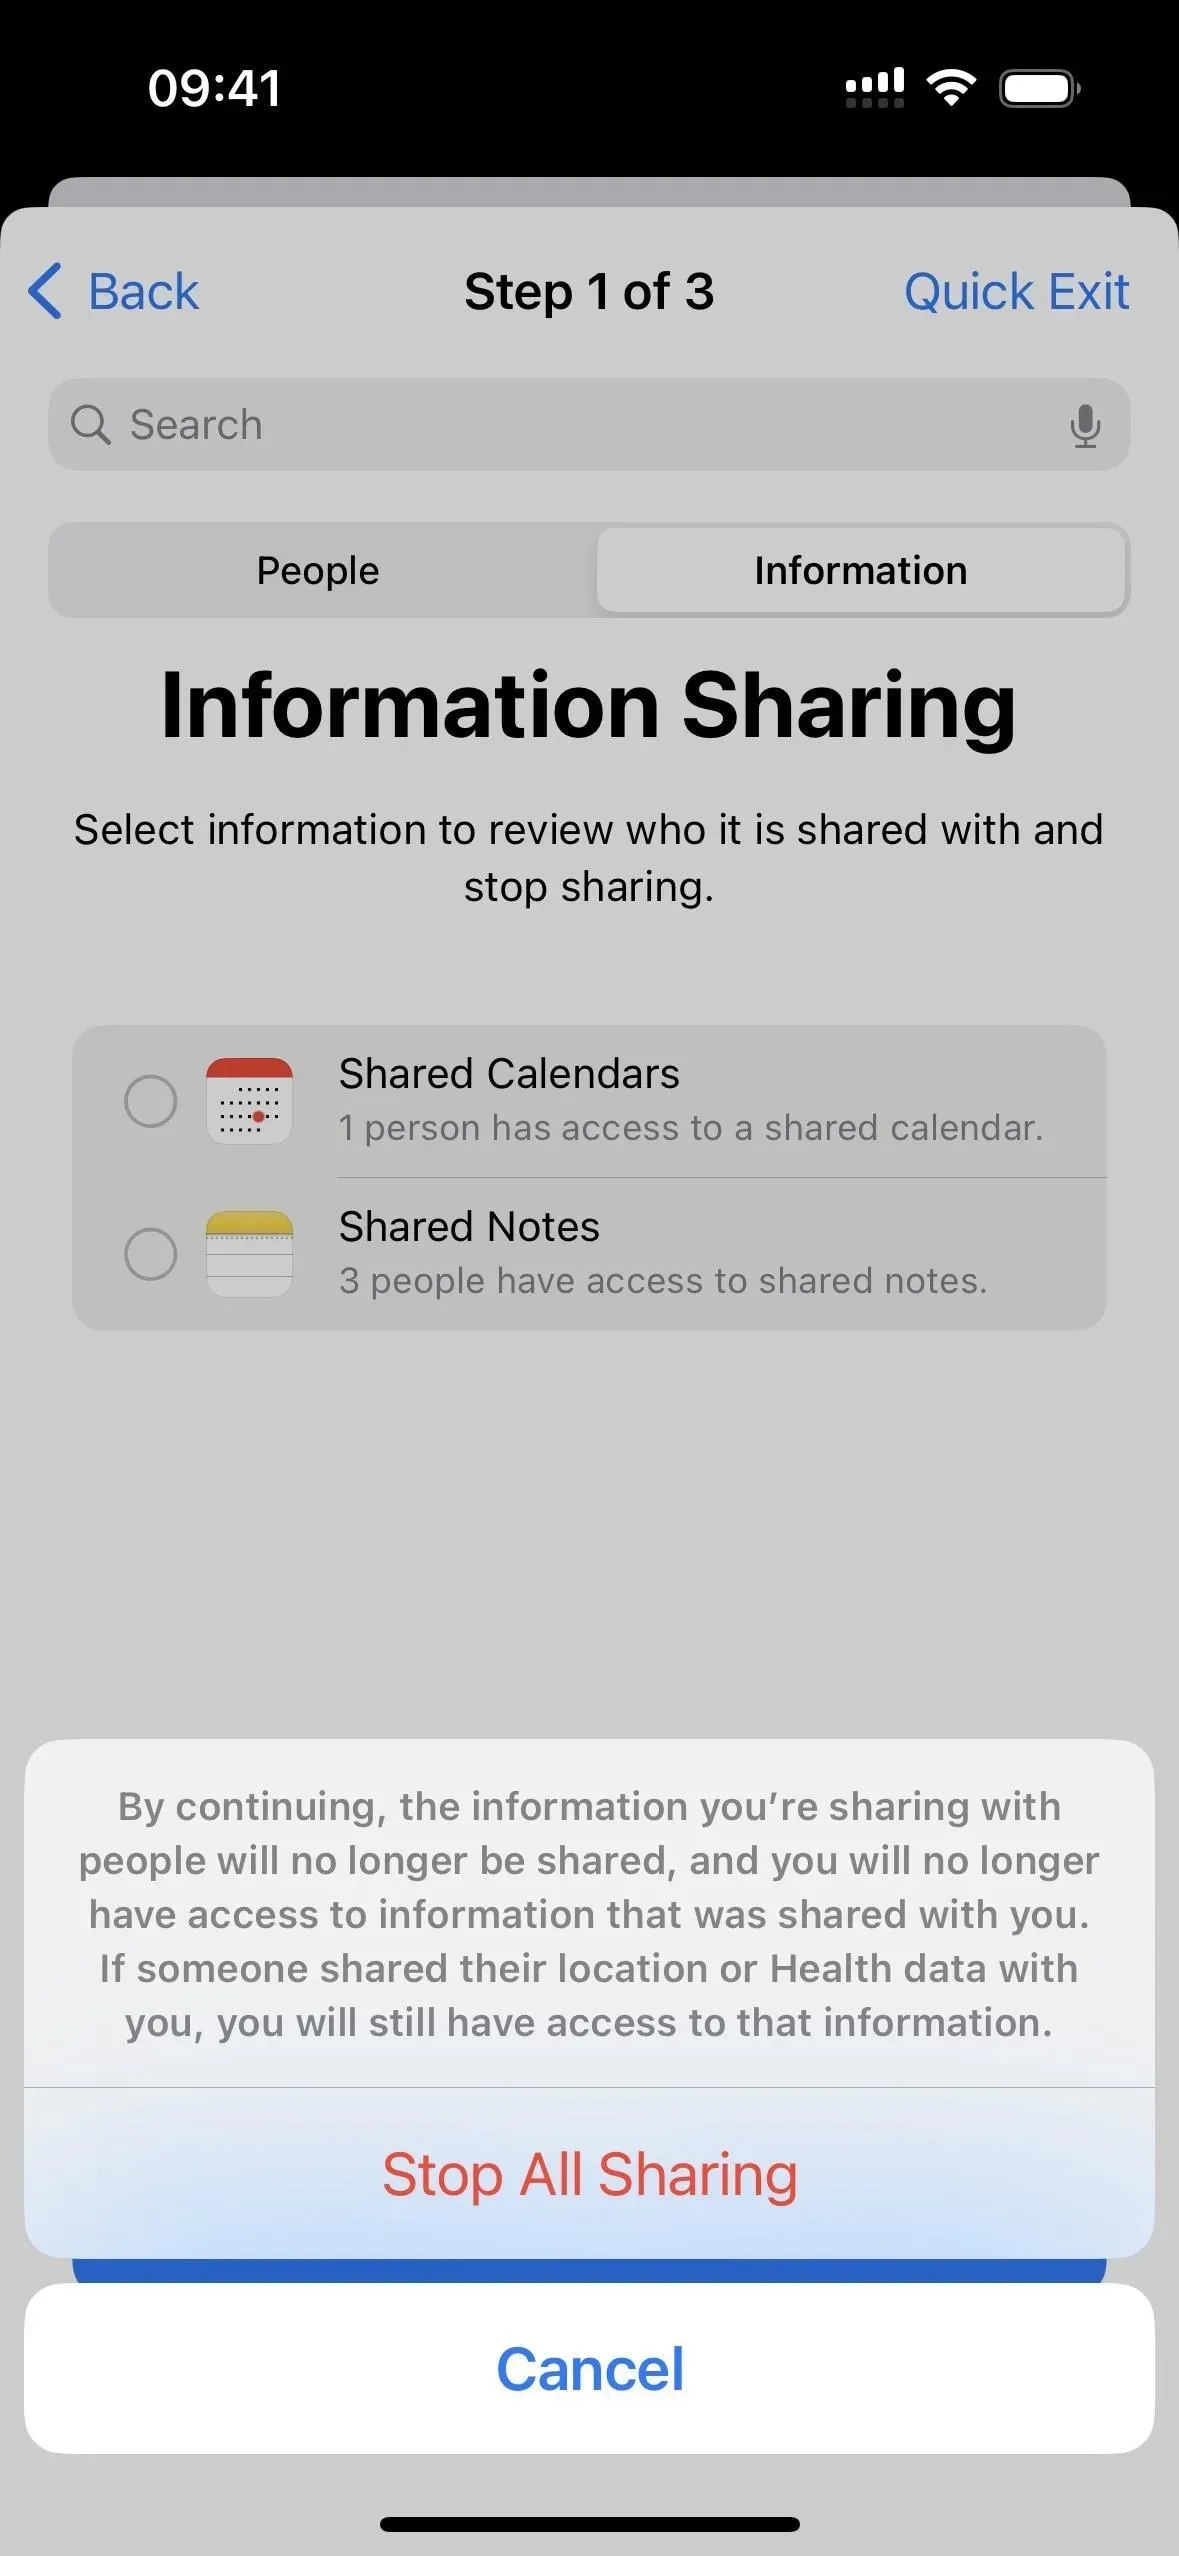
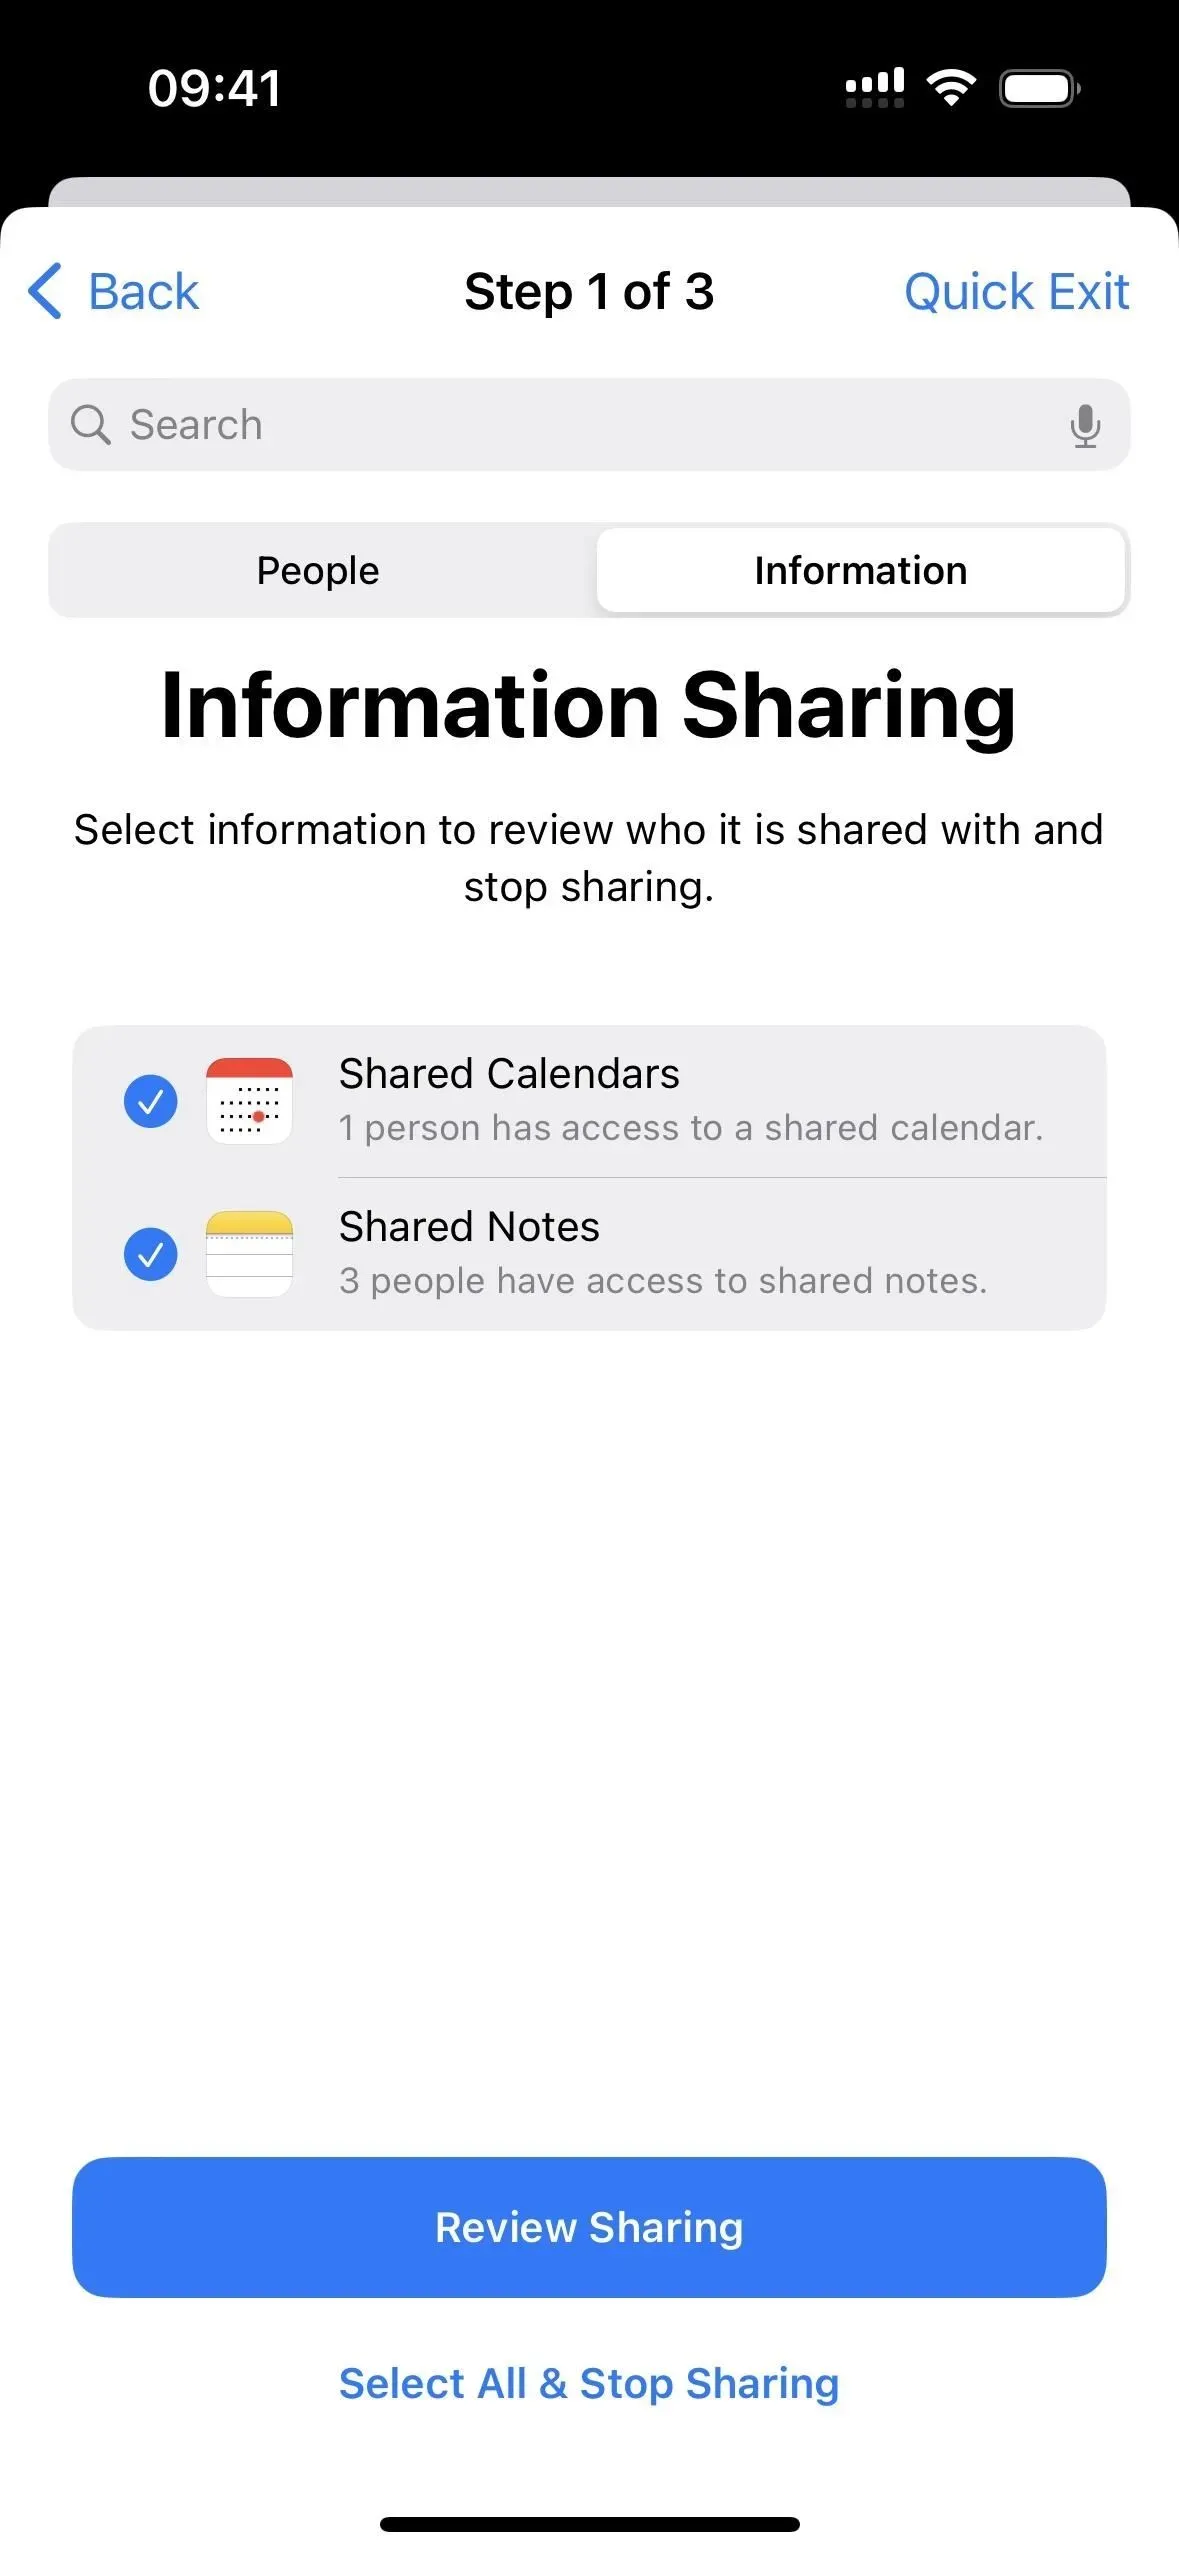
Additionally, you can open the Info tab to view the type of data being exchanged if you want to cut the cord for everyone in certain categories. As with the People tab, you can “Go”to the next step or destroy all shares by clicking “Select All and Stop Sharing”after reading the warning and clicking “Stop Sharing”.
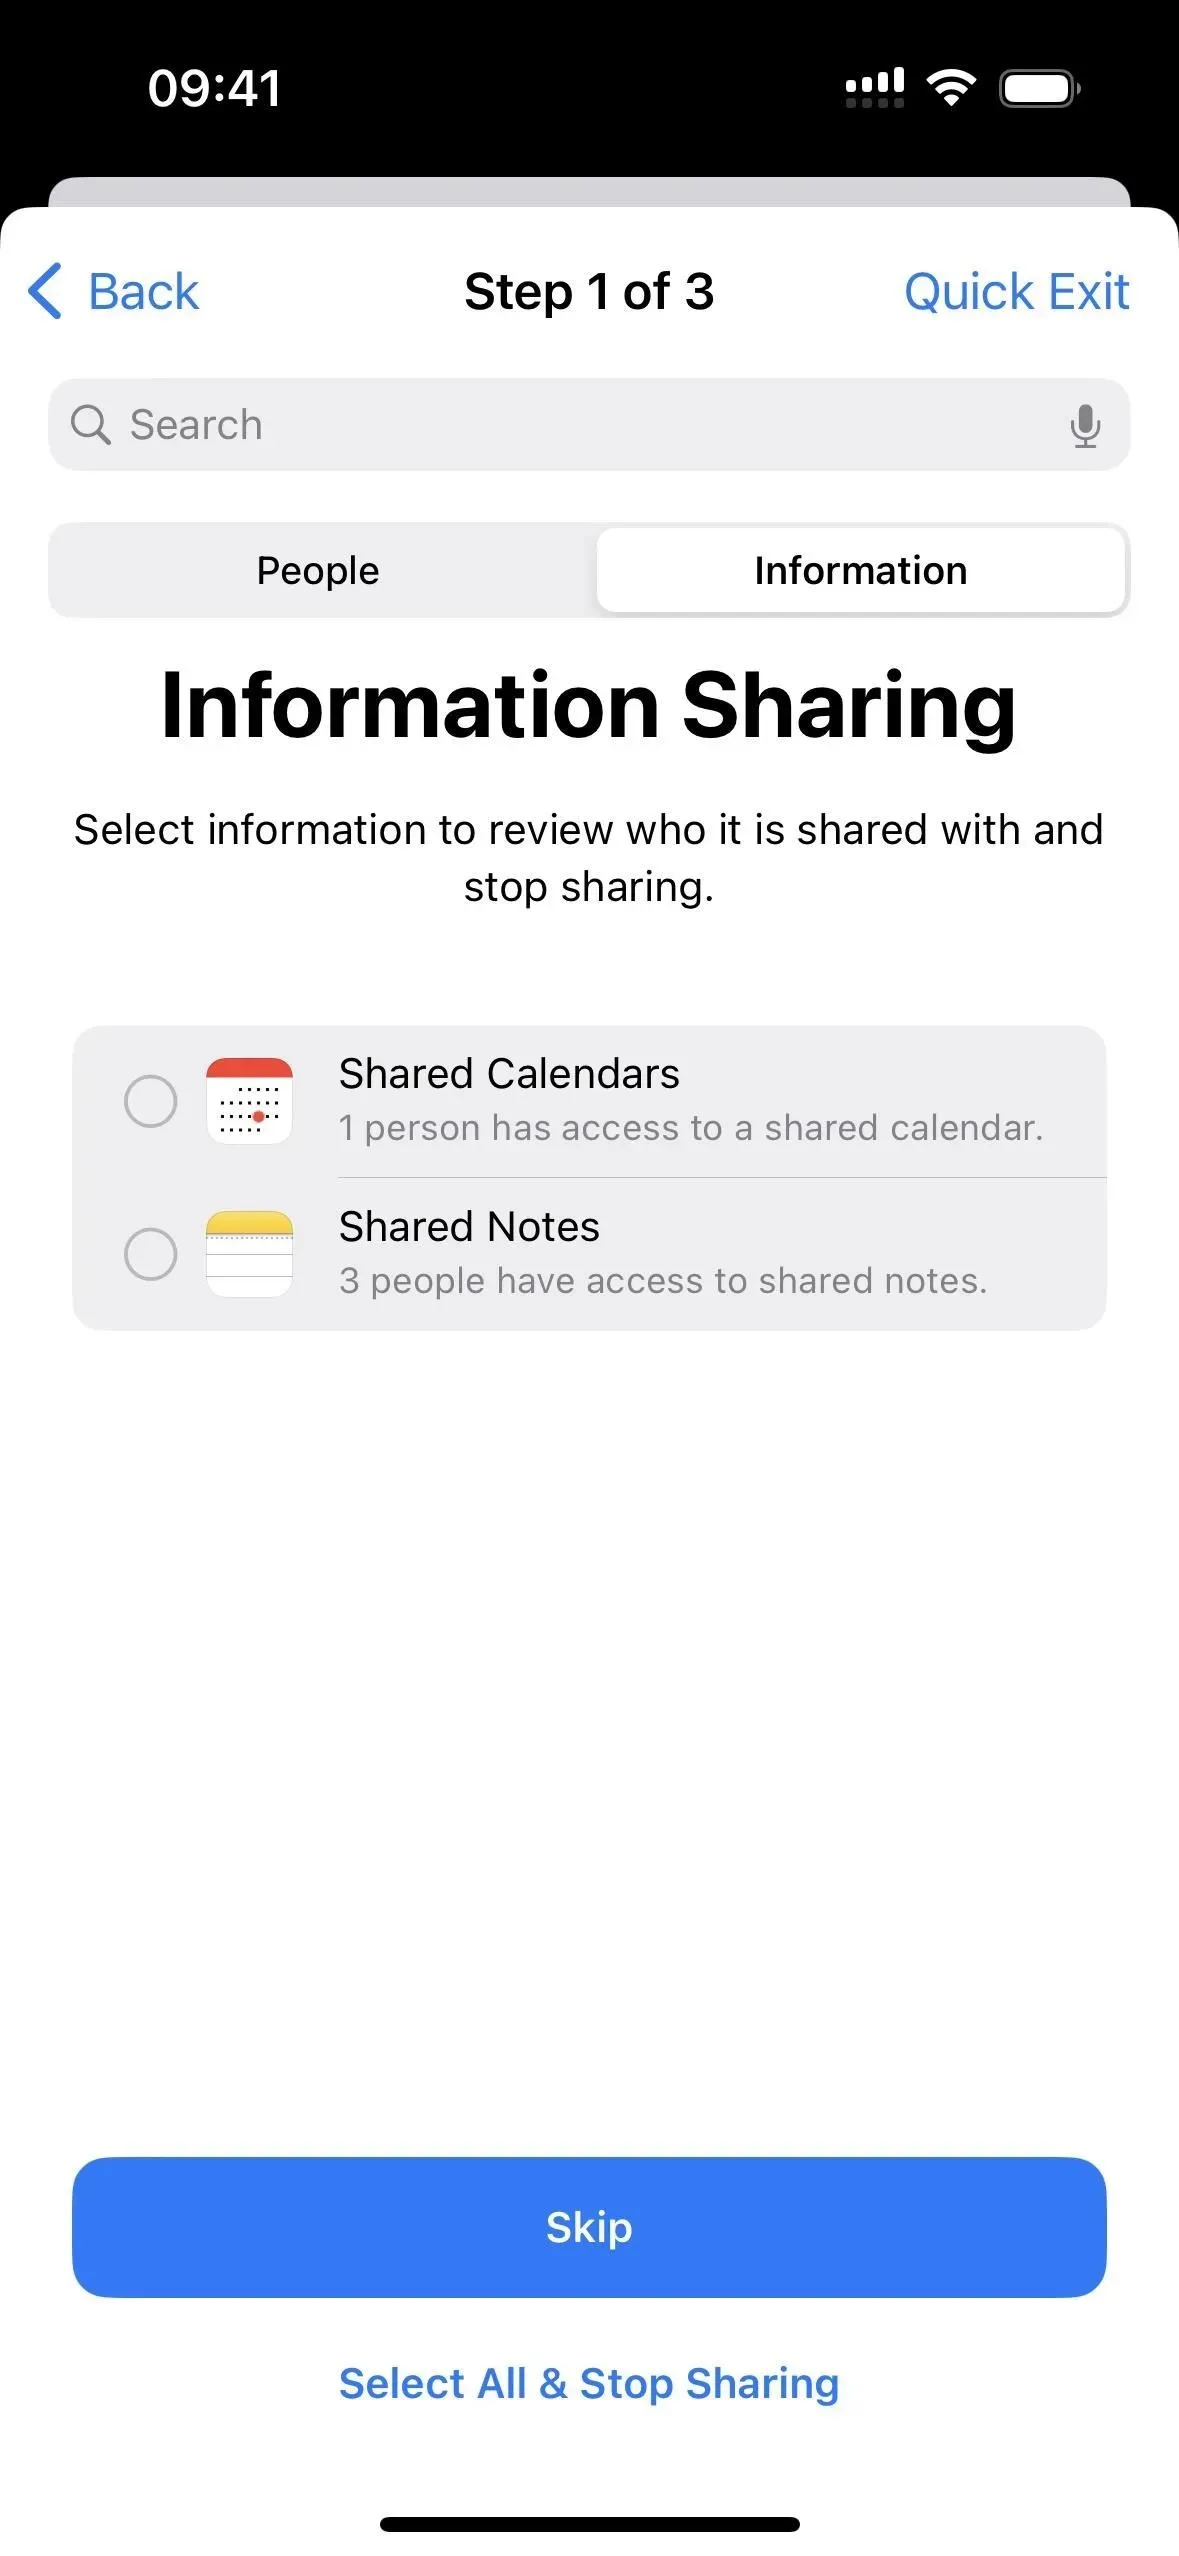
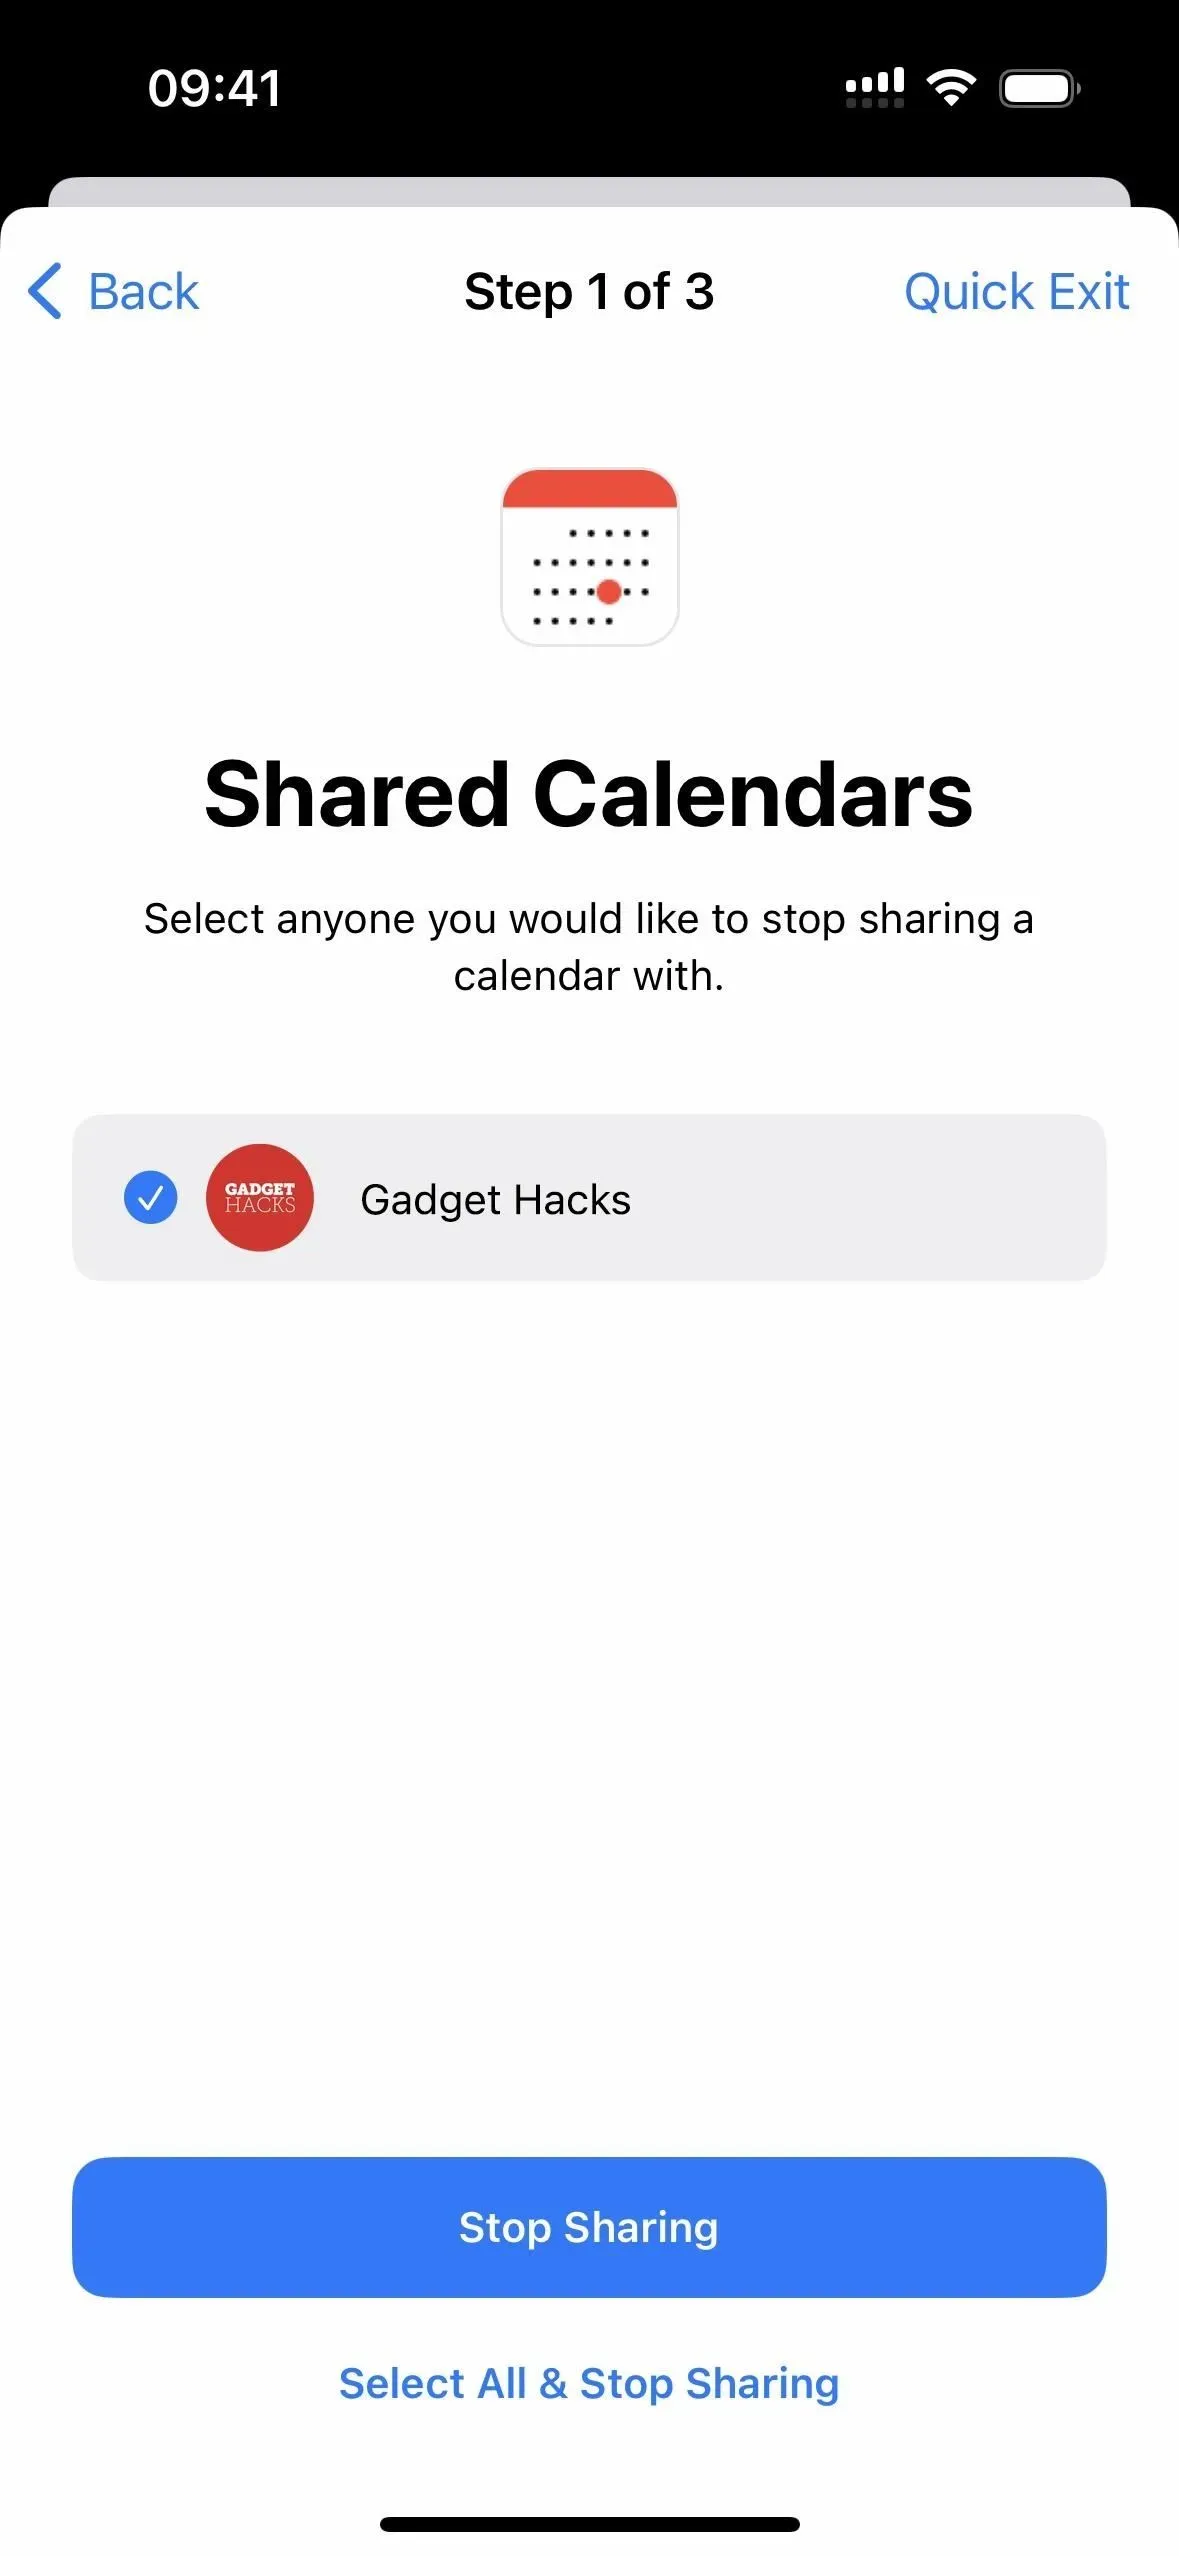
Or you can check the categories and click “Share Reviews”to see which people can access them. Each category lists the people with access and you can “Skip”them all, or check the names and click Stop Sharing to display the next category, or complete the first step of the Sharing and Access Control tool.
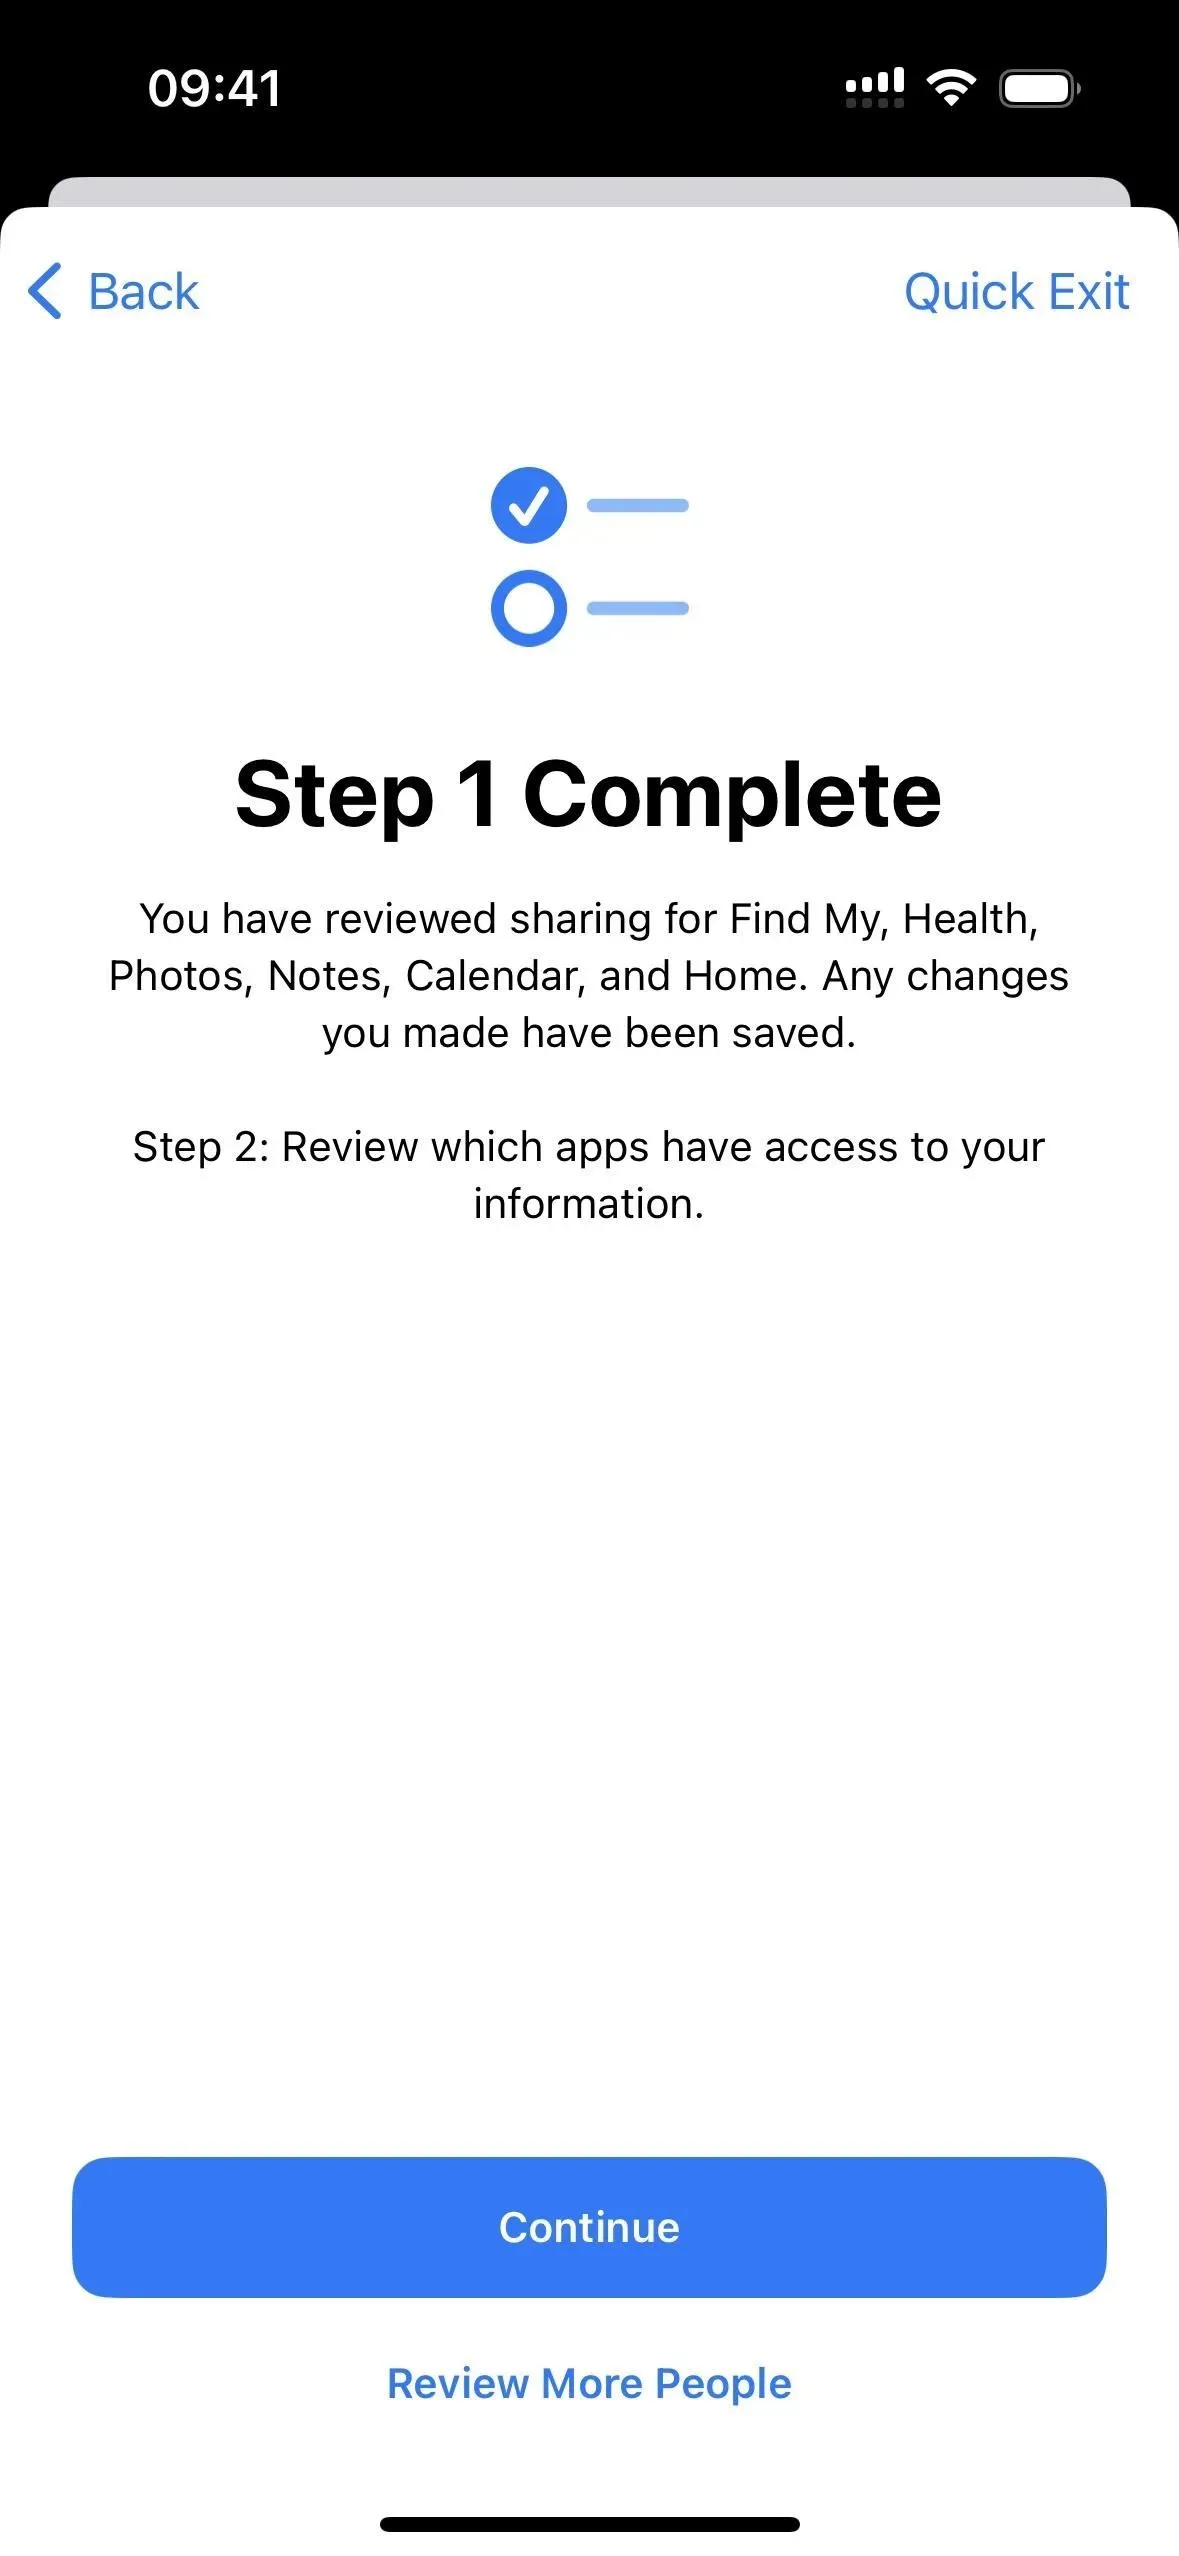
After completing the first step, click “Continue”or “Check Other People”if you want to go back and remove more sharing for other people.
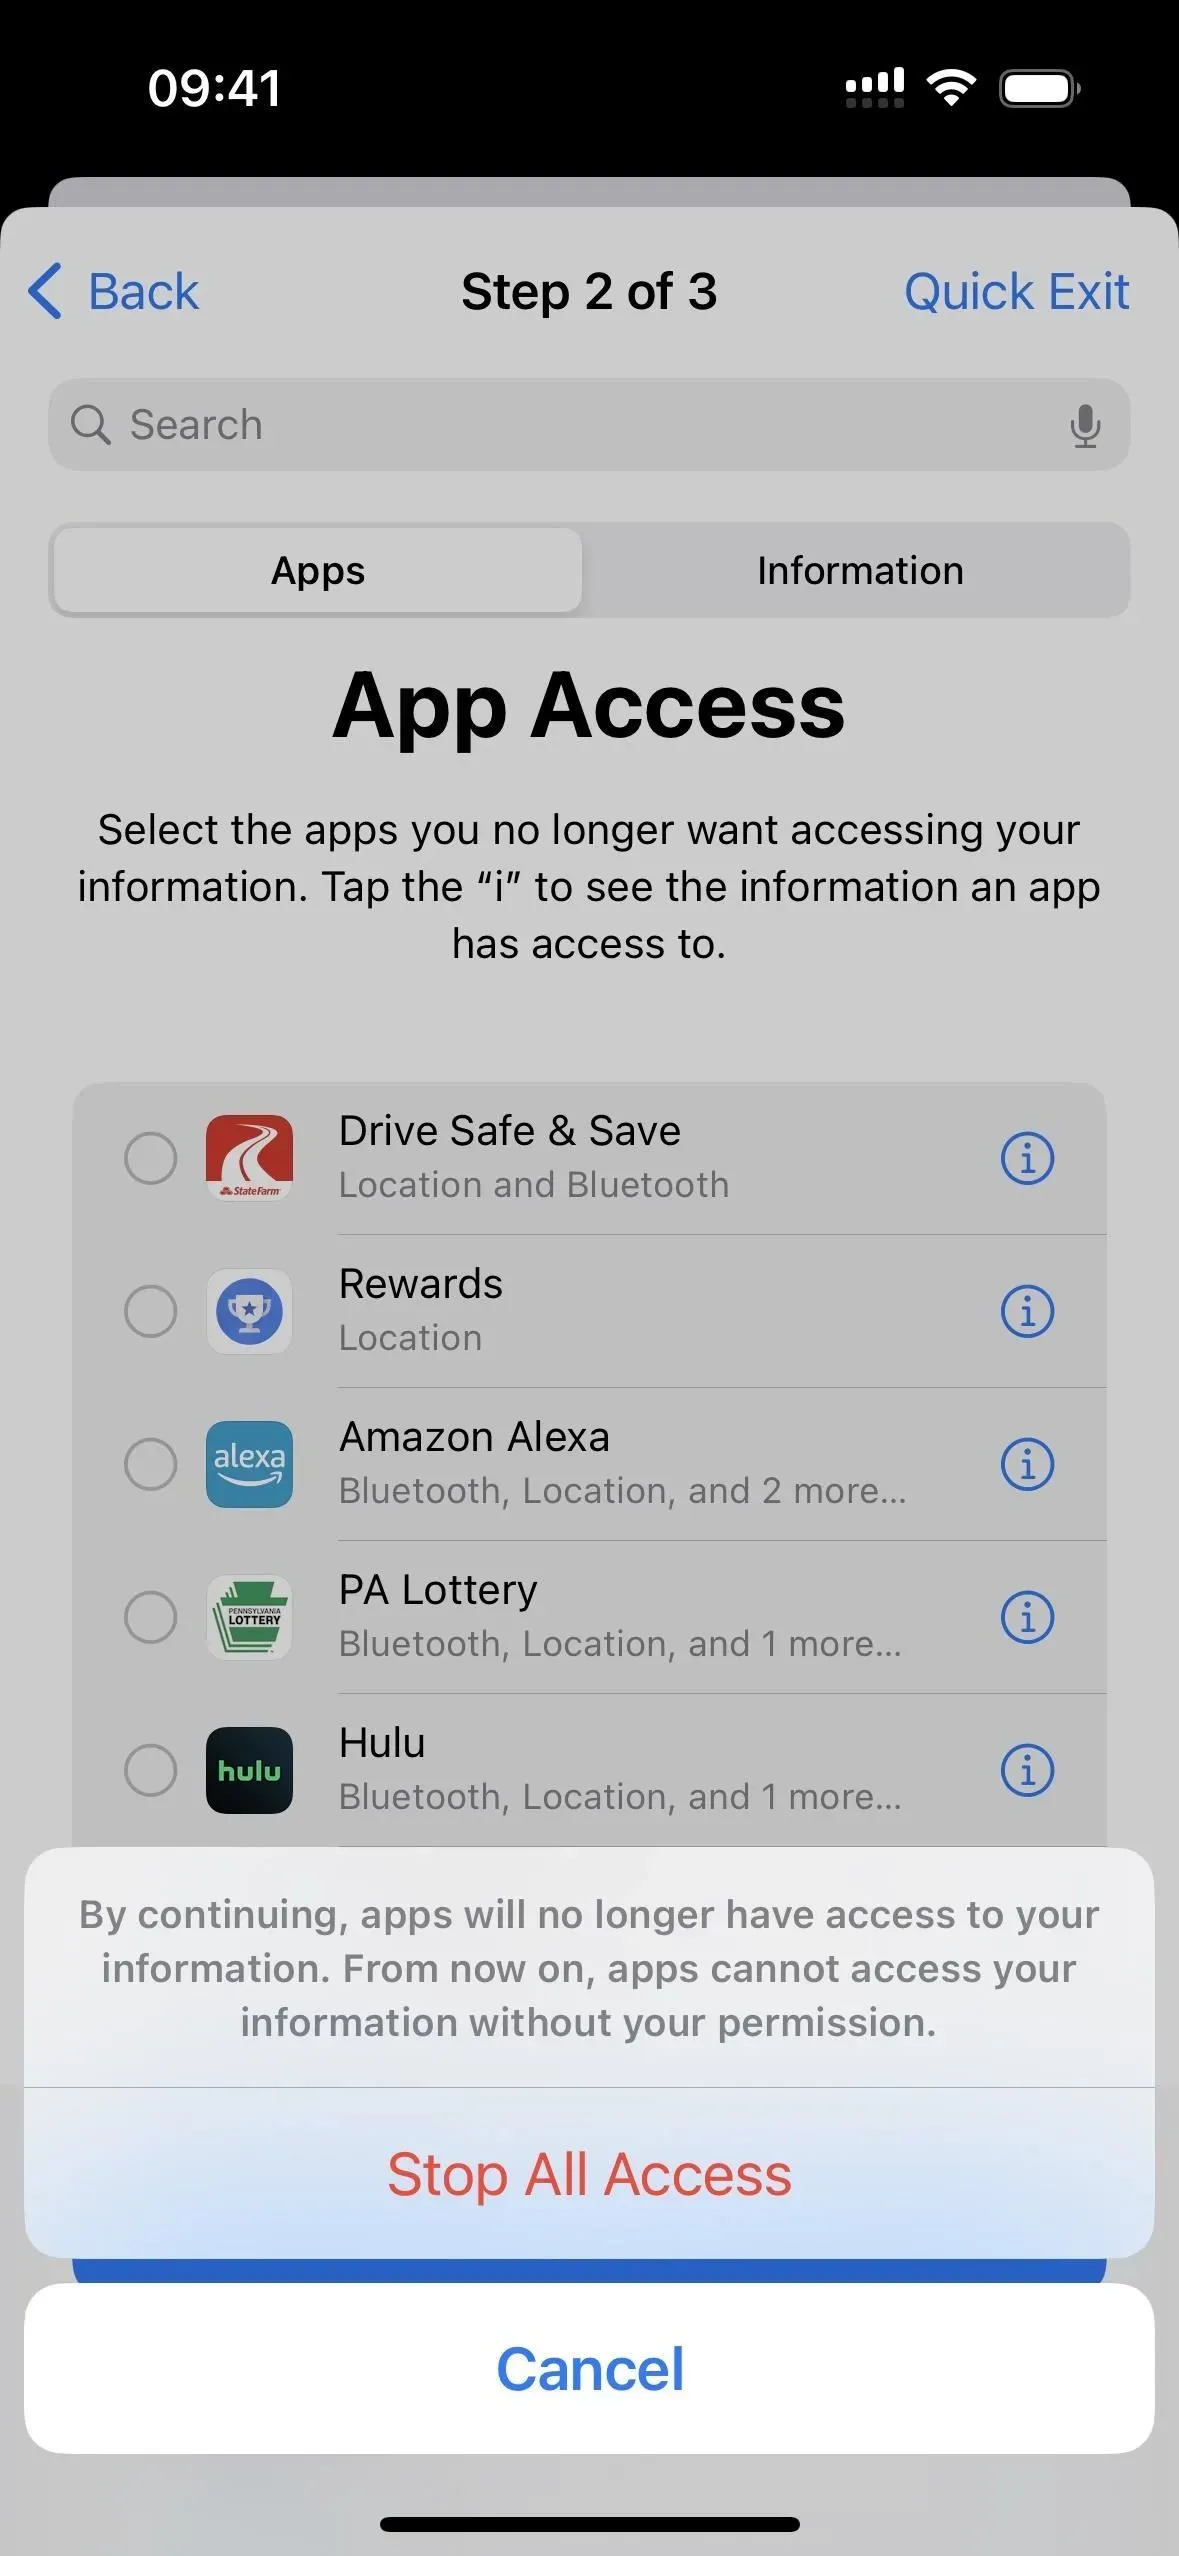
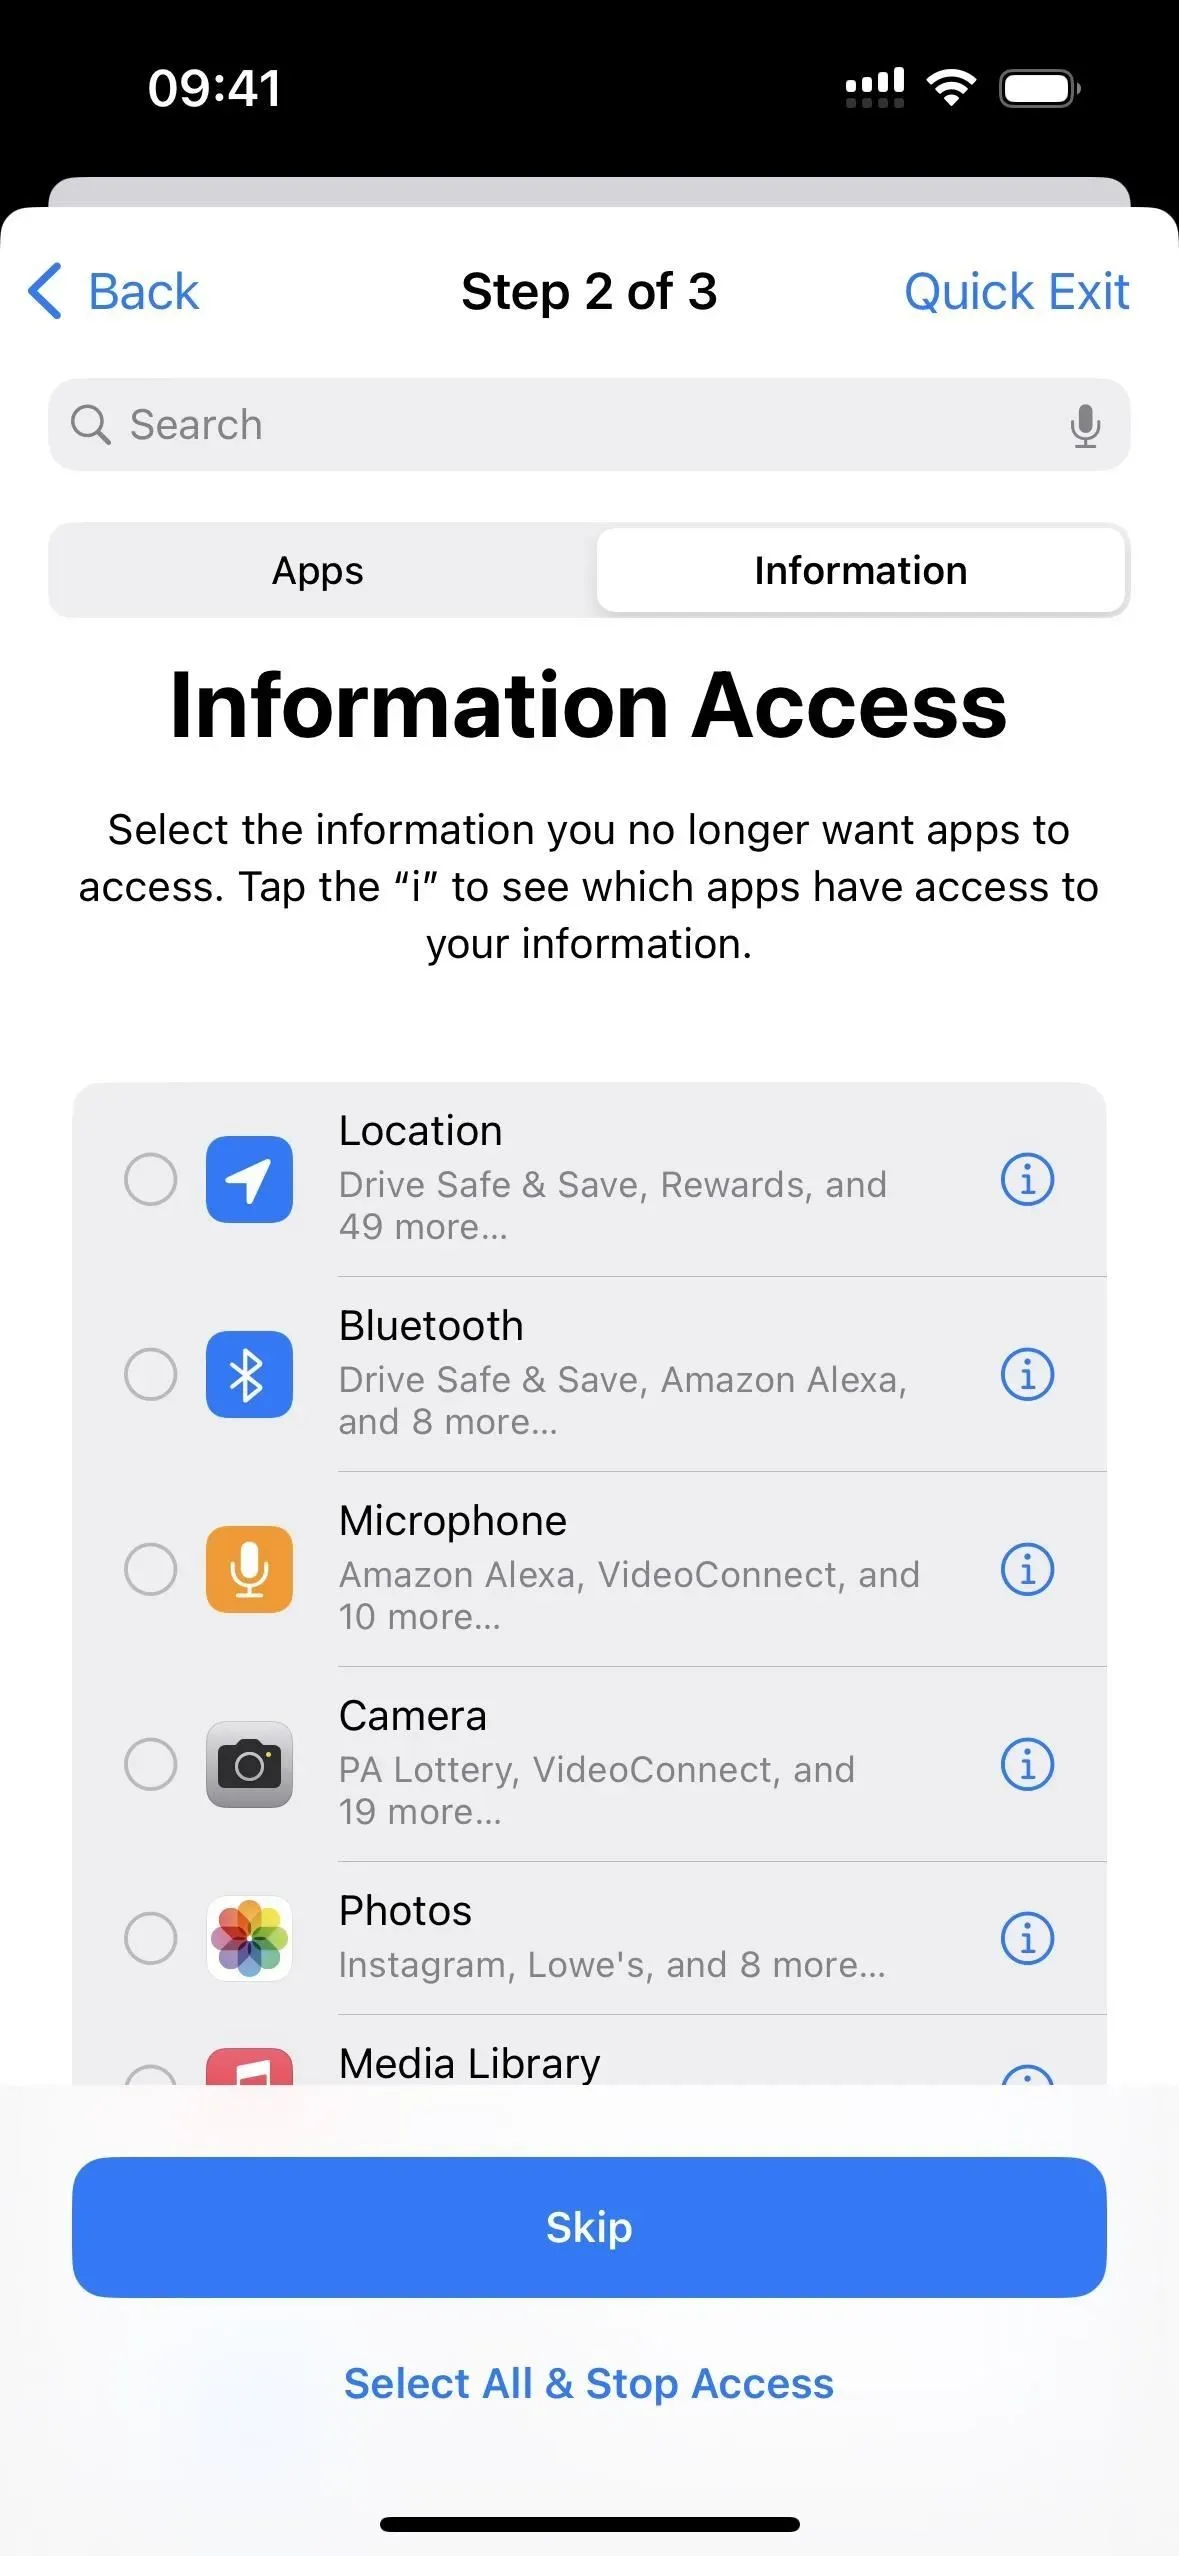
Step 2: Manage Permissions Shared by Applications
The second step shows you all the apps on your iPhone that access your information in one way or another. This information includes Bluetooth, calendars, camera, contacts, files, folders, health, LAN, location services, media, Apple Music, microphone, motion, fitness, photos, reminders, research, and speech recognition.
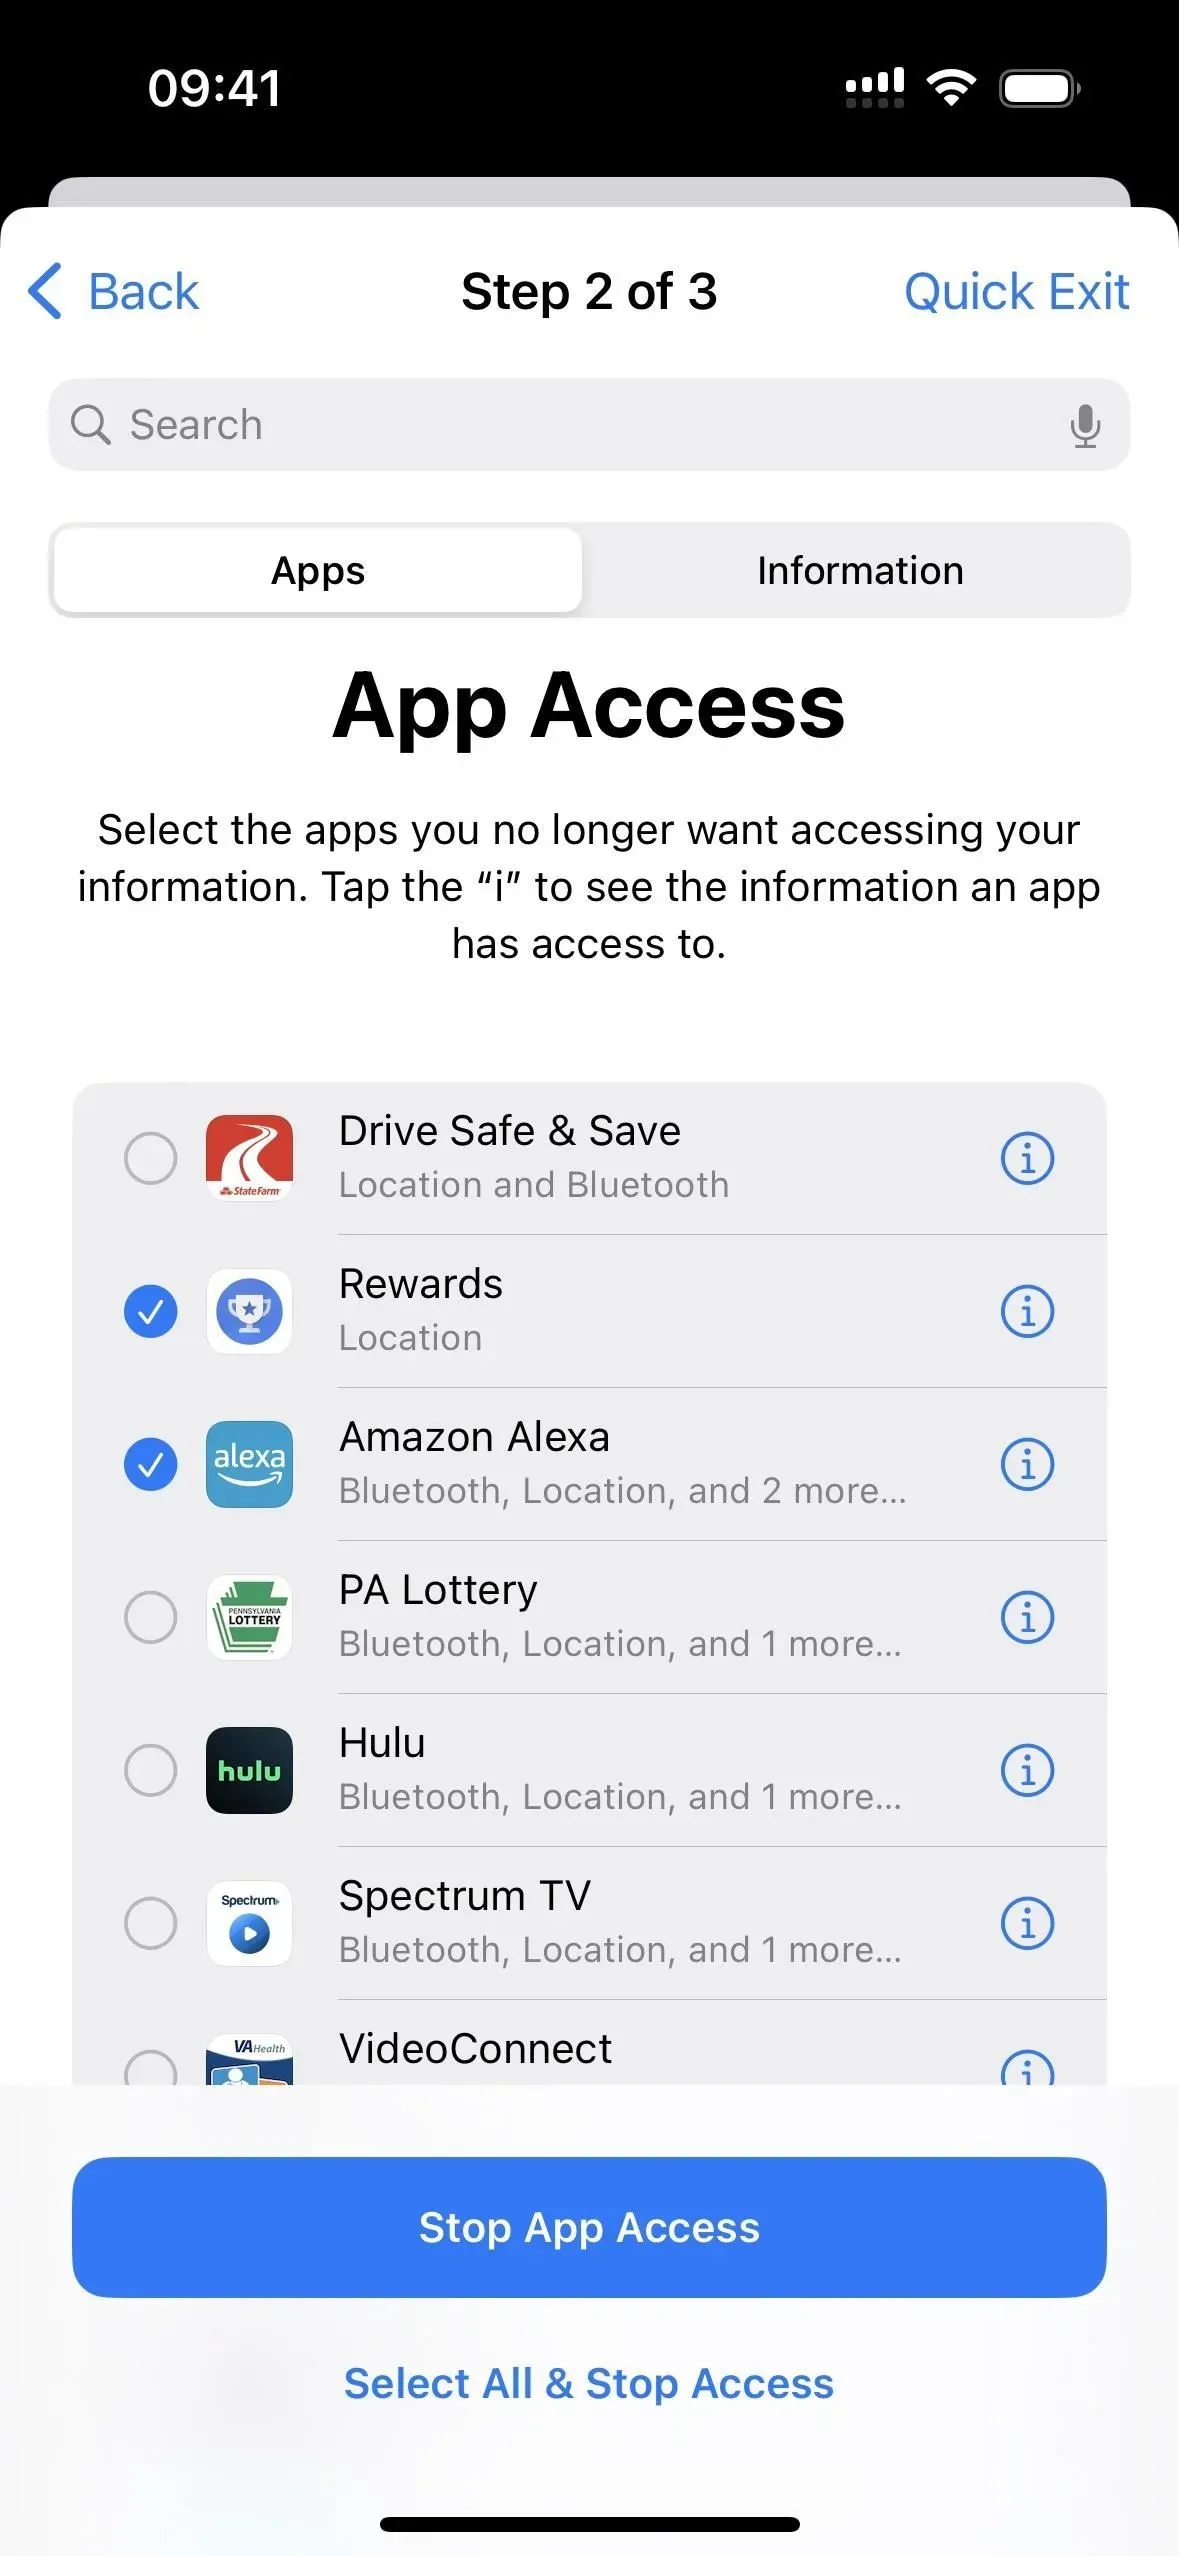
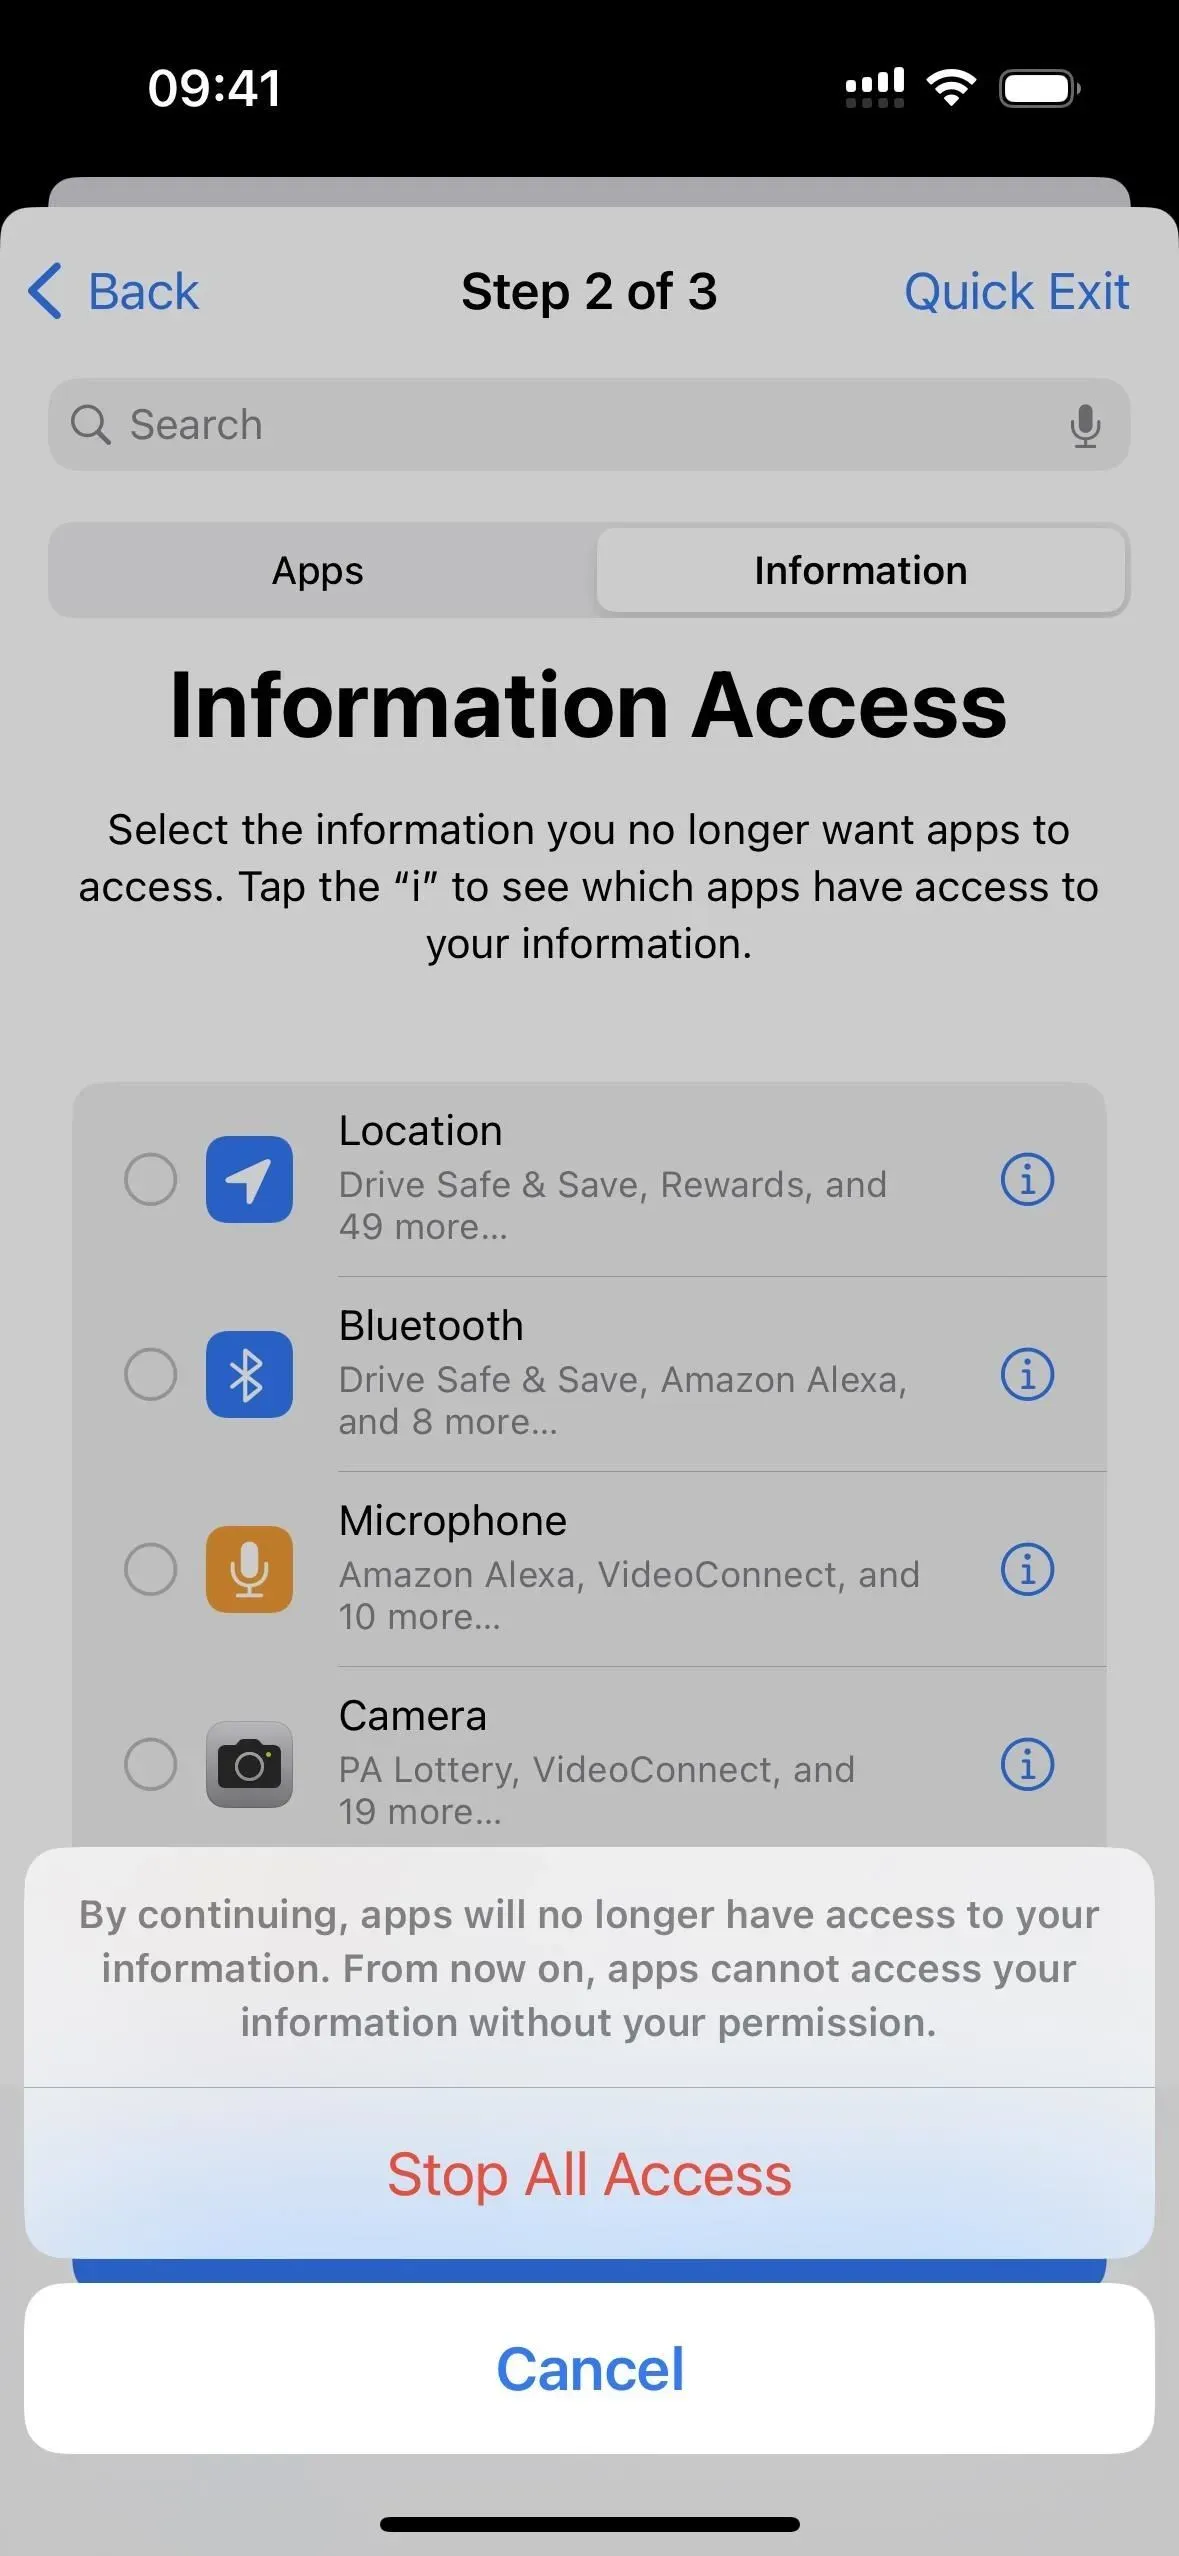
You can click Skip if you don’t want to change anything. If you want to revoke all access and permissions for all apps, click “Select all and stop access”, read the warning and click “Stop all access”.
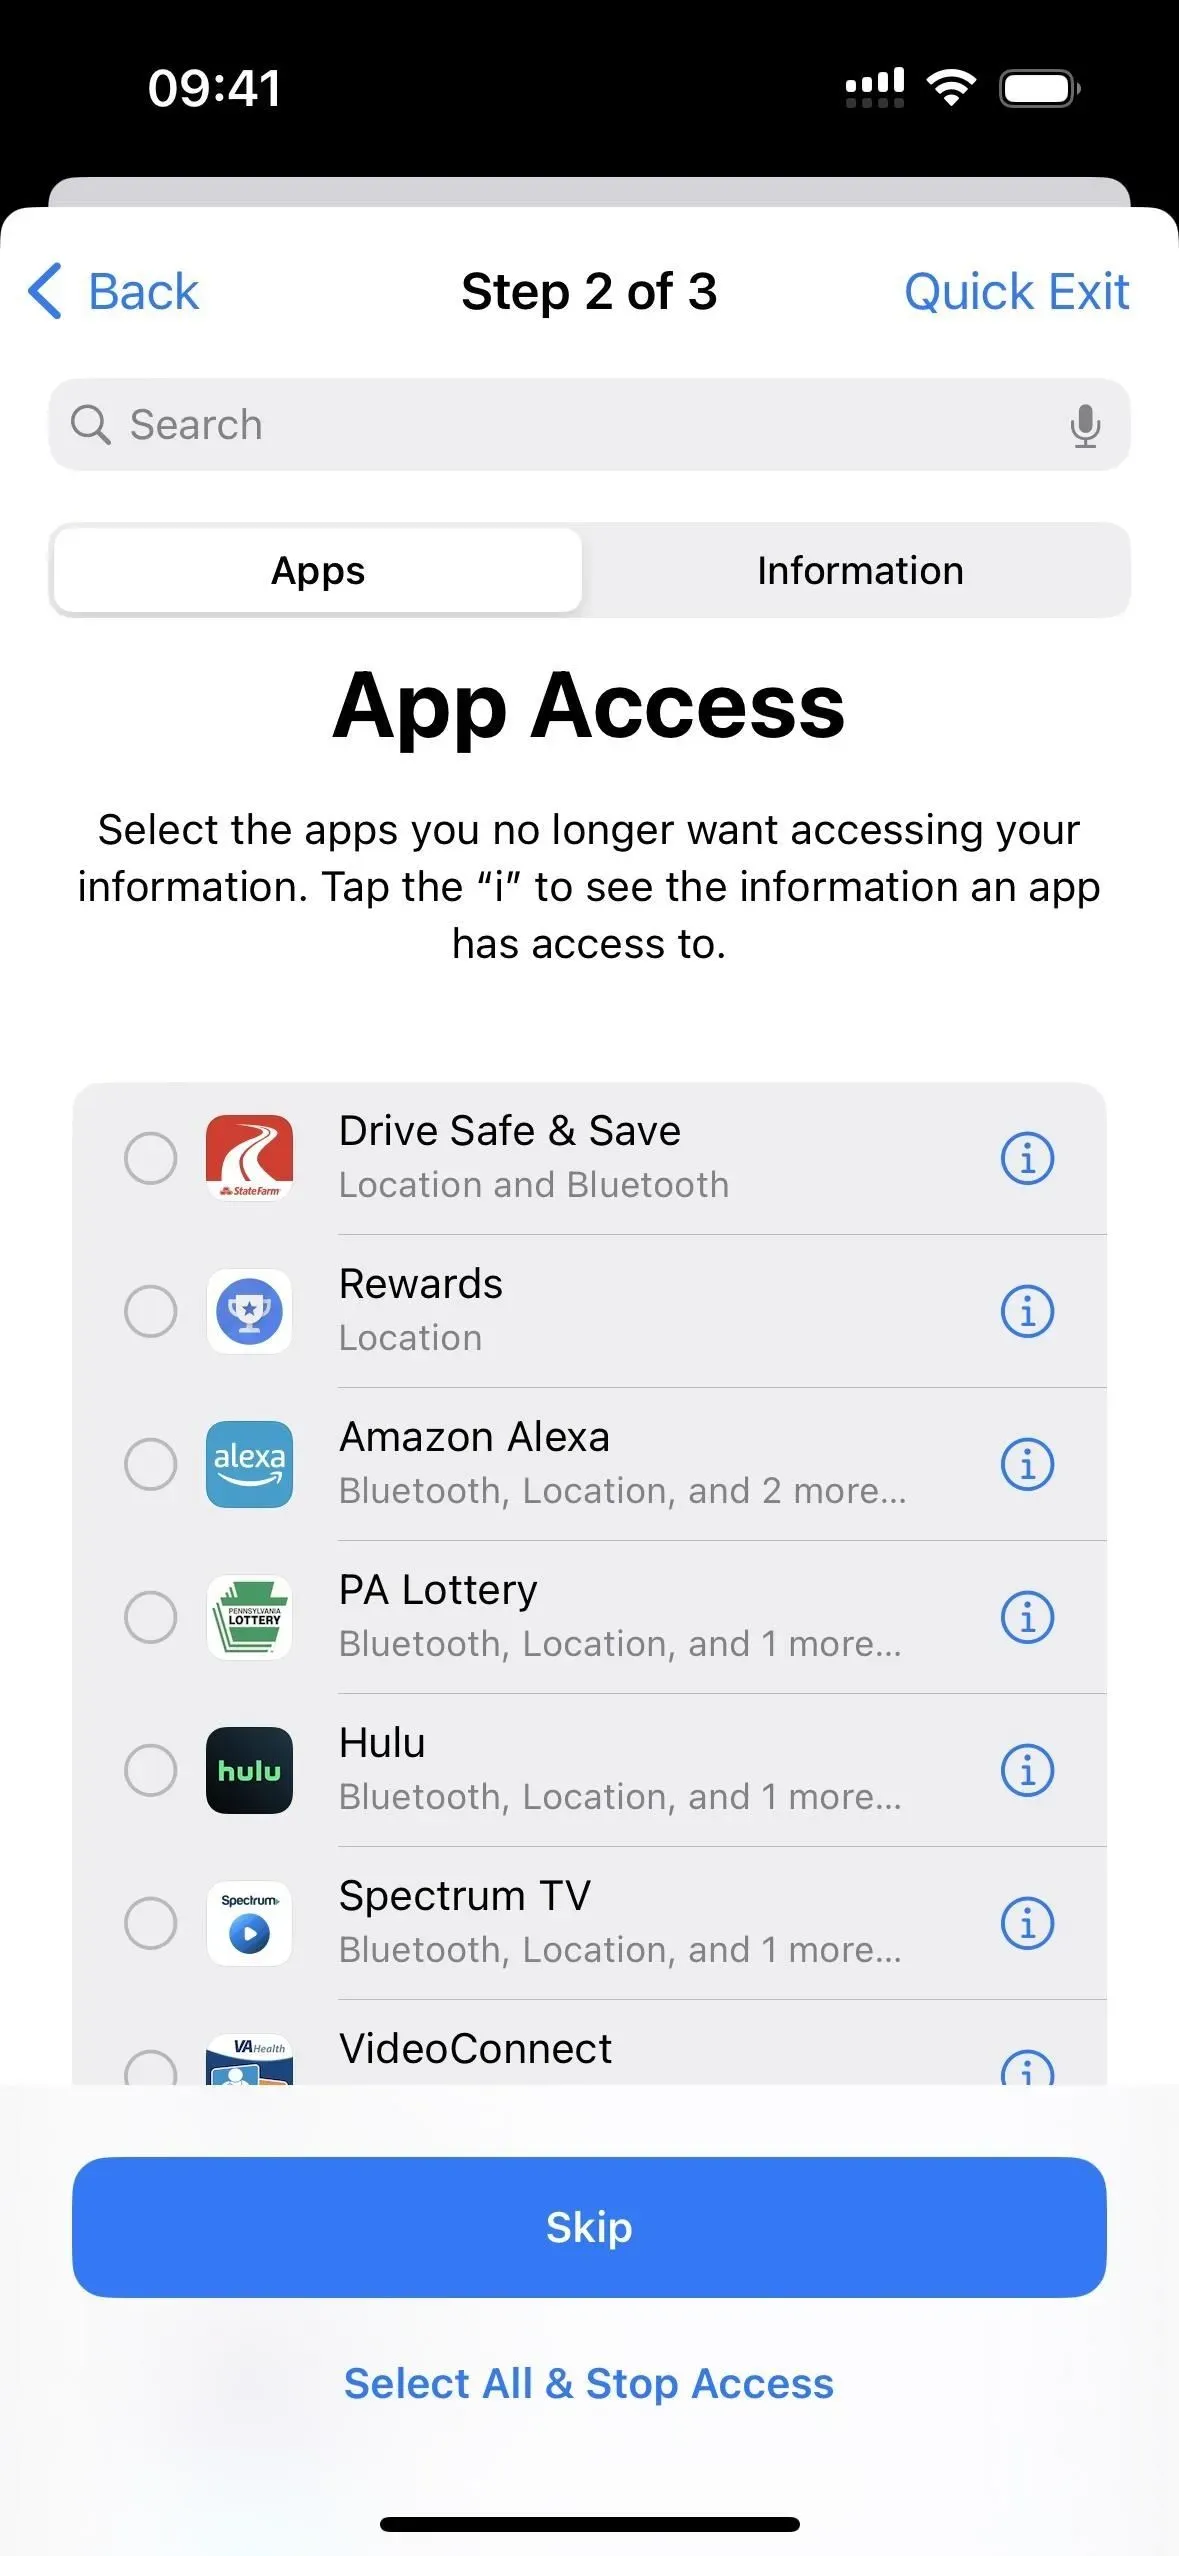
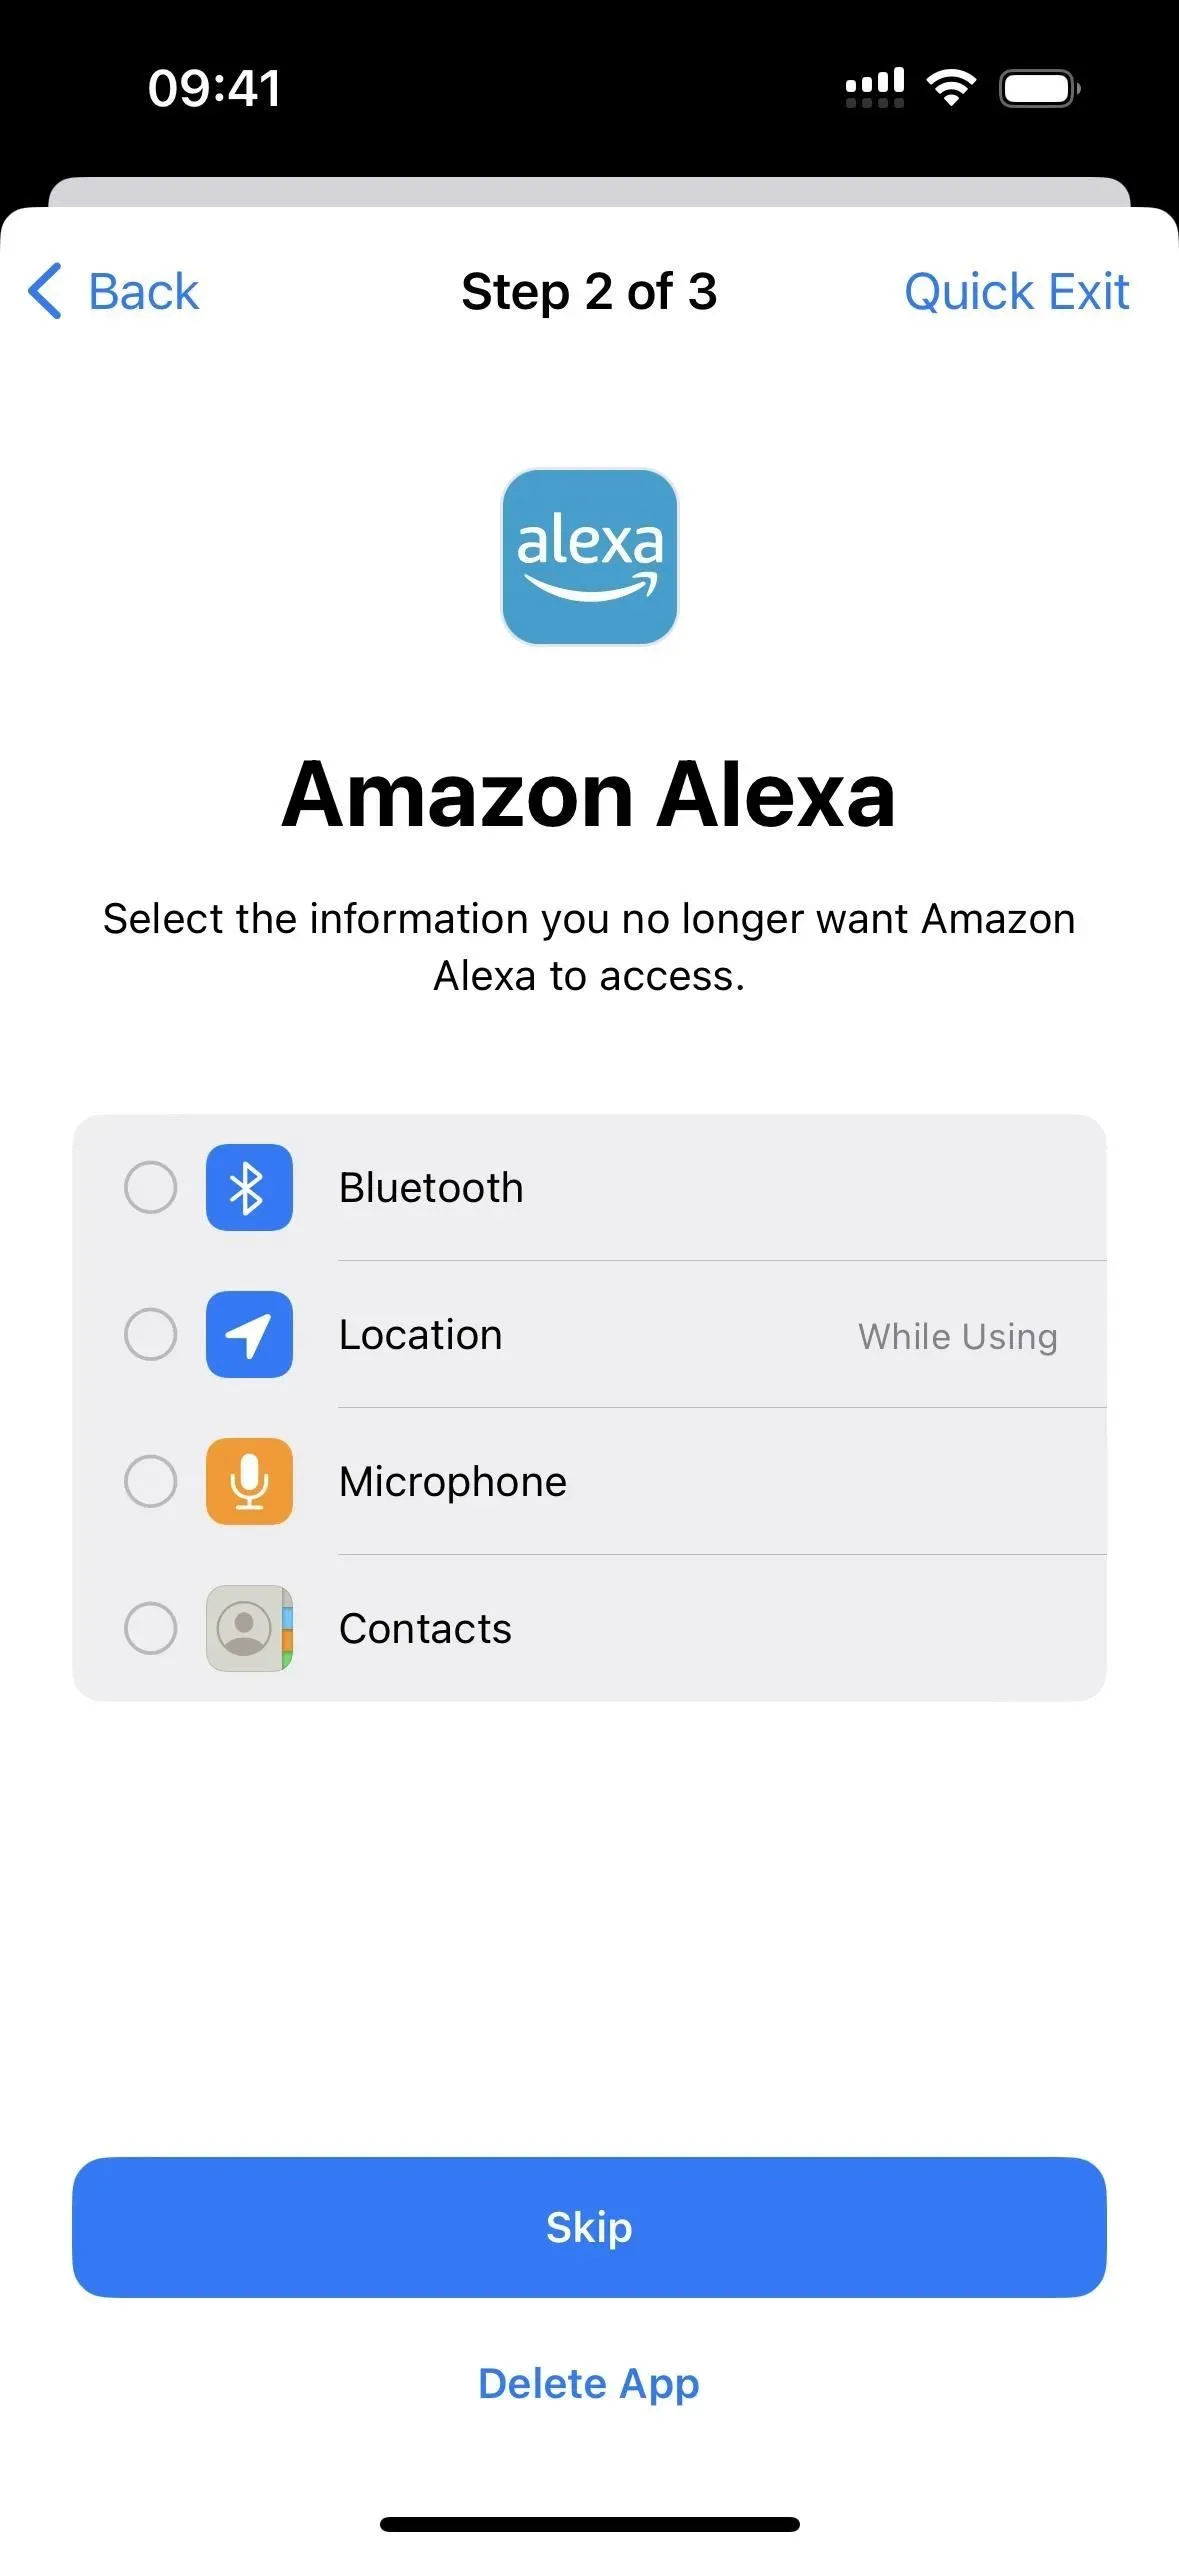
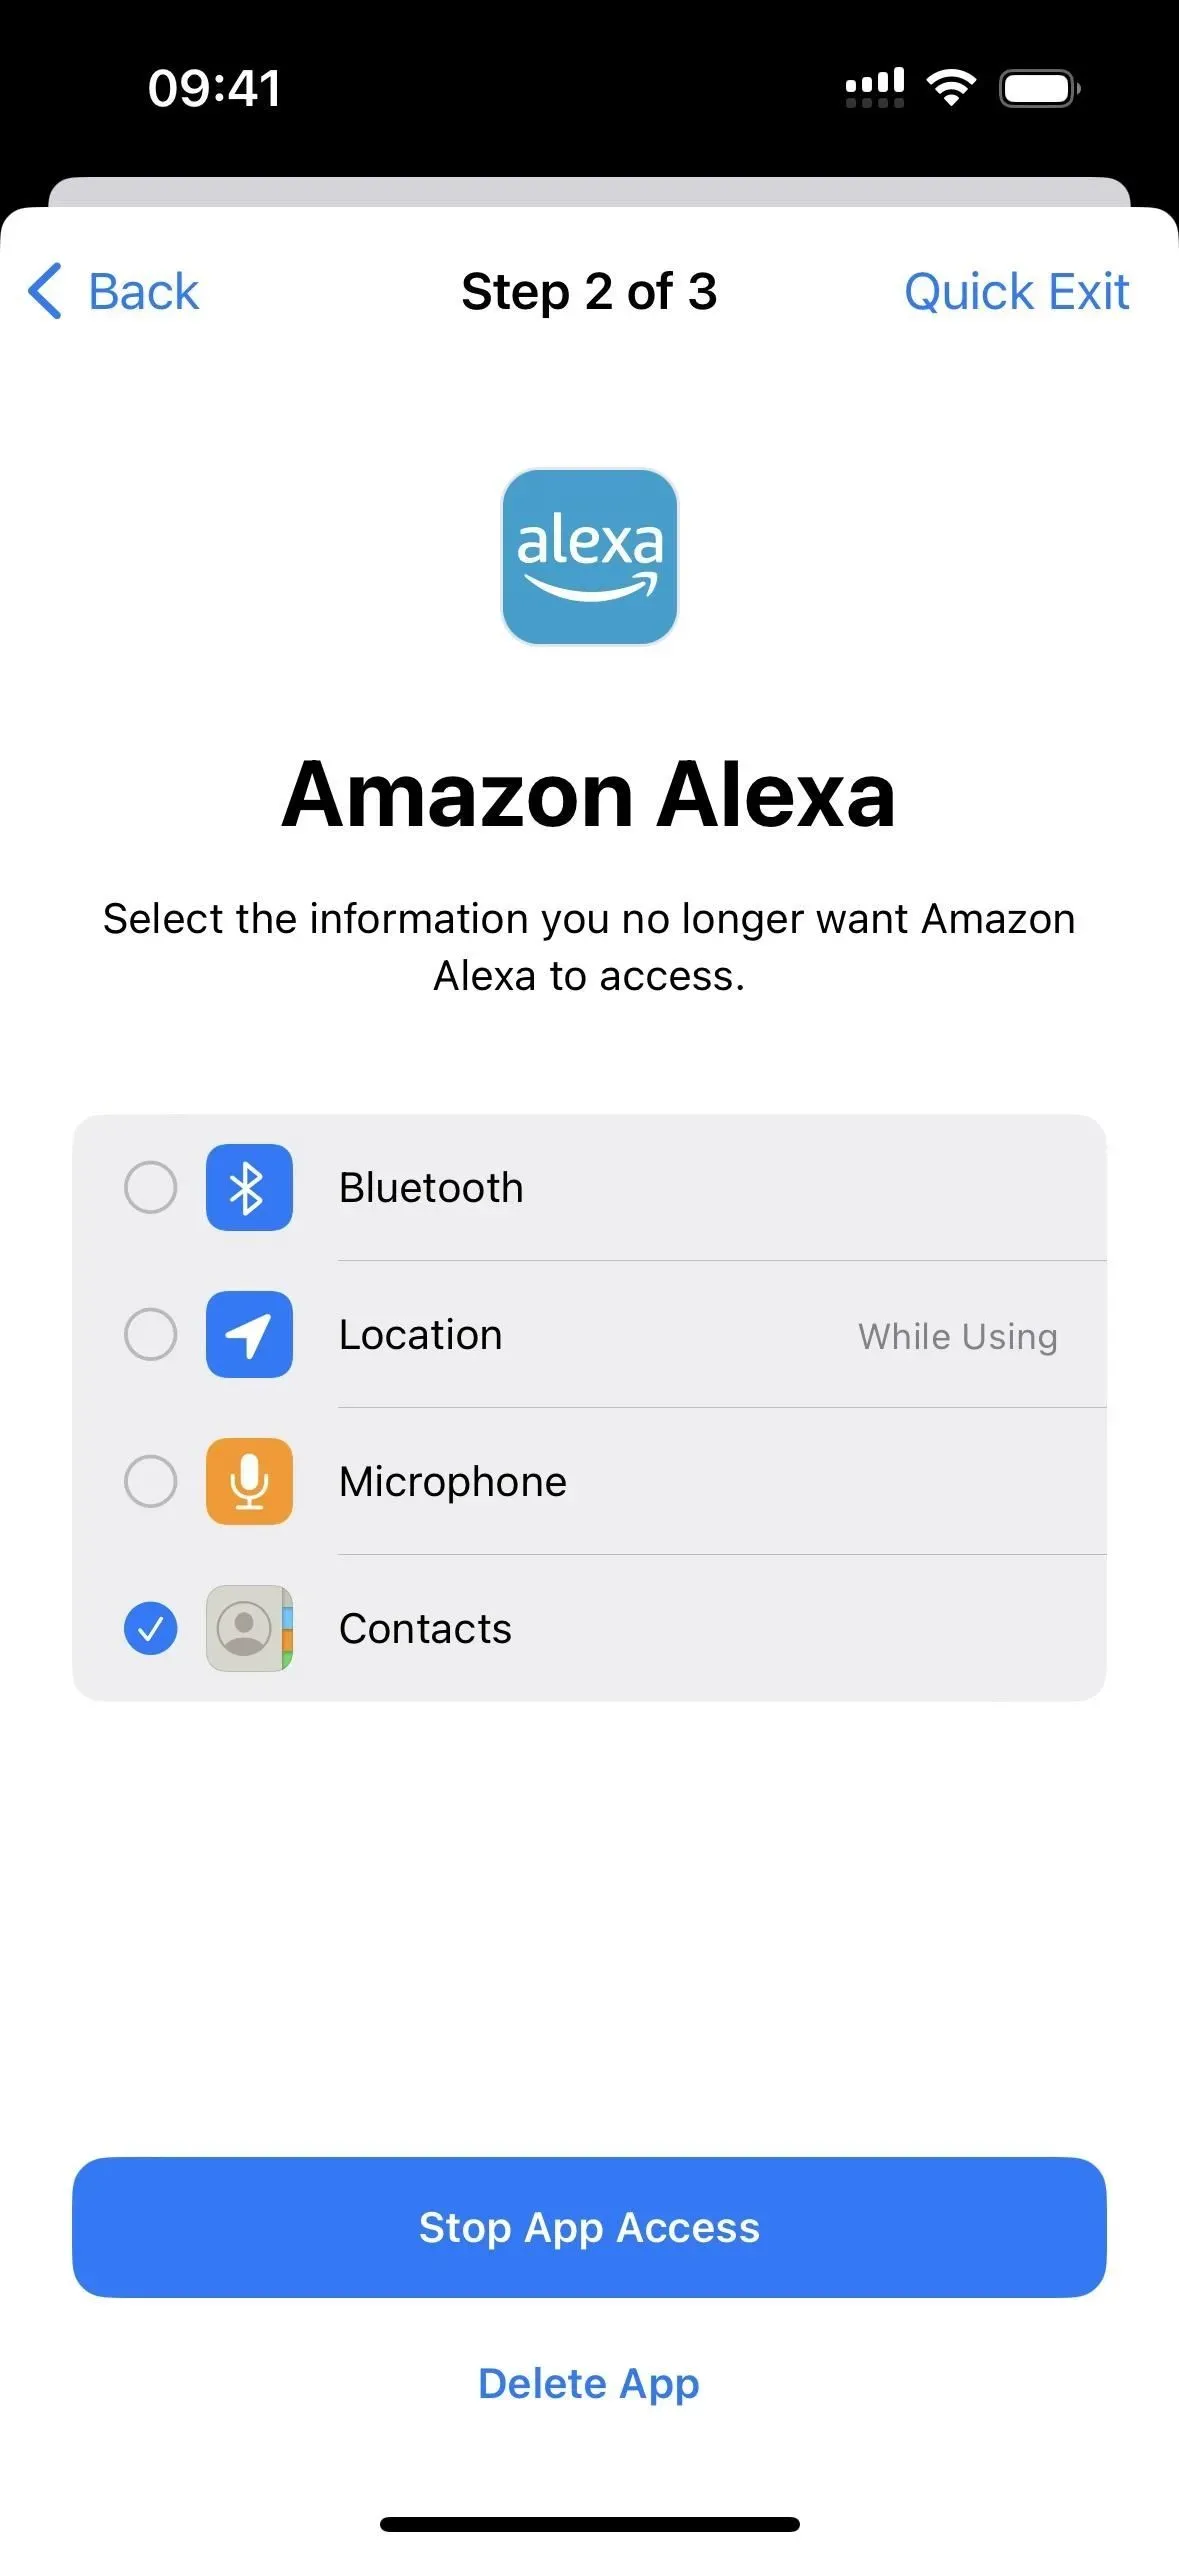
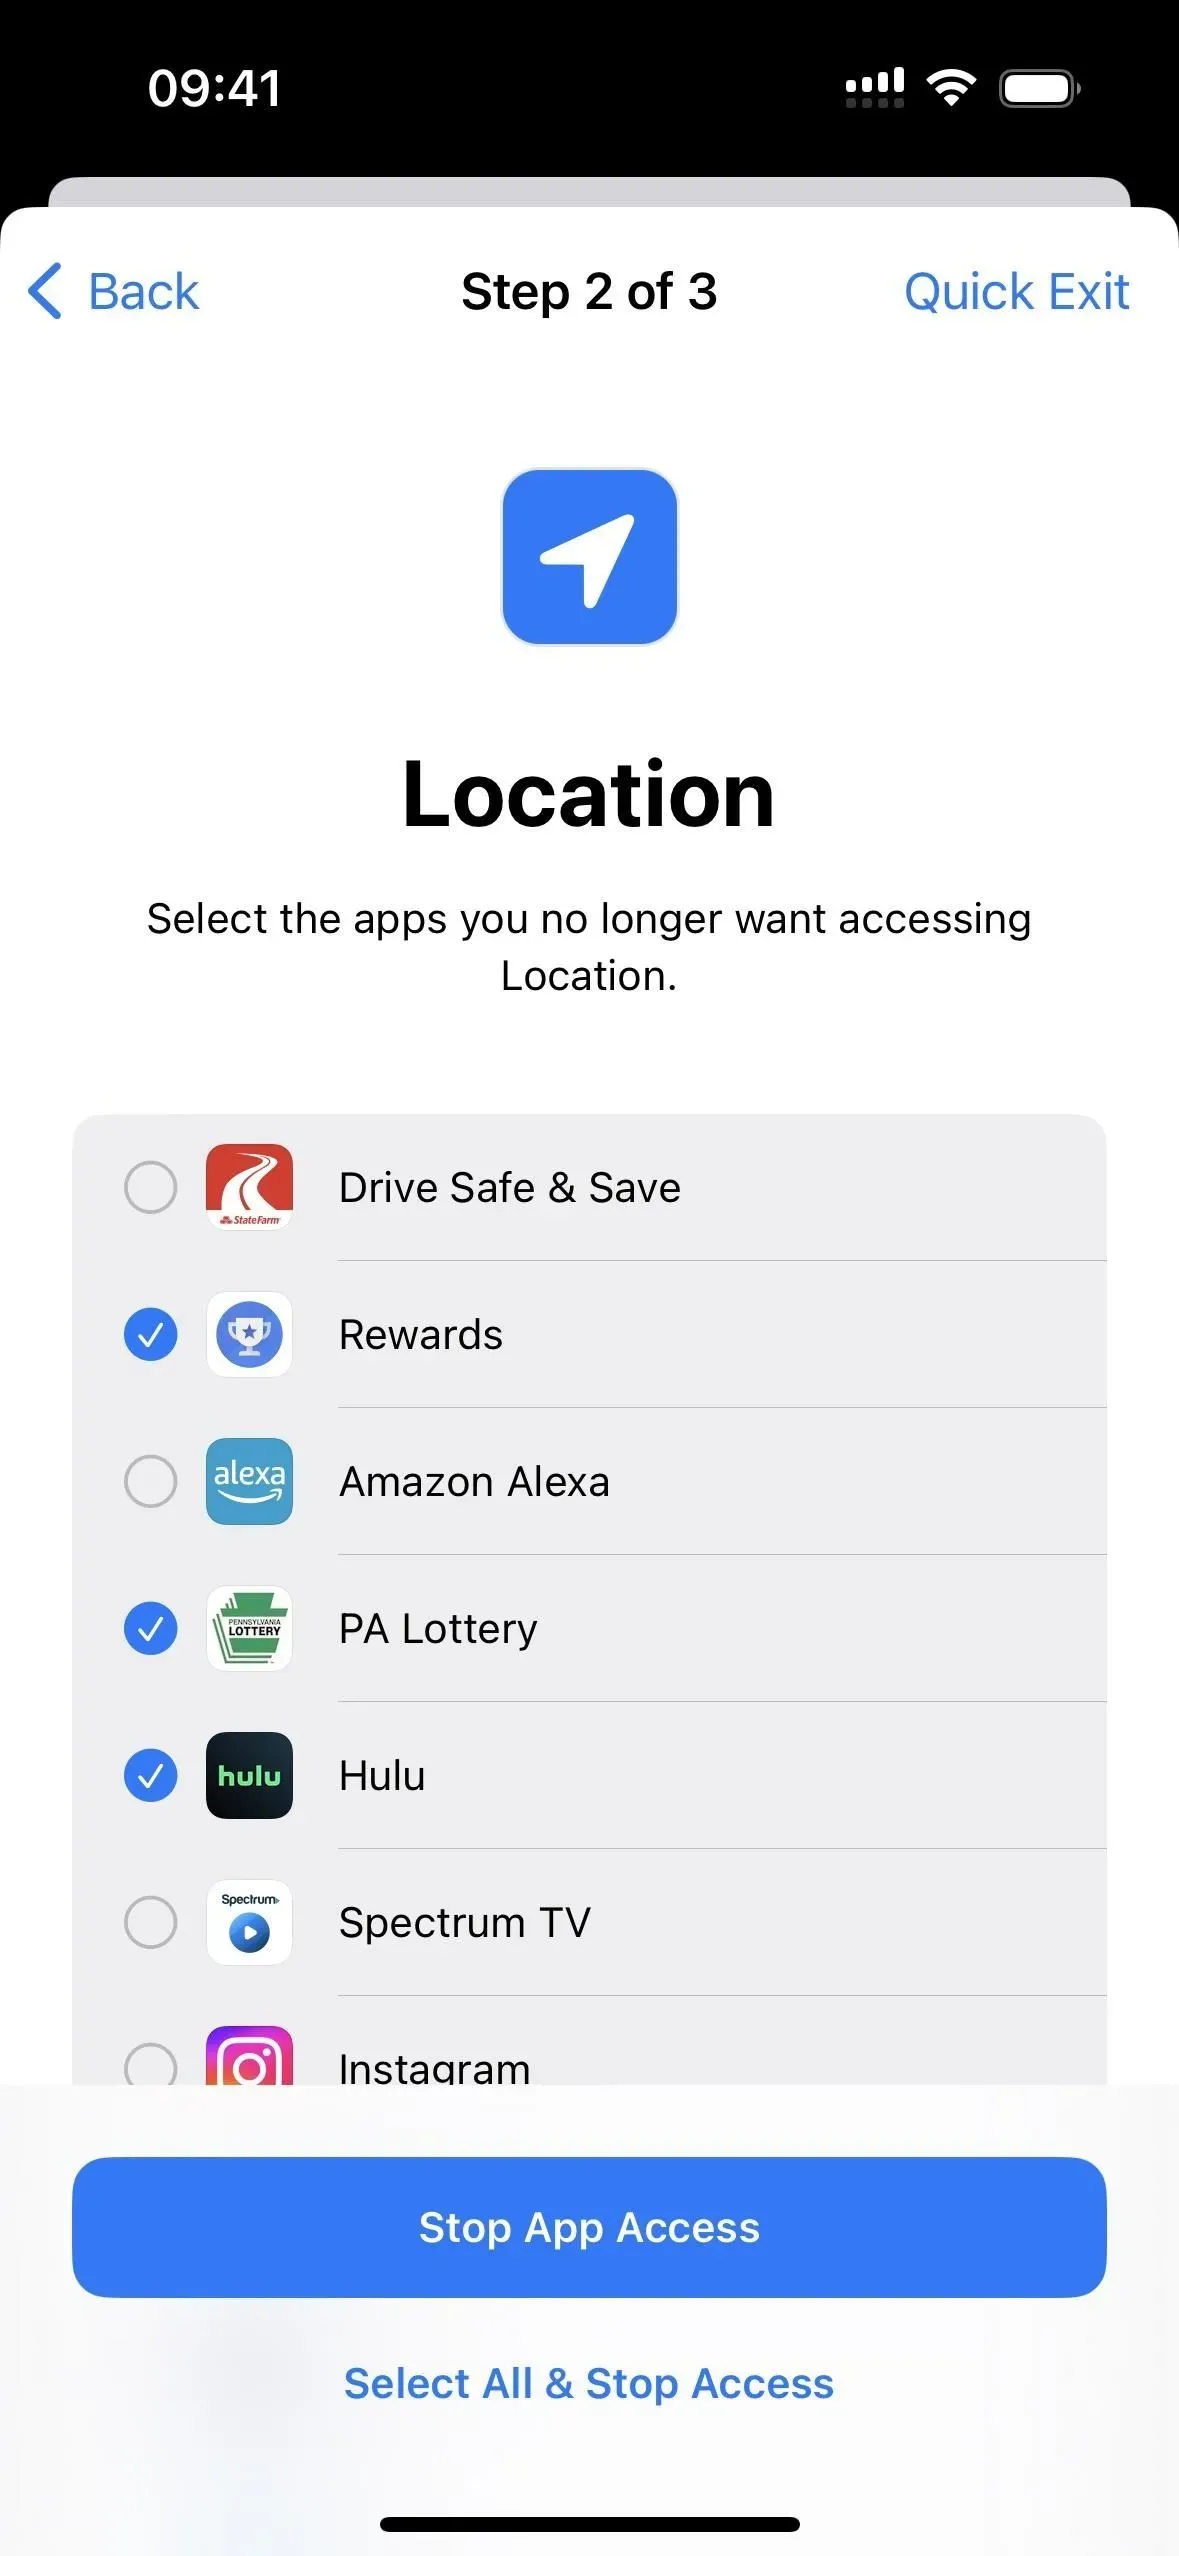
If you see all the information an app can access at once, tap (i) next to it to see everything. Here you can also check certain items and click “Stop App Access”to stop permissions immediately, click “Remove App”to remove an app from your iPhone, or “Skip”to return to the list of apps.
In addition, you can open the Information tab to view the type of data being transferred. So you can stop all apps in specific categories. As with the Applications tab, you can “Go”to the next step, or disable all access and permissions for all applications by clicking “Select All and Stop Access”after reading the warning and clicking “Stop All Access”.
You can also check the categories and click “Stop App Access”to disable multiple category permissions at the same time. To remove only specific apps from each category, tap (i) next to the category.

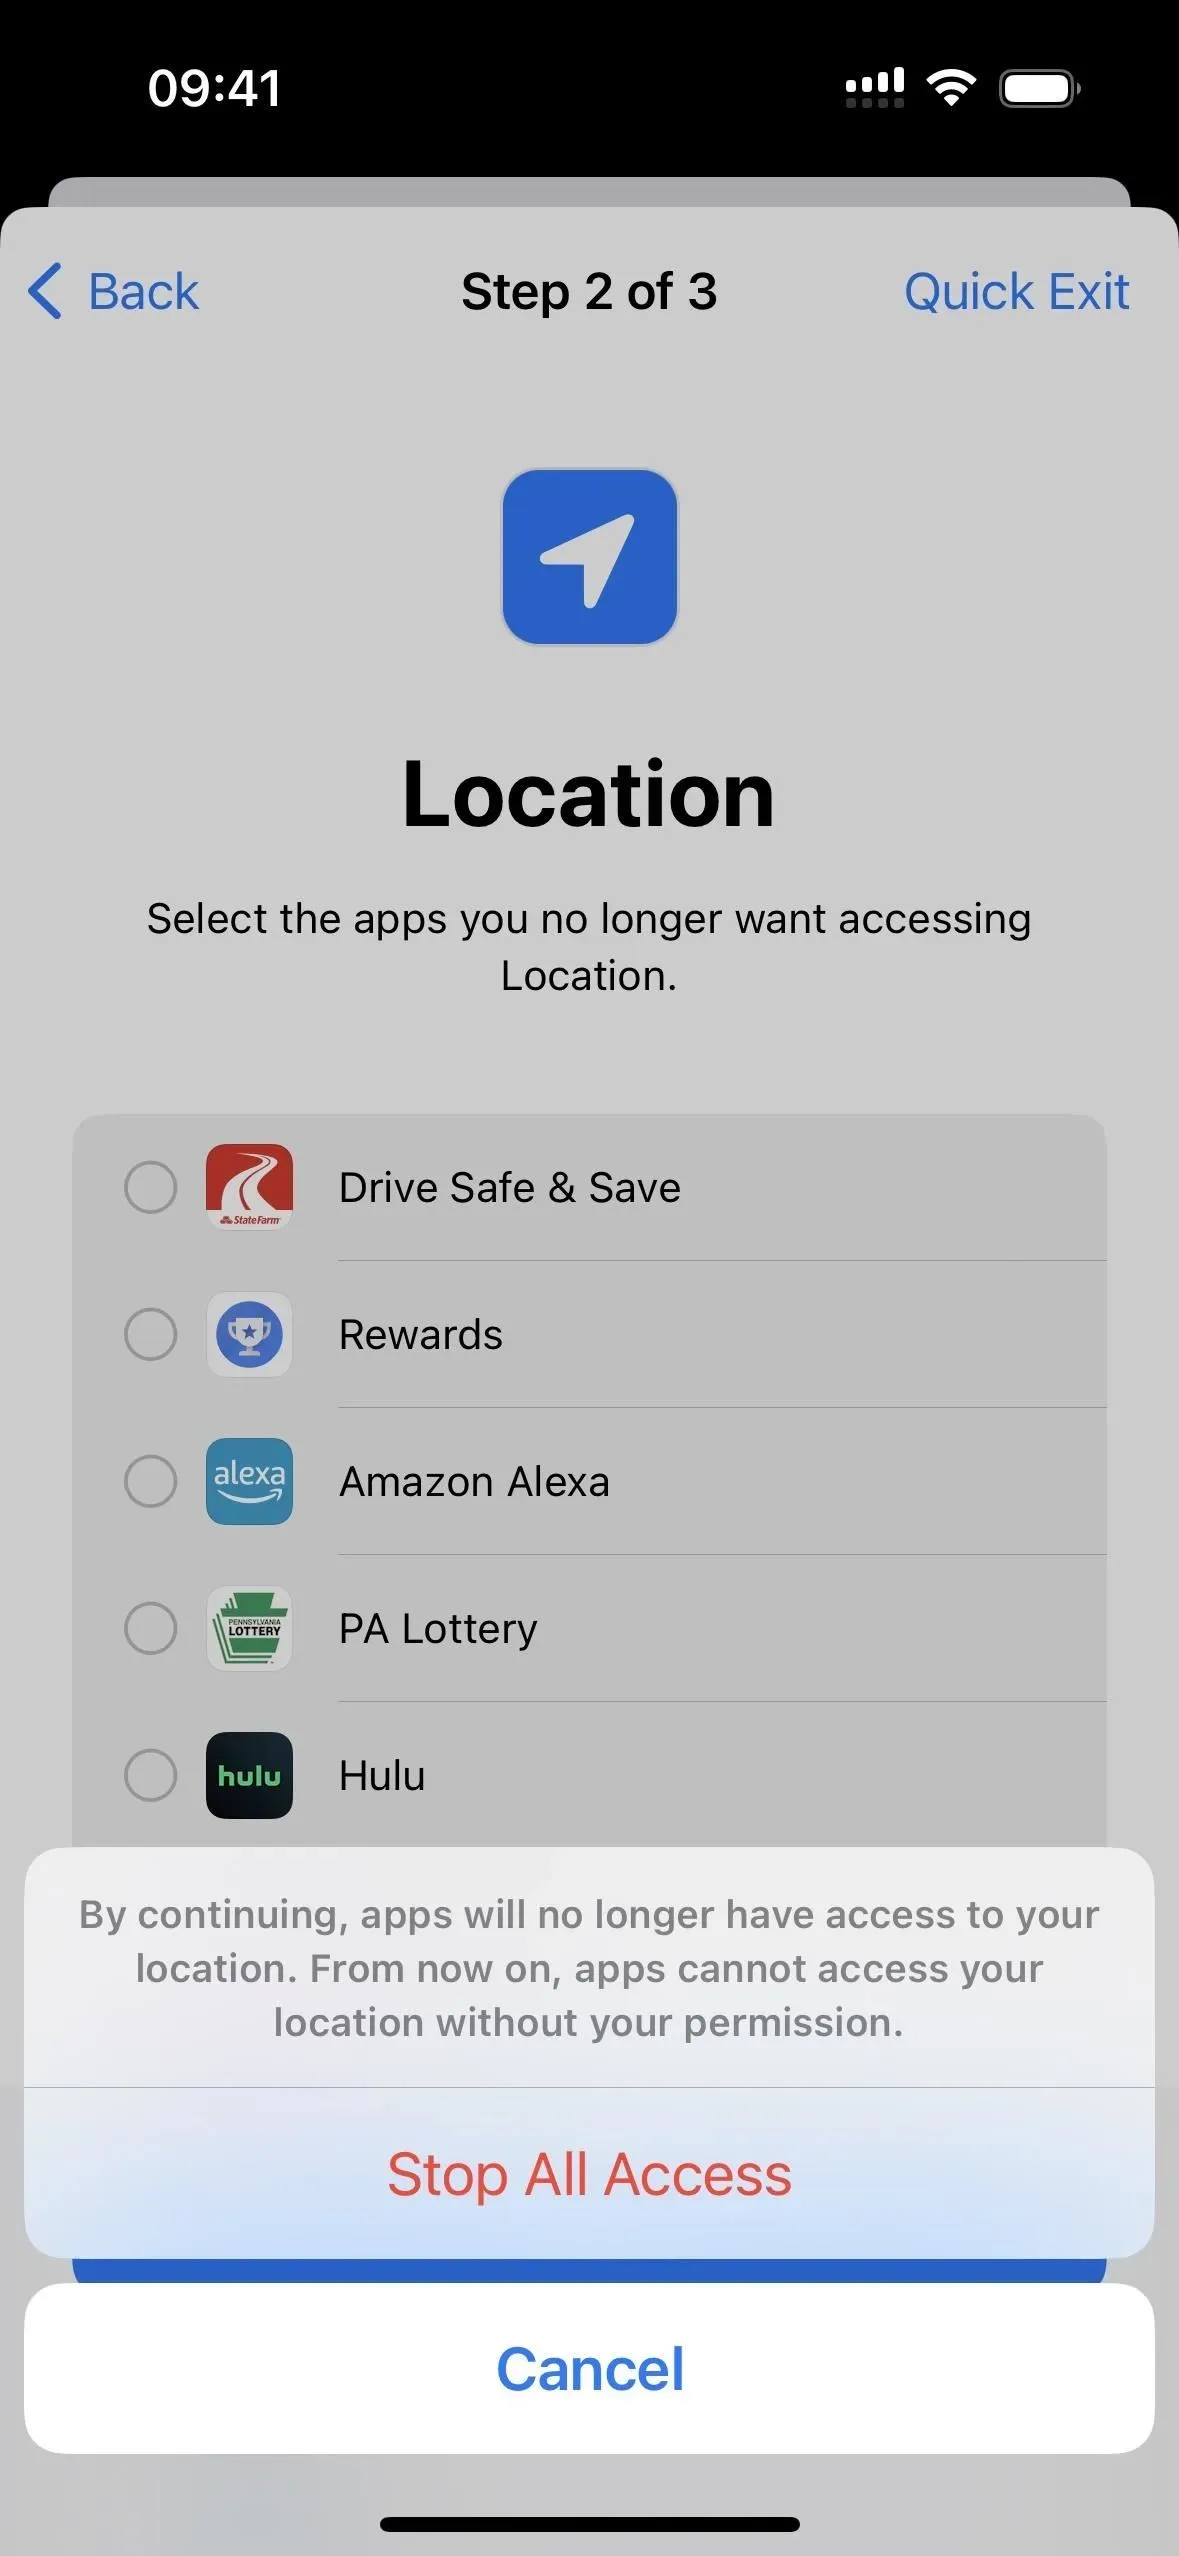
Here you can click “Skip”to go to the next step, select “Select all and stop access”and then “Stop access to all”to remove category access from all listed apps, or you can check multiple apps and click “Stop access to the application.”
After completing the second step, click “Continue”or “View other apps”if you want to go back and remove sharing for other apps.
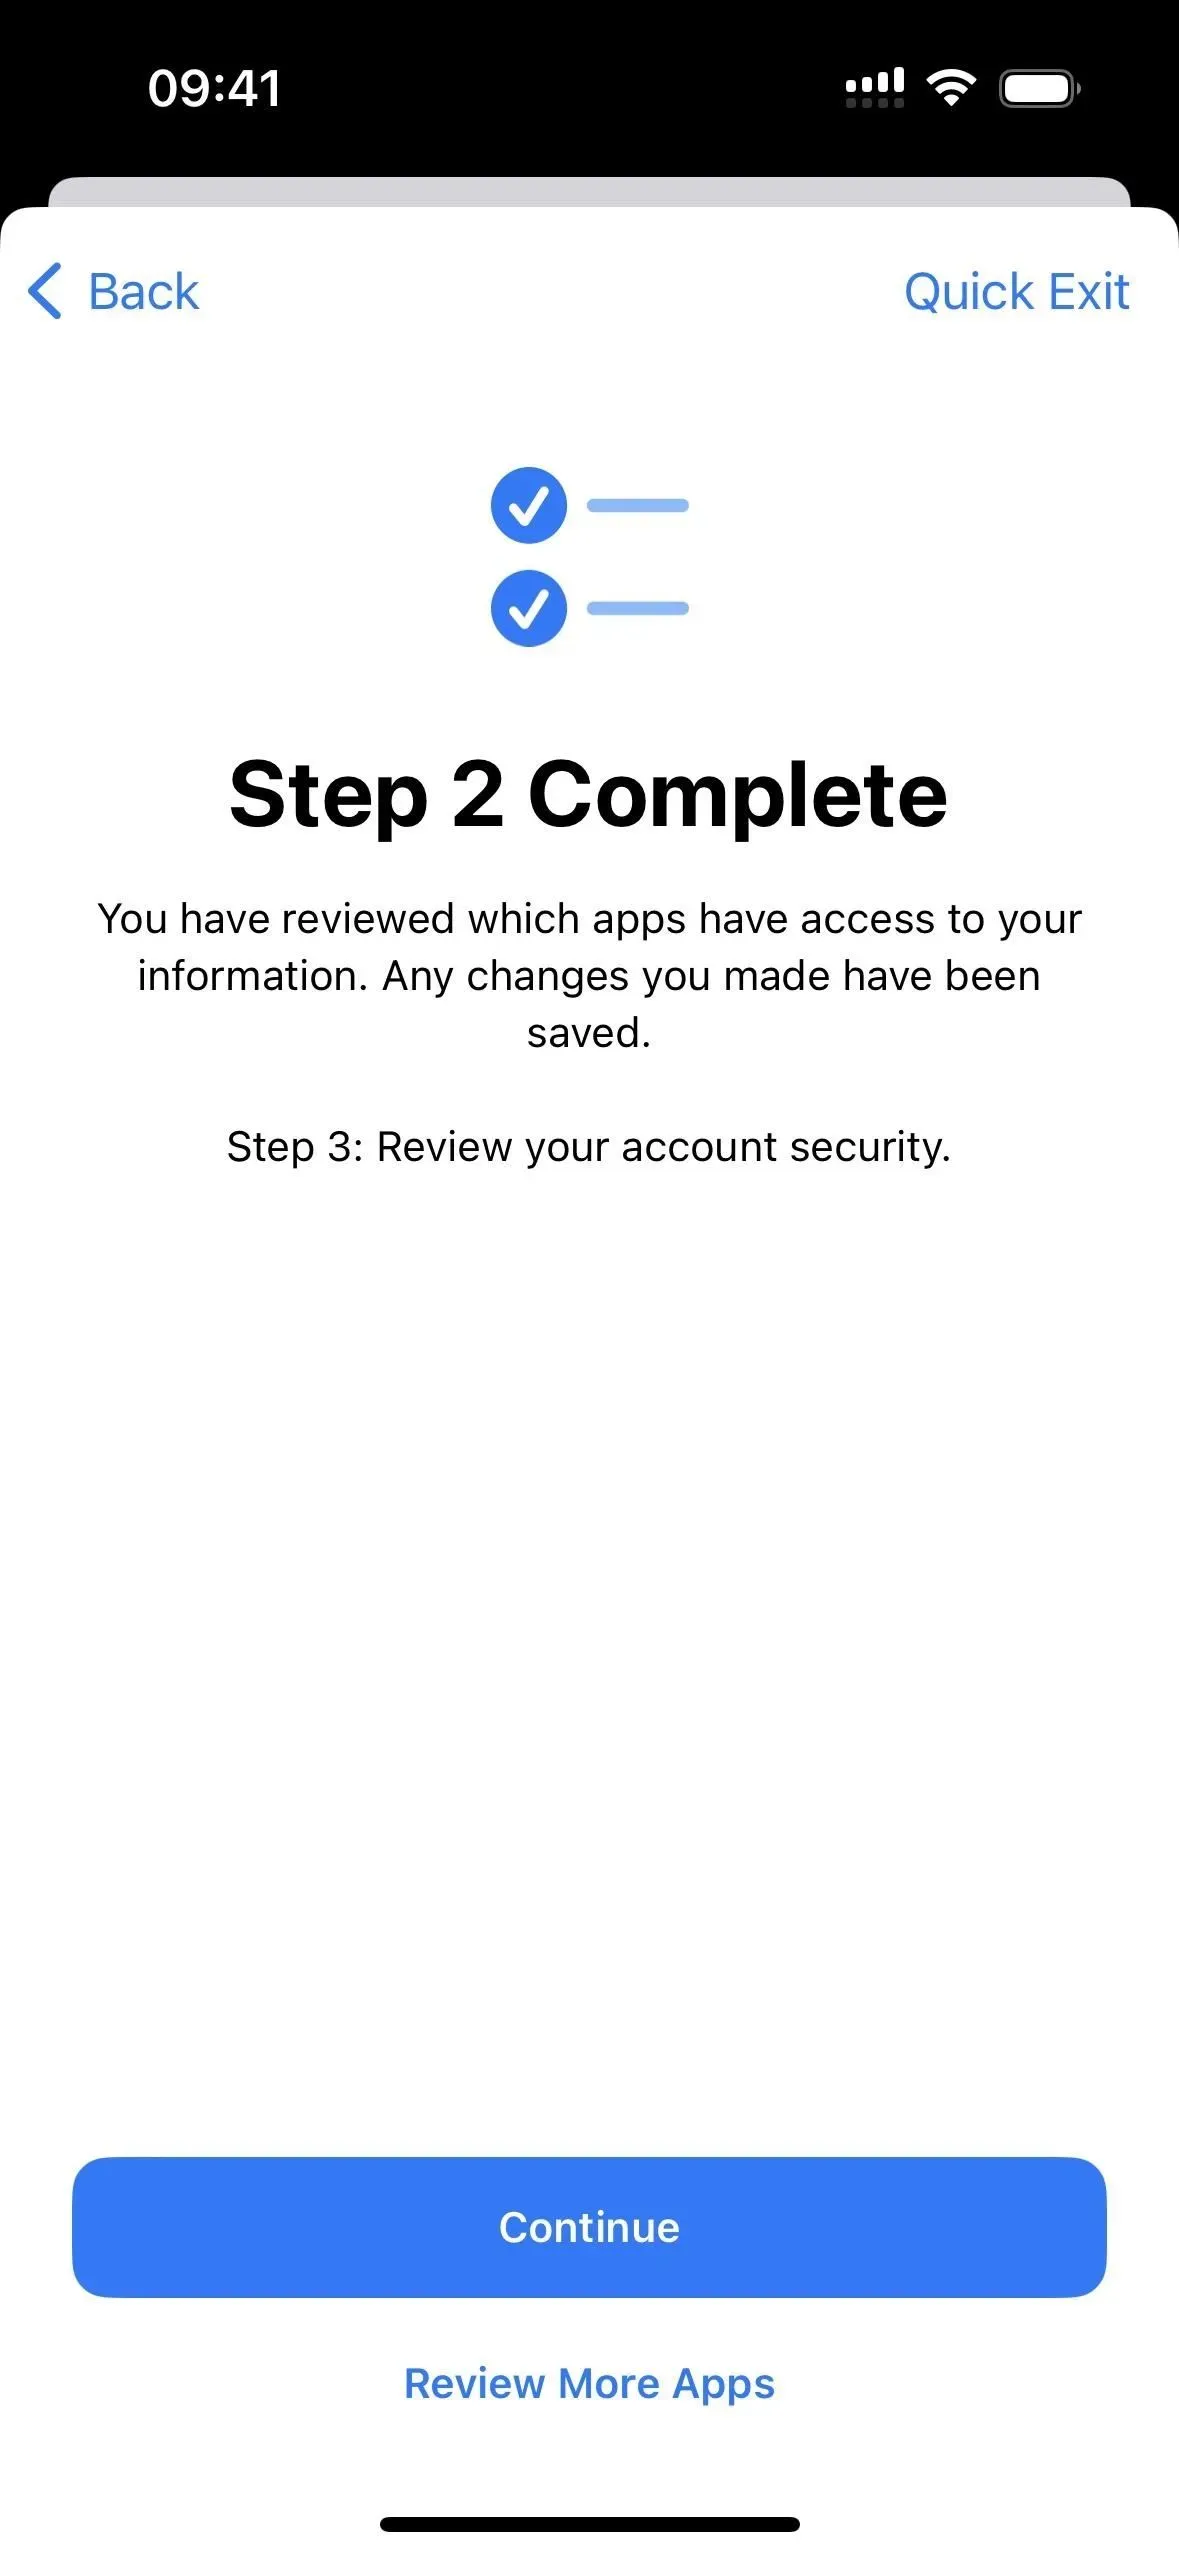
Step 3: Check your security
The last step concerns the overall security of your Apple ID account and iPhone. The items you view here may differ from what is shown below, depending on how you set everything up.
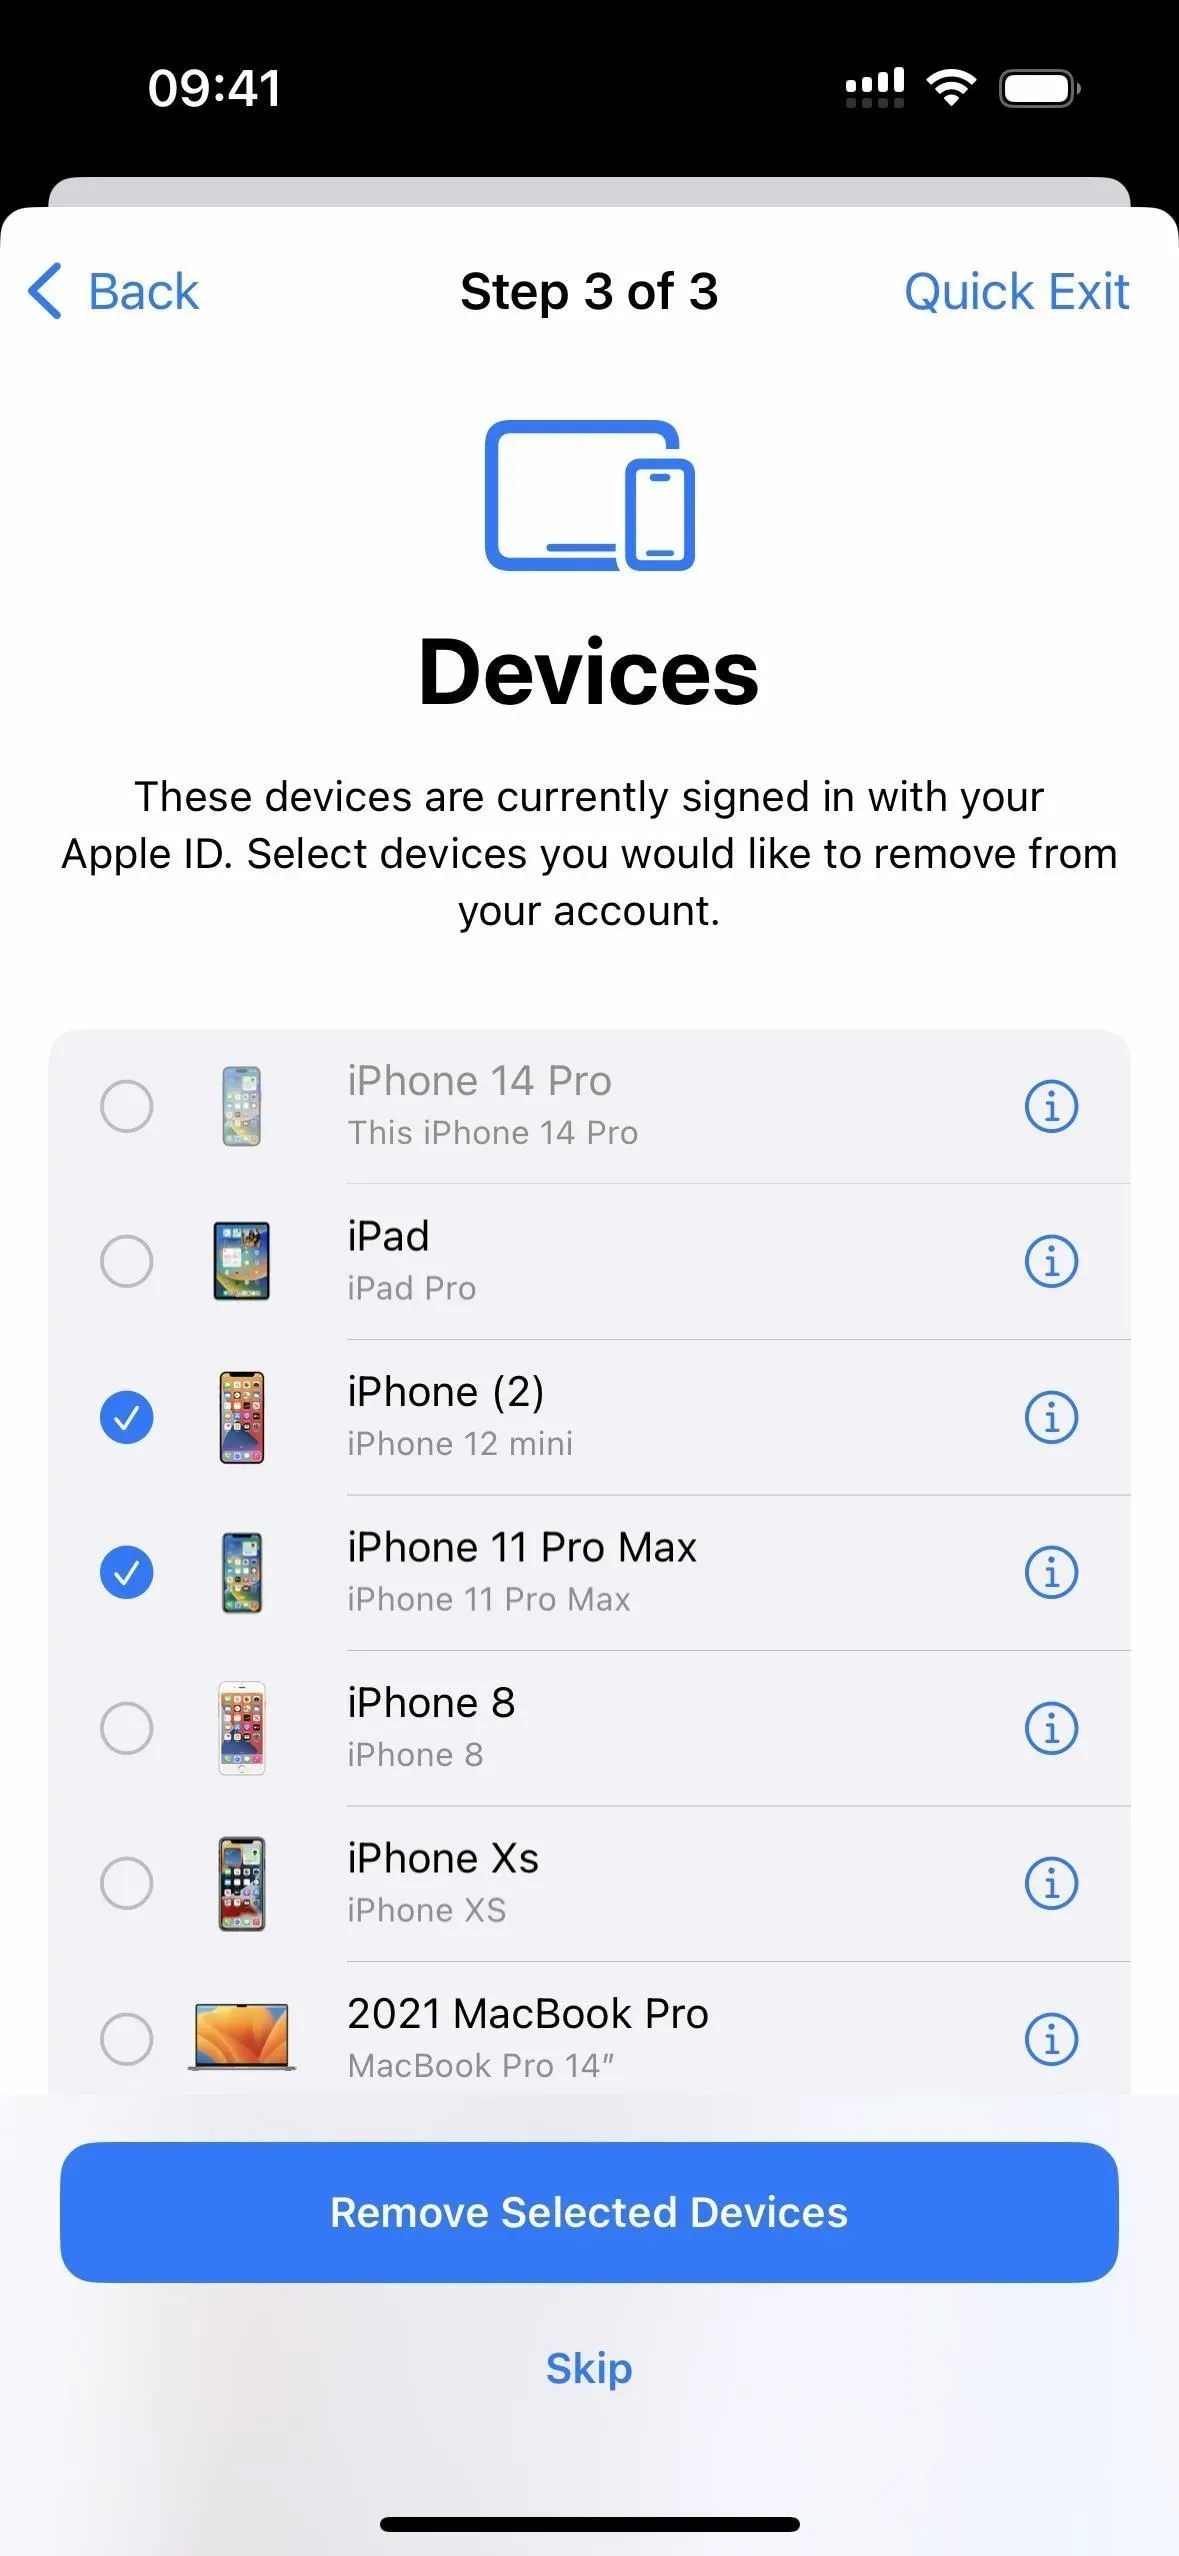
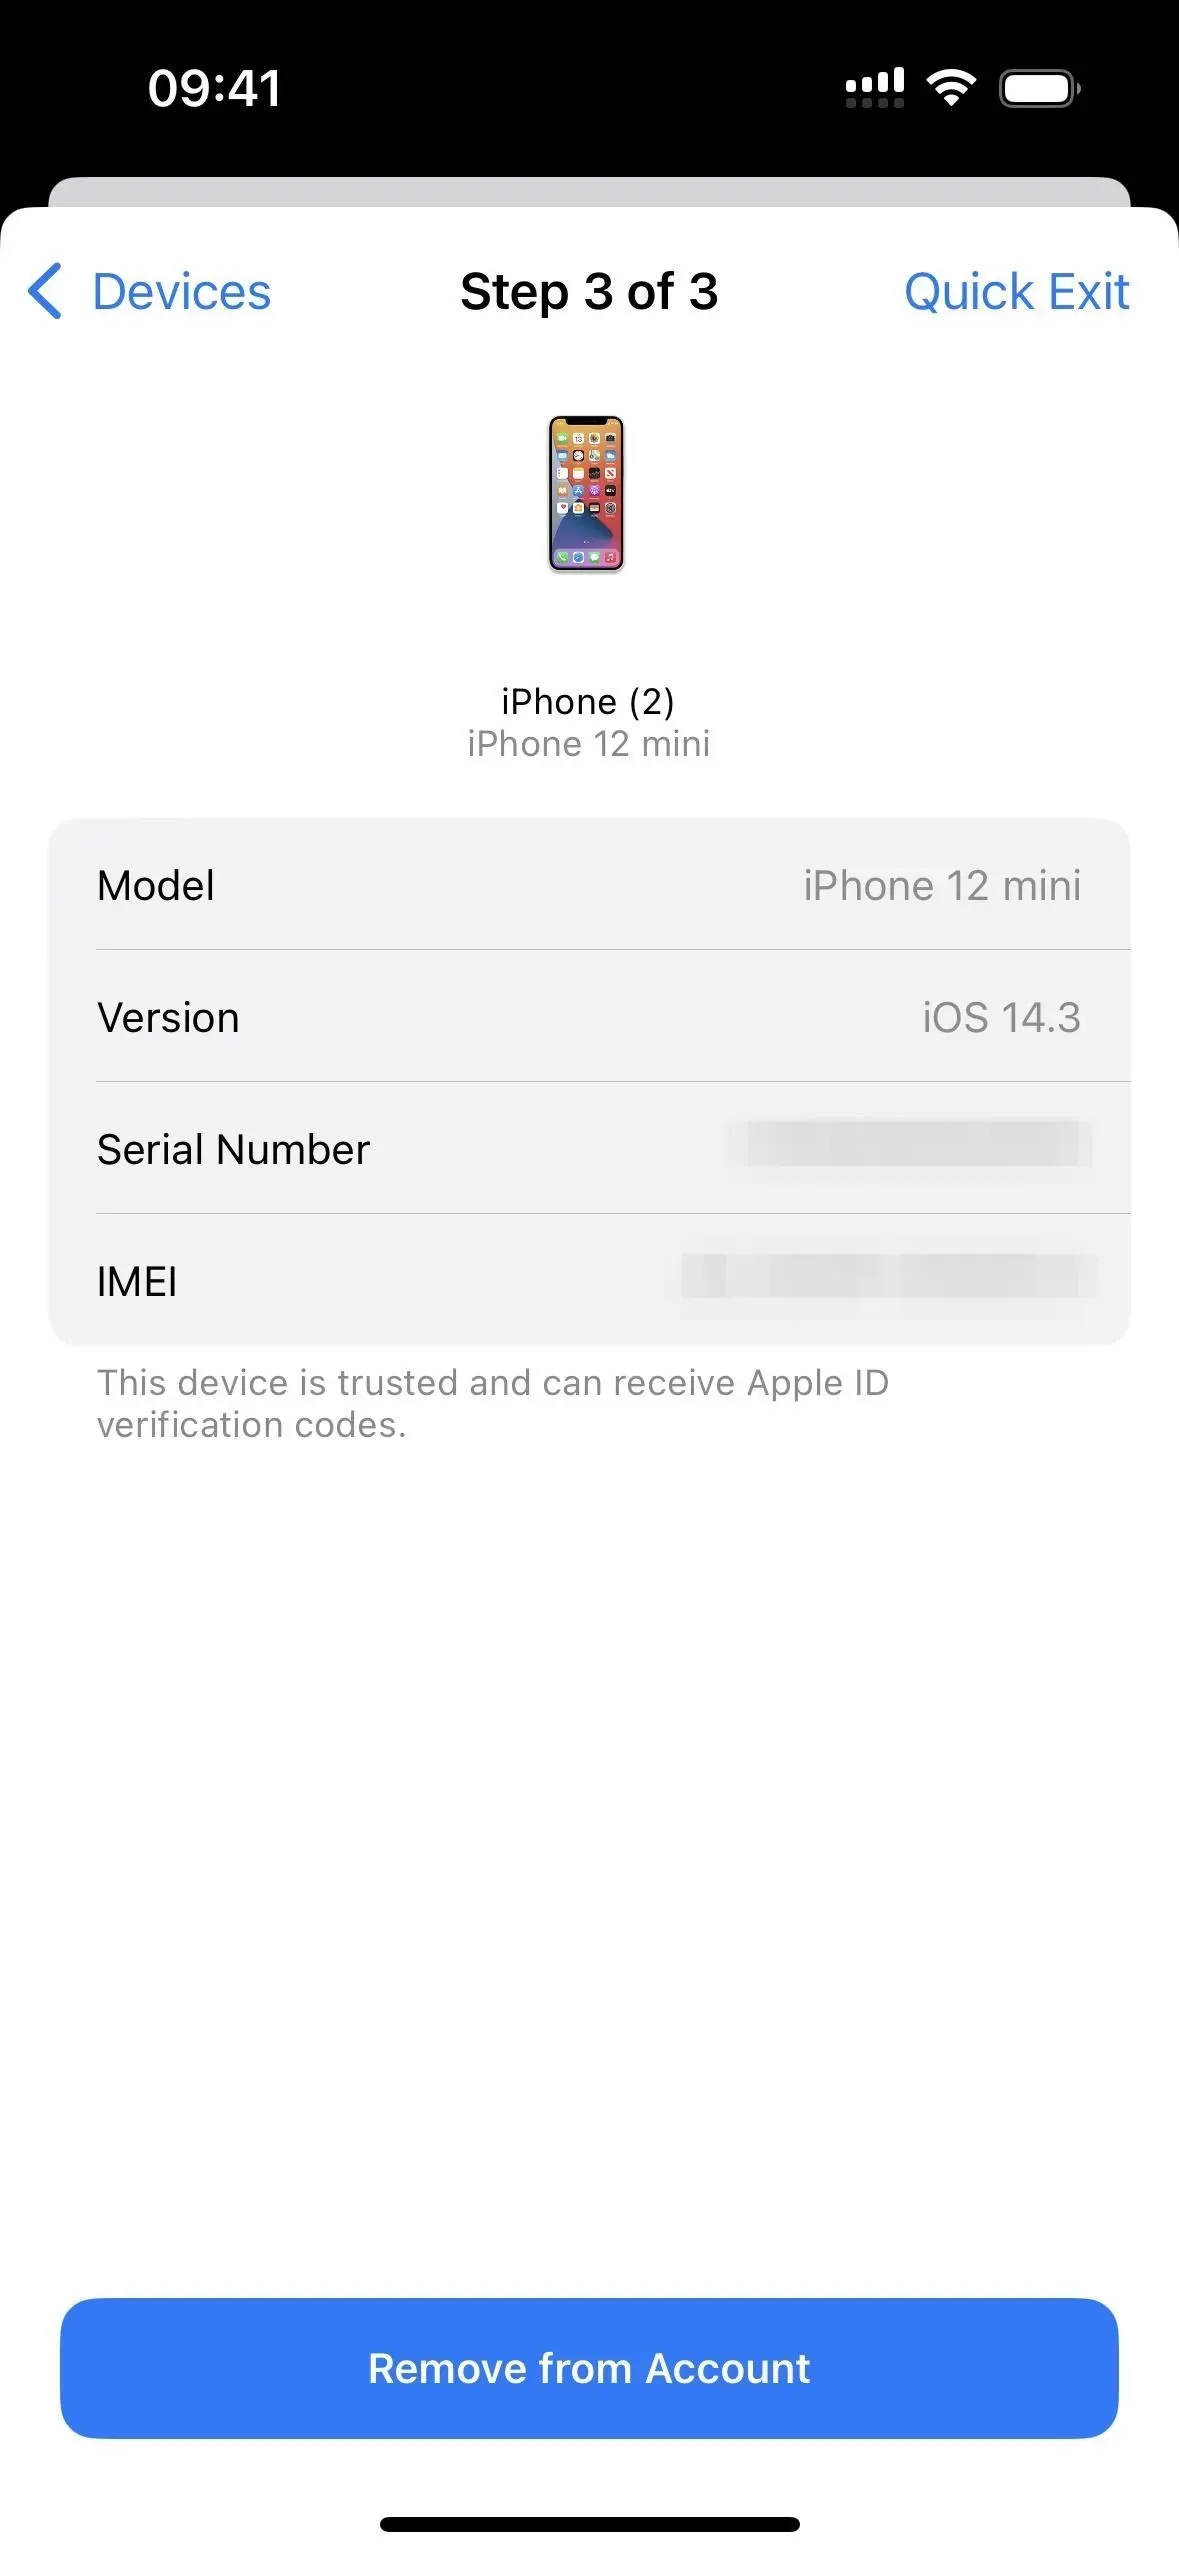
If you see a “Devices”list, you can “Skip”it, or check one or more devices and click “Remove Selected Devices”. You can also click (i) next to each device to view models, versions, serial numbers and IMEI; Click “Devices”to return to the main list, or select “Remove from Account”if you no longer want a device associated with your Apple ID.
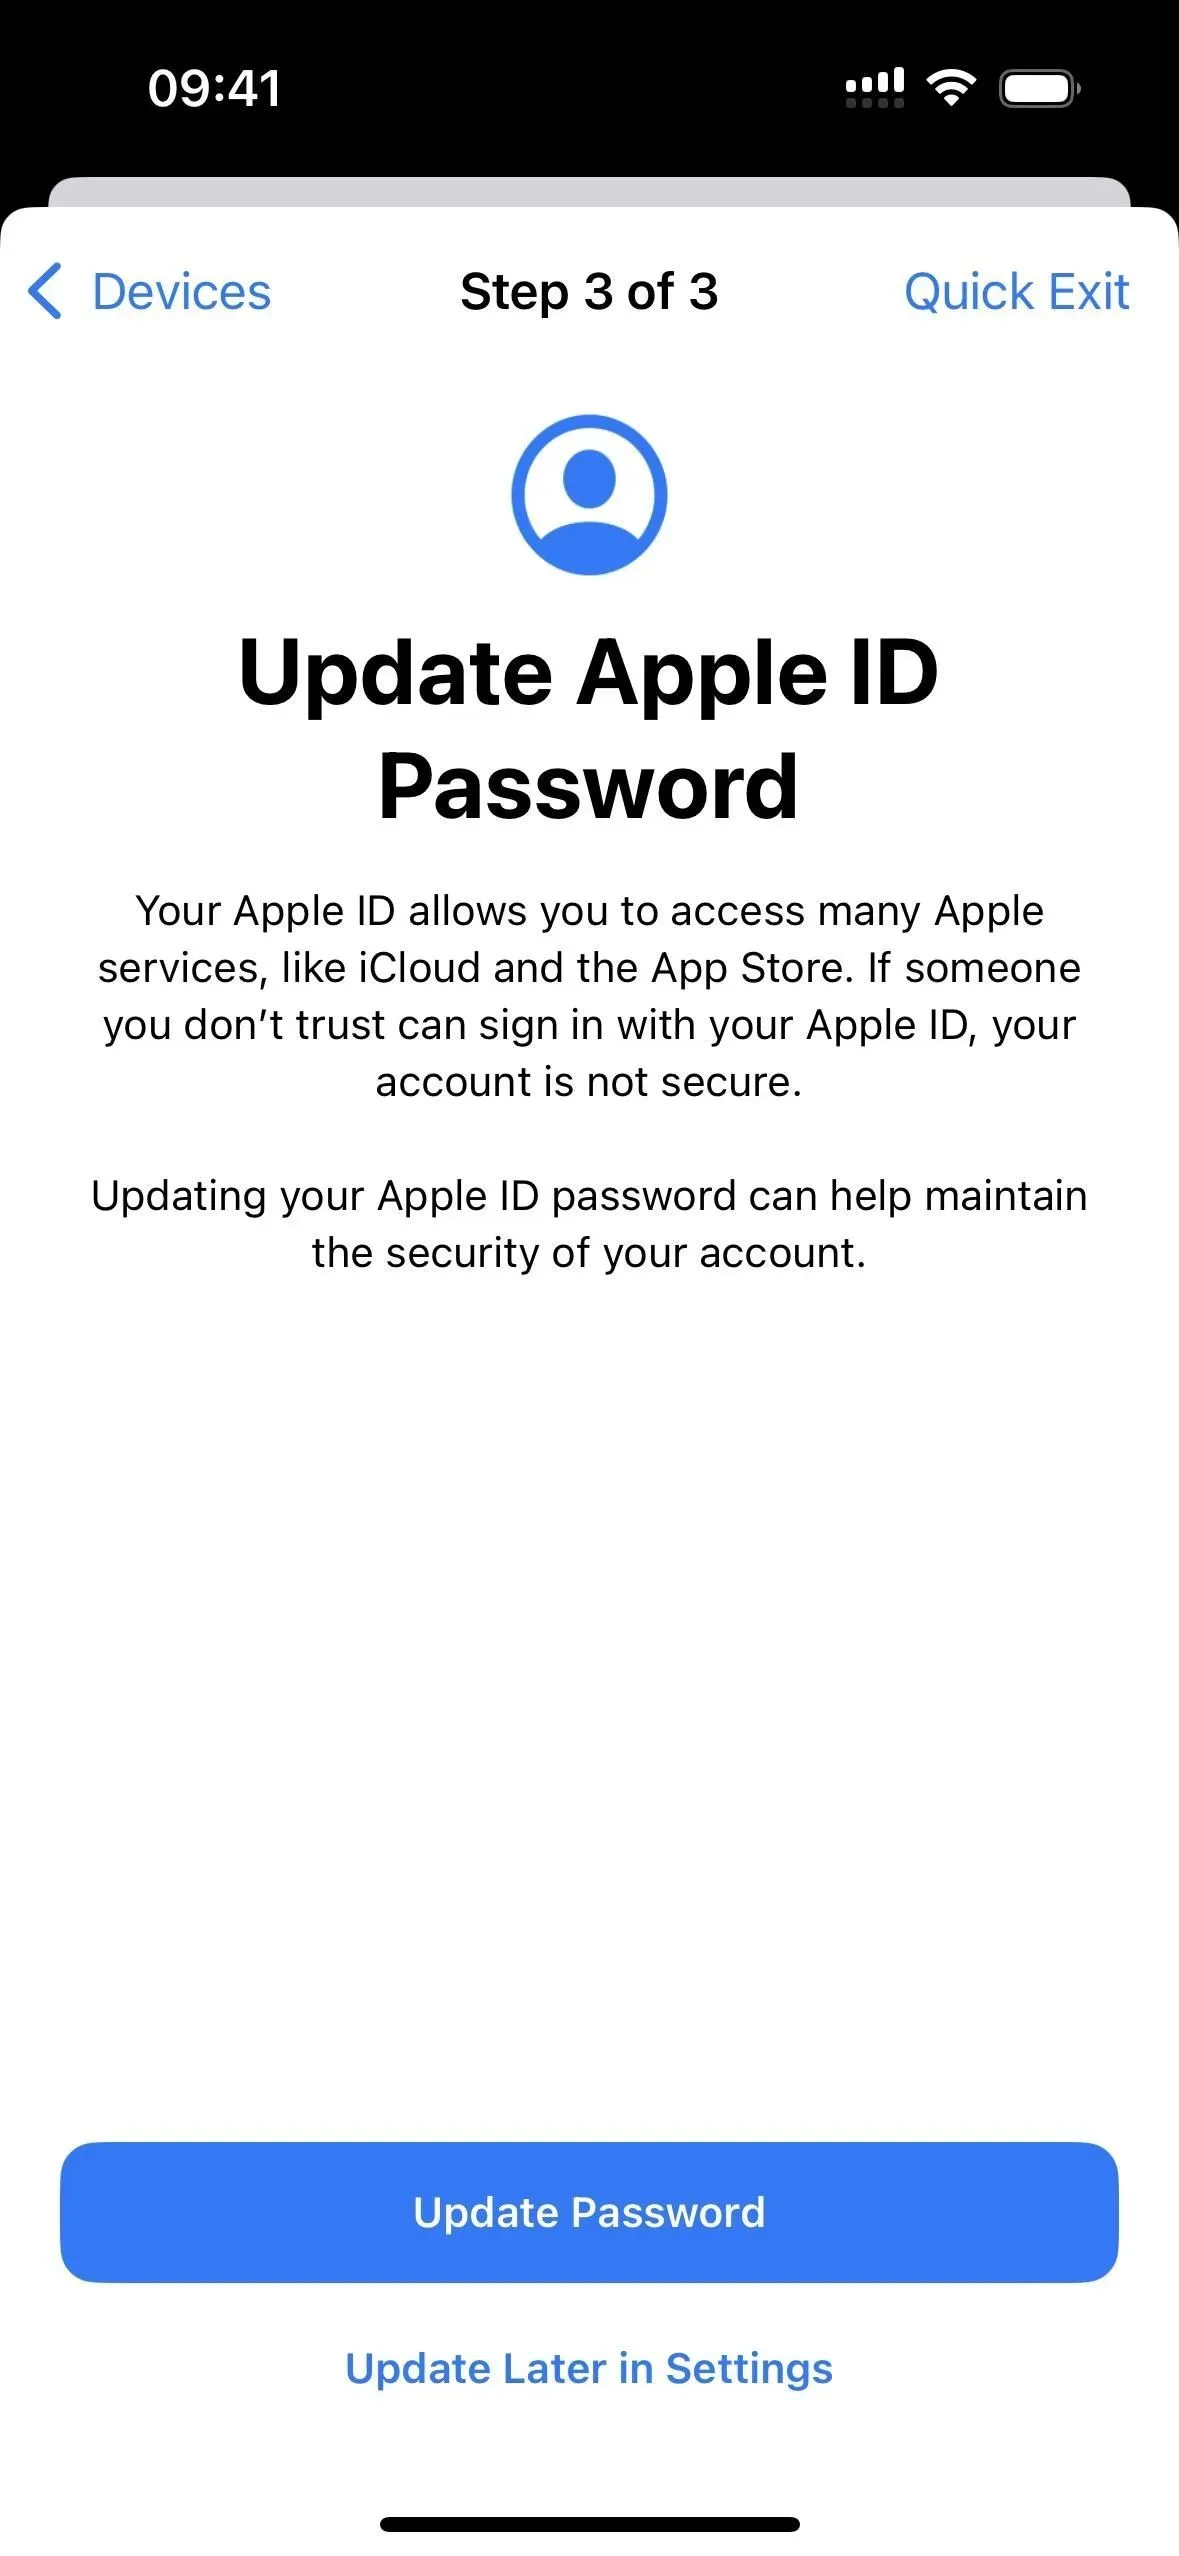
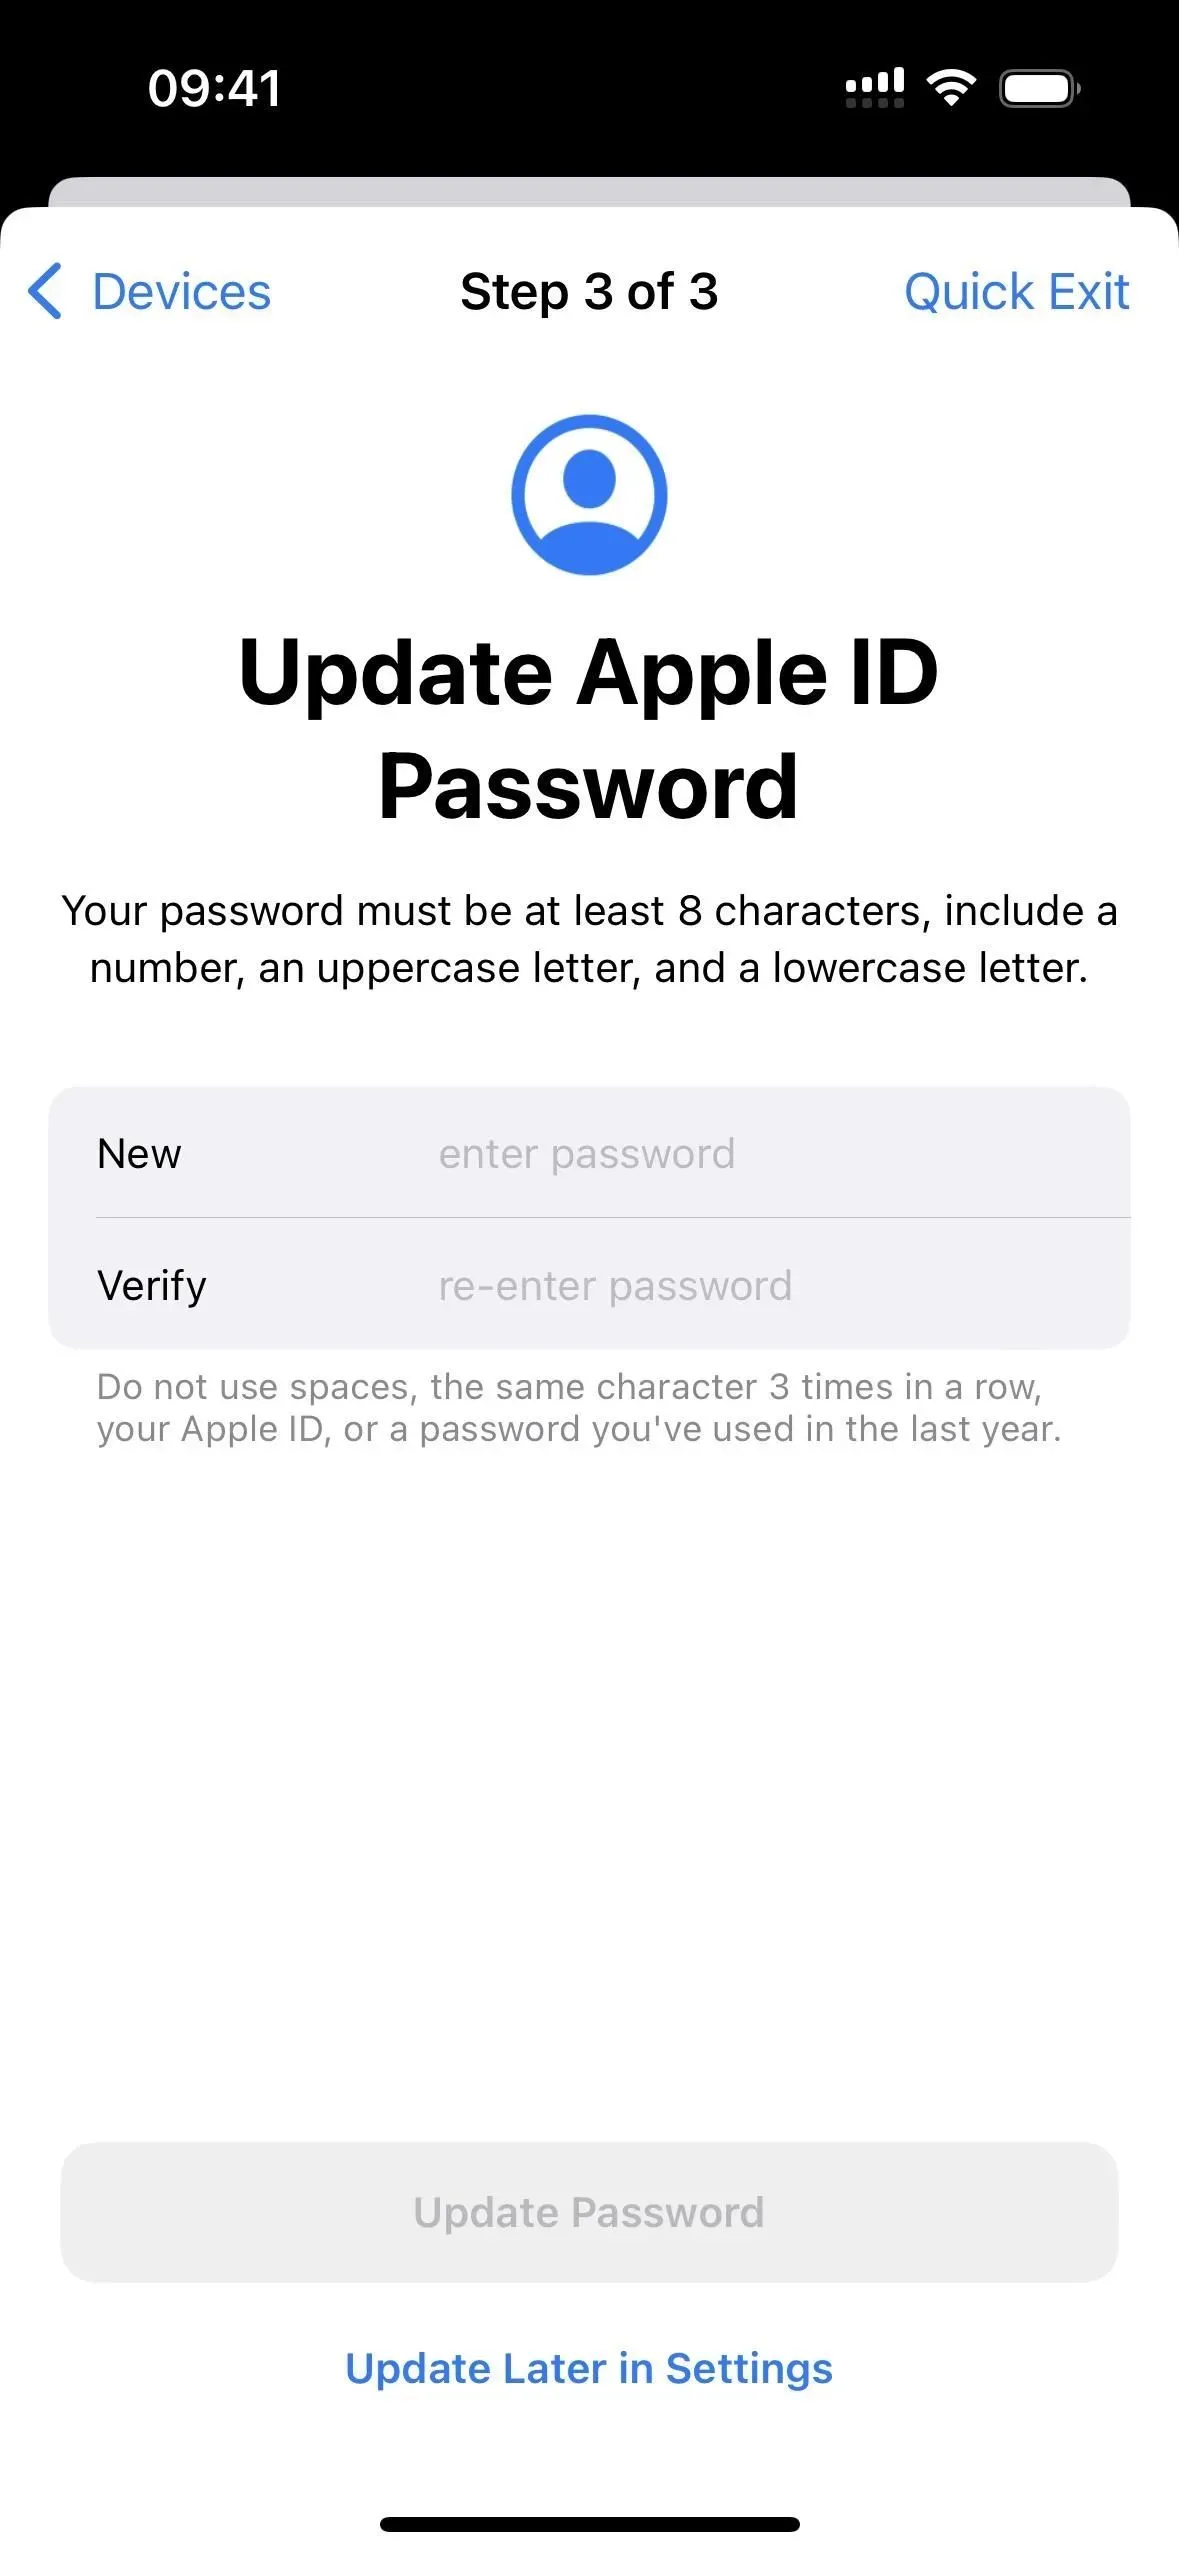
You may be asked if you want to update your Apple ID password. Click “Update Later in Settings”if you don’t want to, or “Update Password”to go through the process.
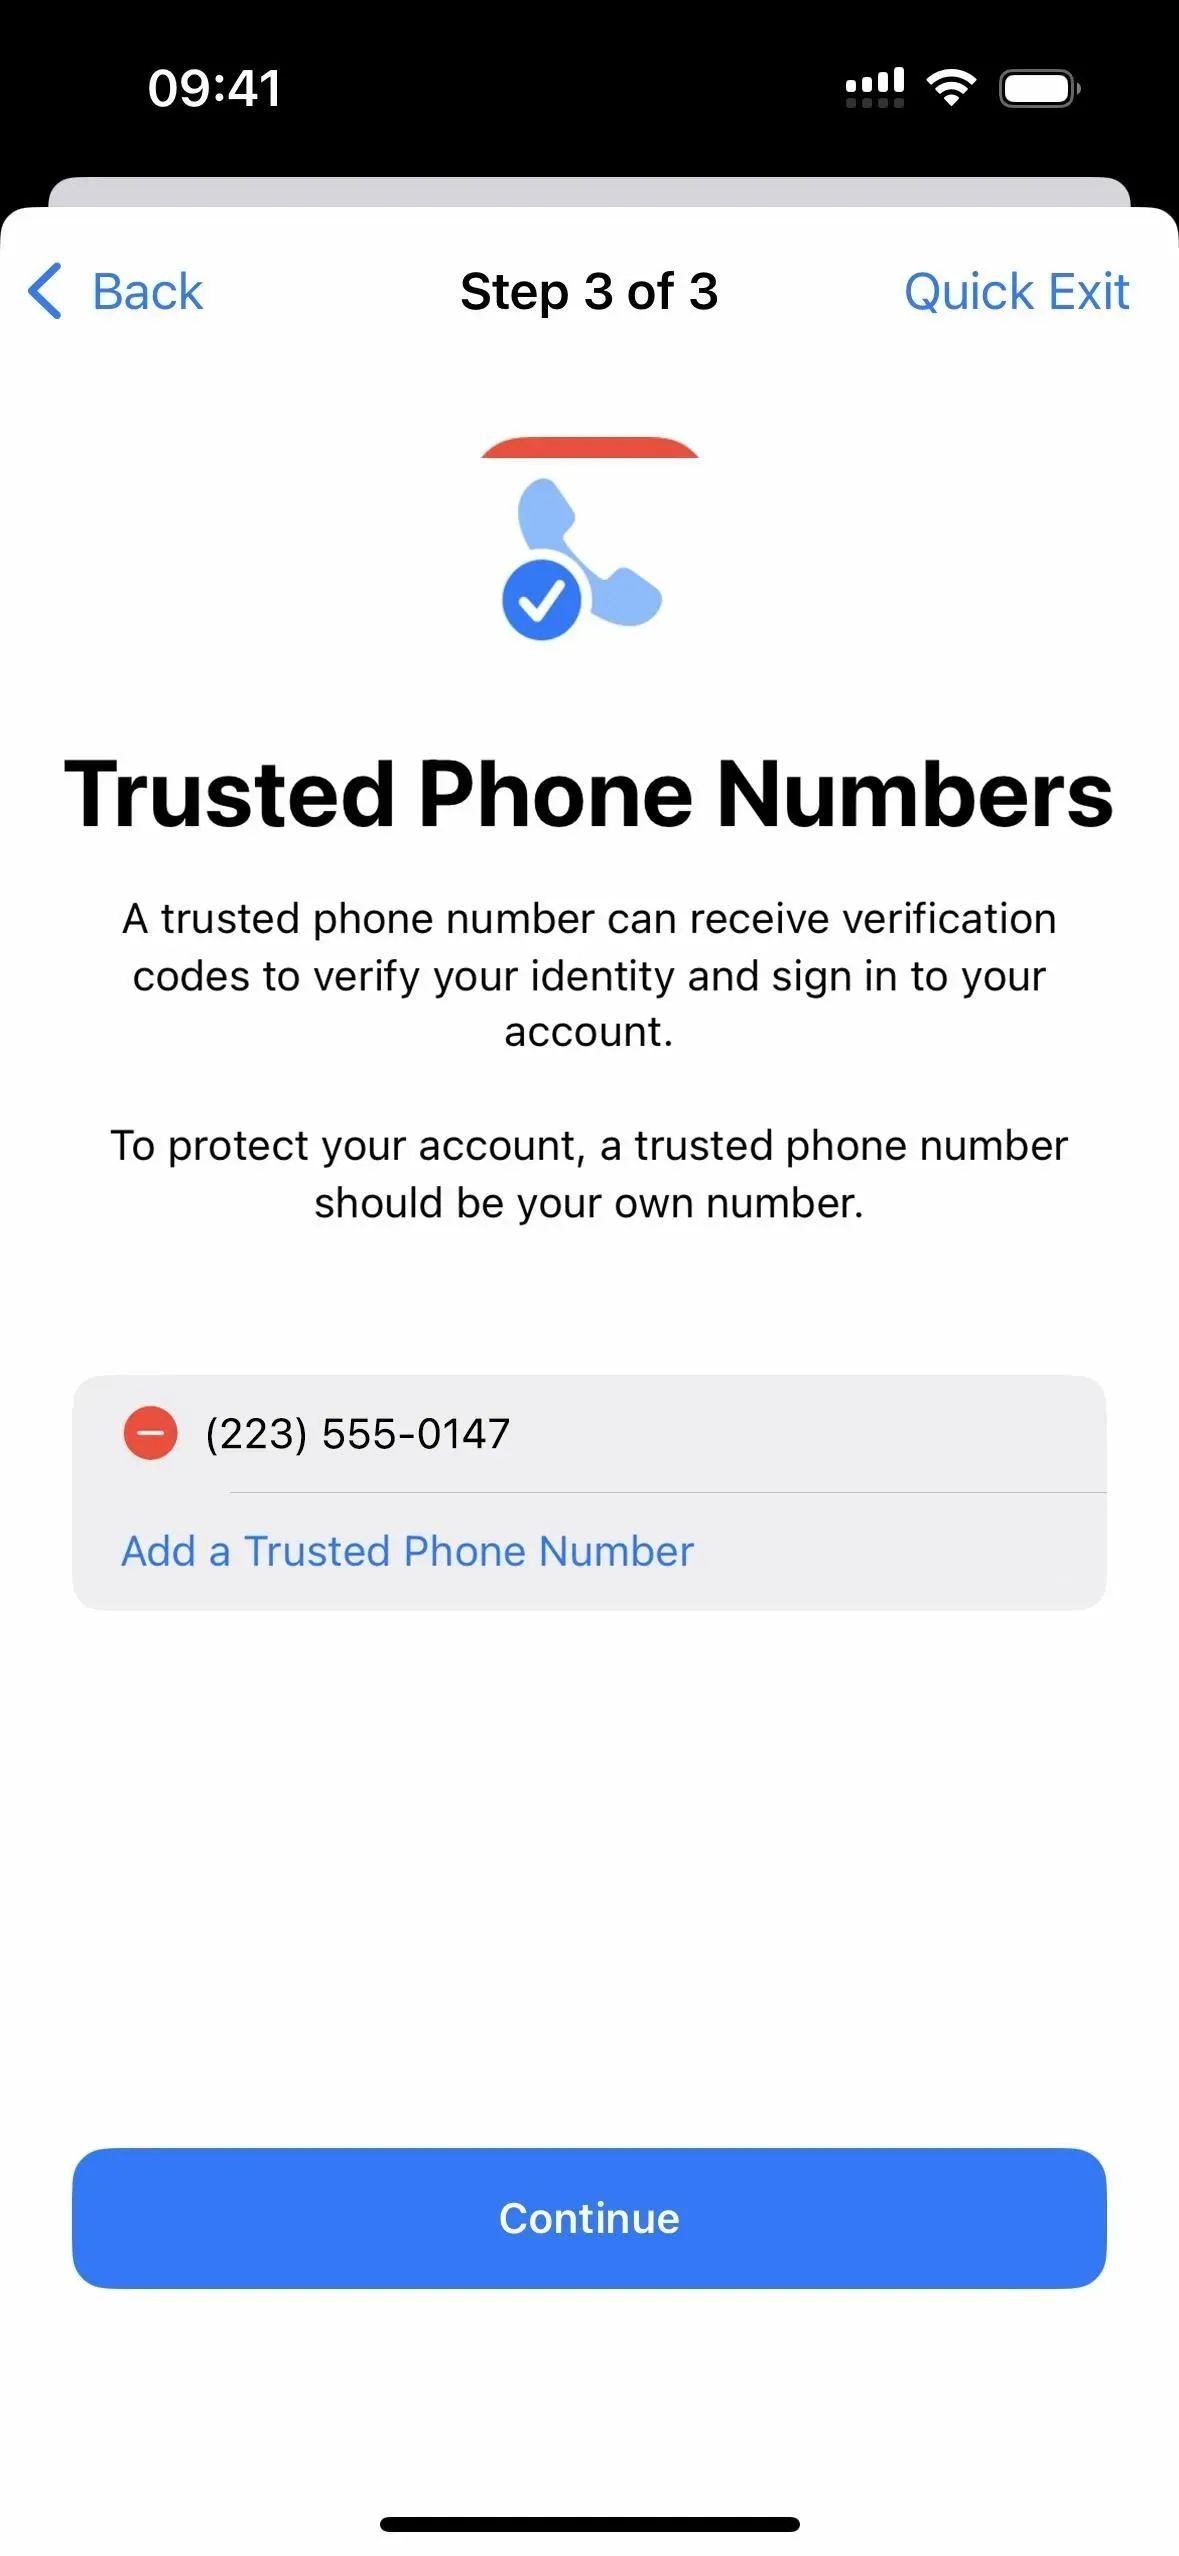
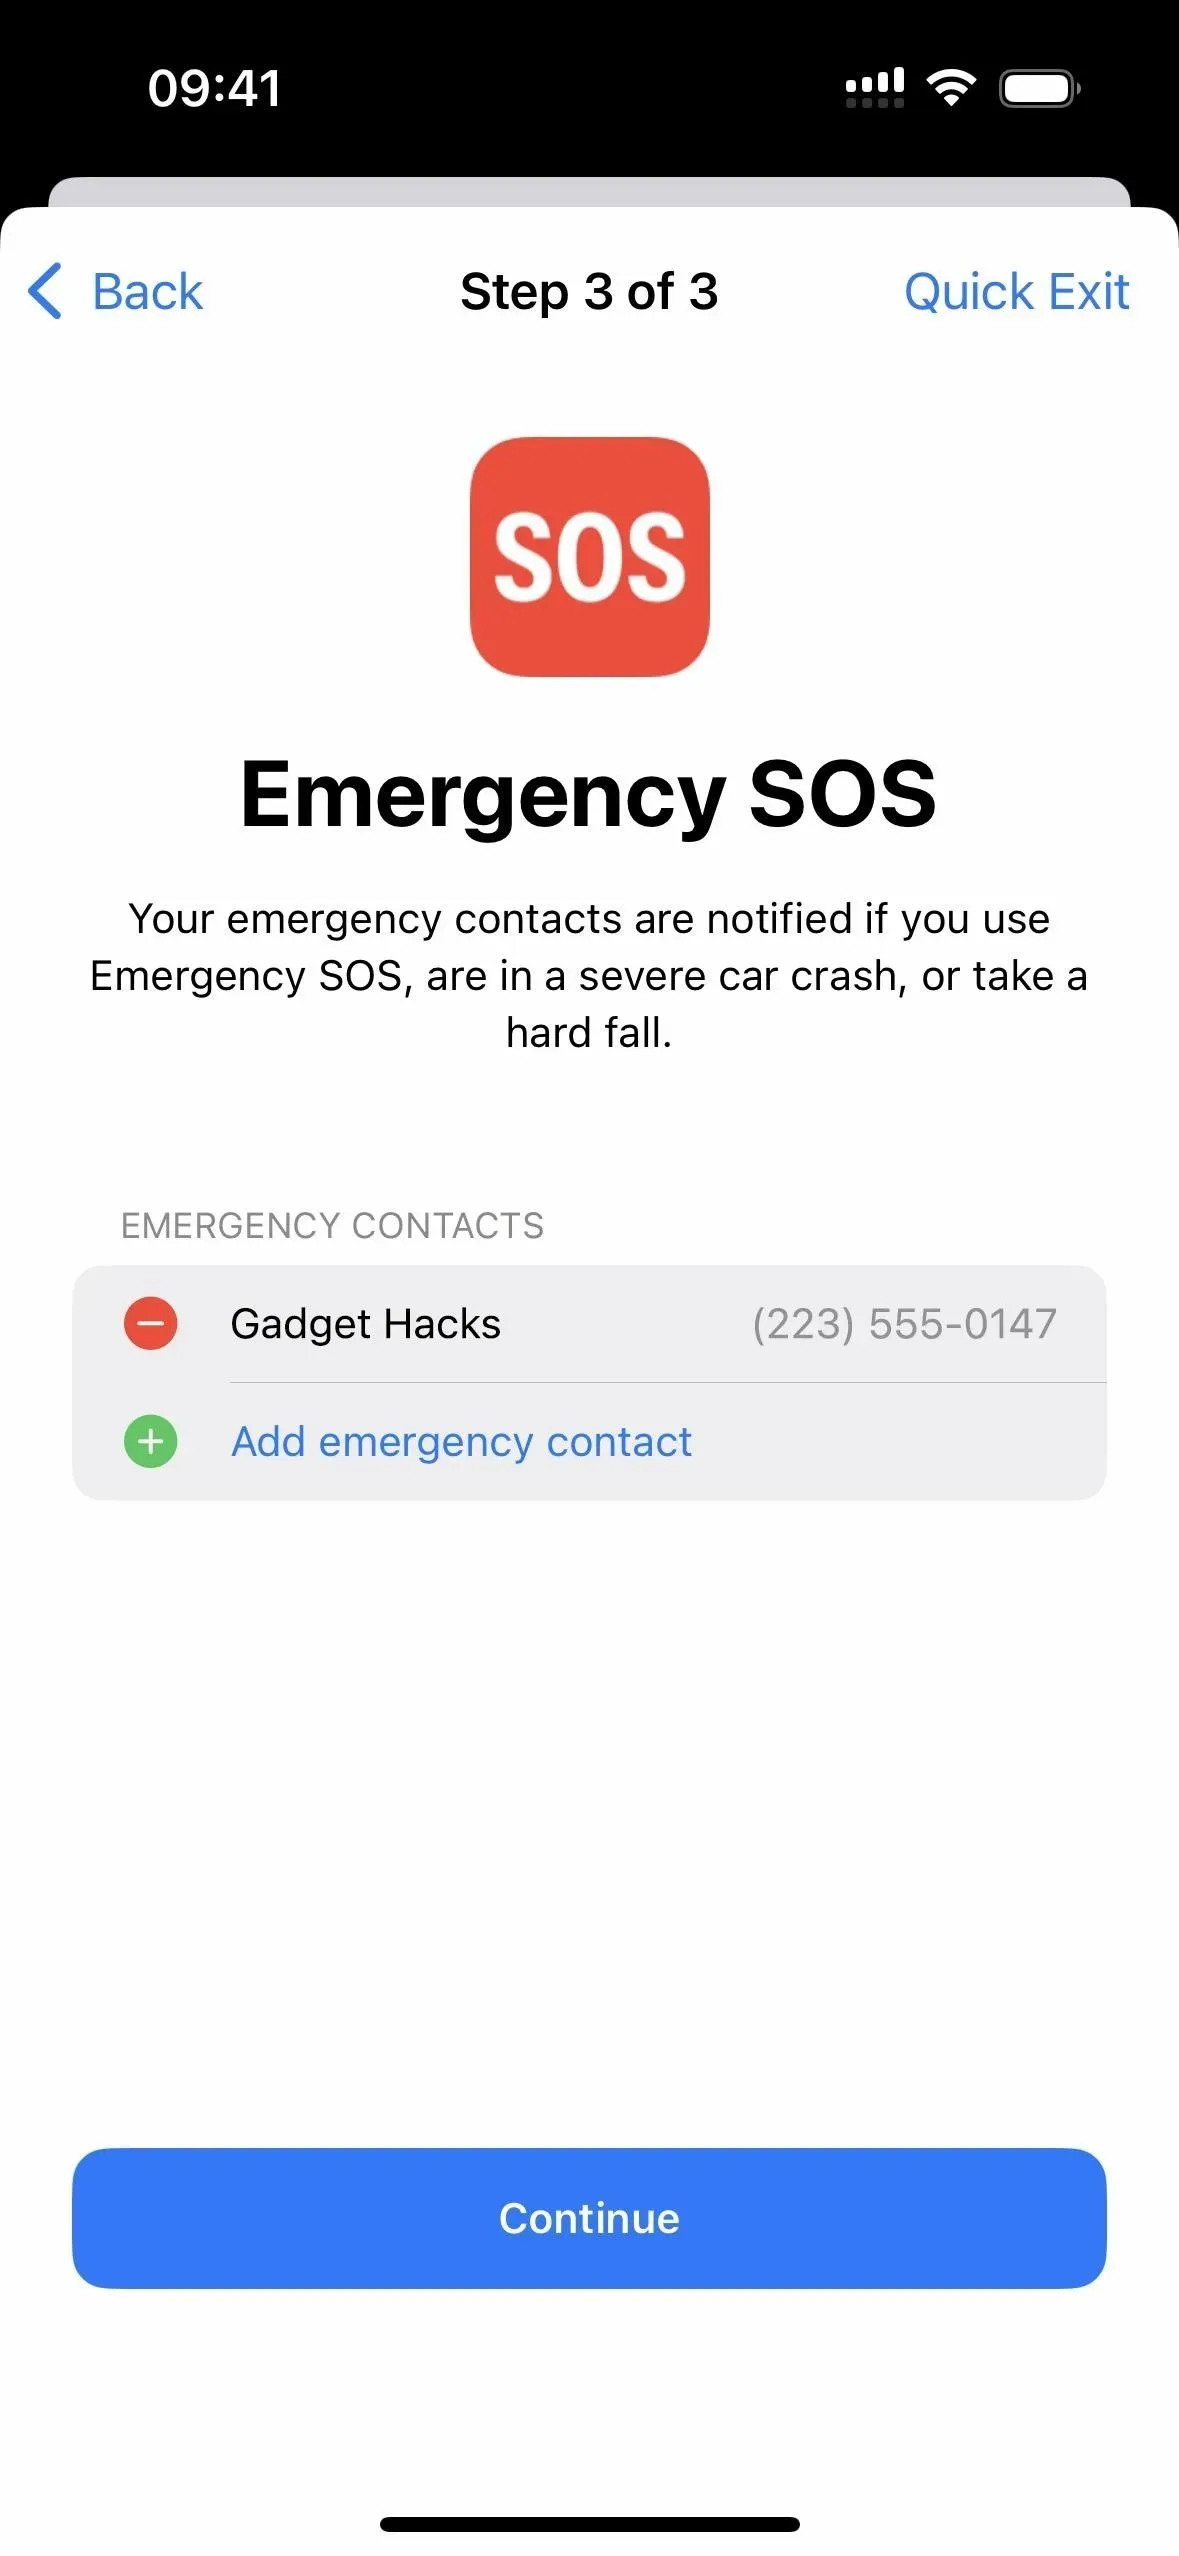
You can also view and set up trusted phone numbers that can receive verification codes to help you sign in to your Apple ID account on another device. And the Emergency SOS section will let you see, delete, or add emergency contacts that are notified during car accidents, heavy falls, and more. Click Continue when you’re done with these sections.
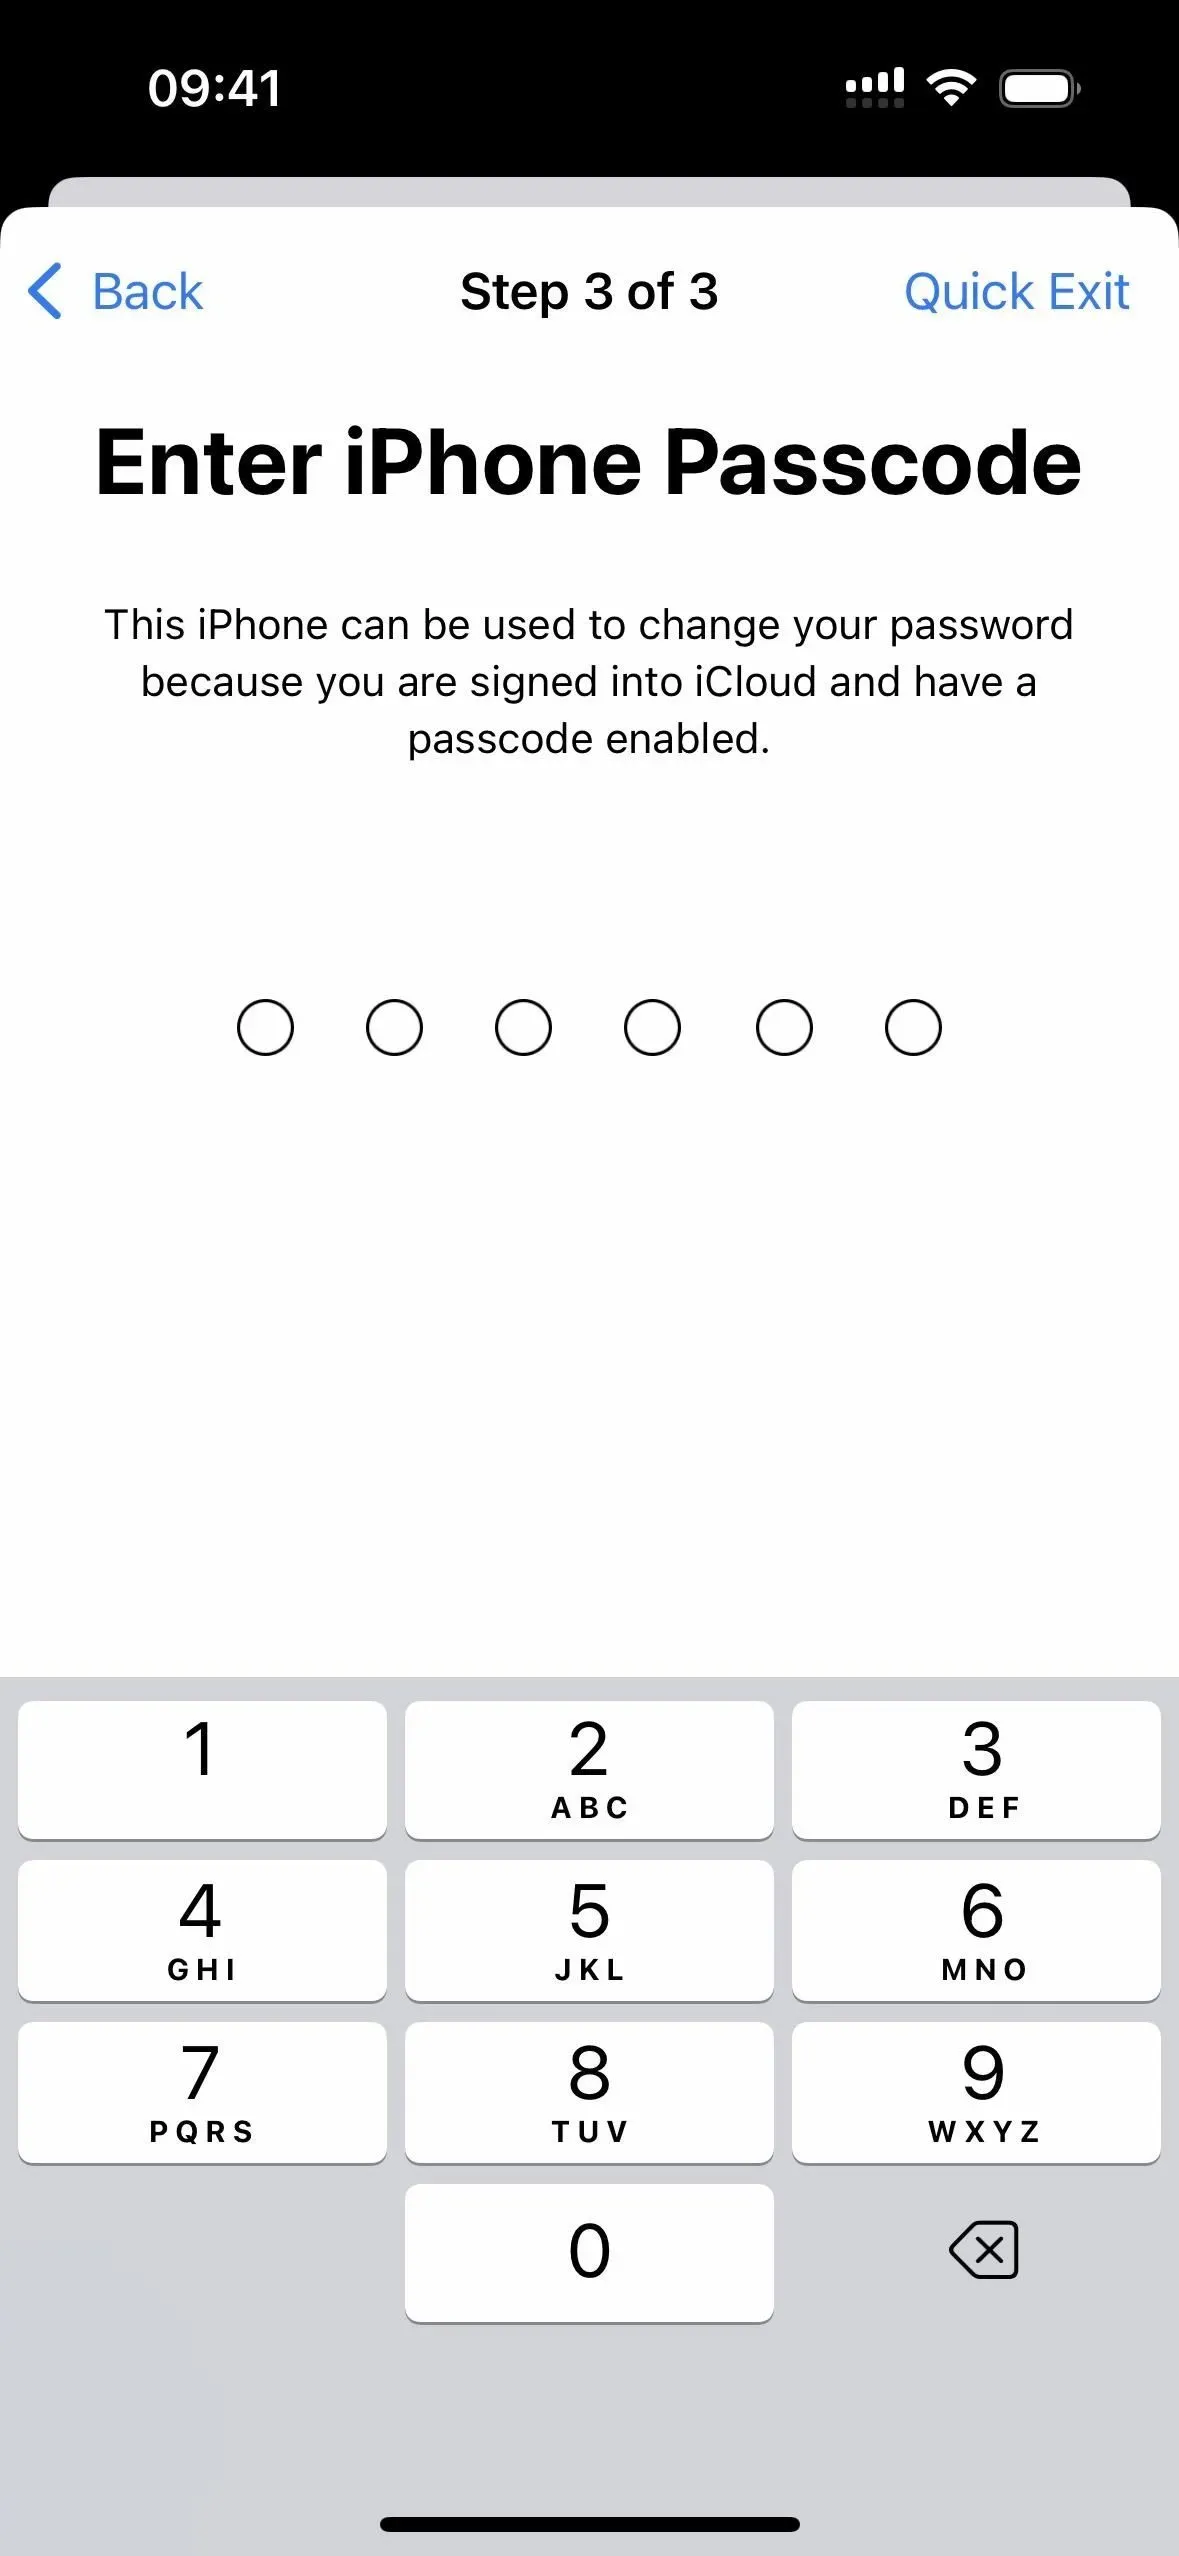
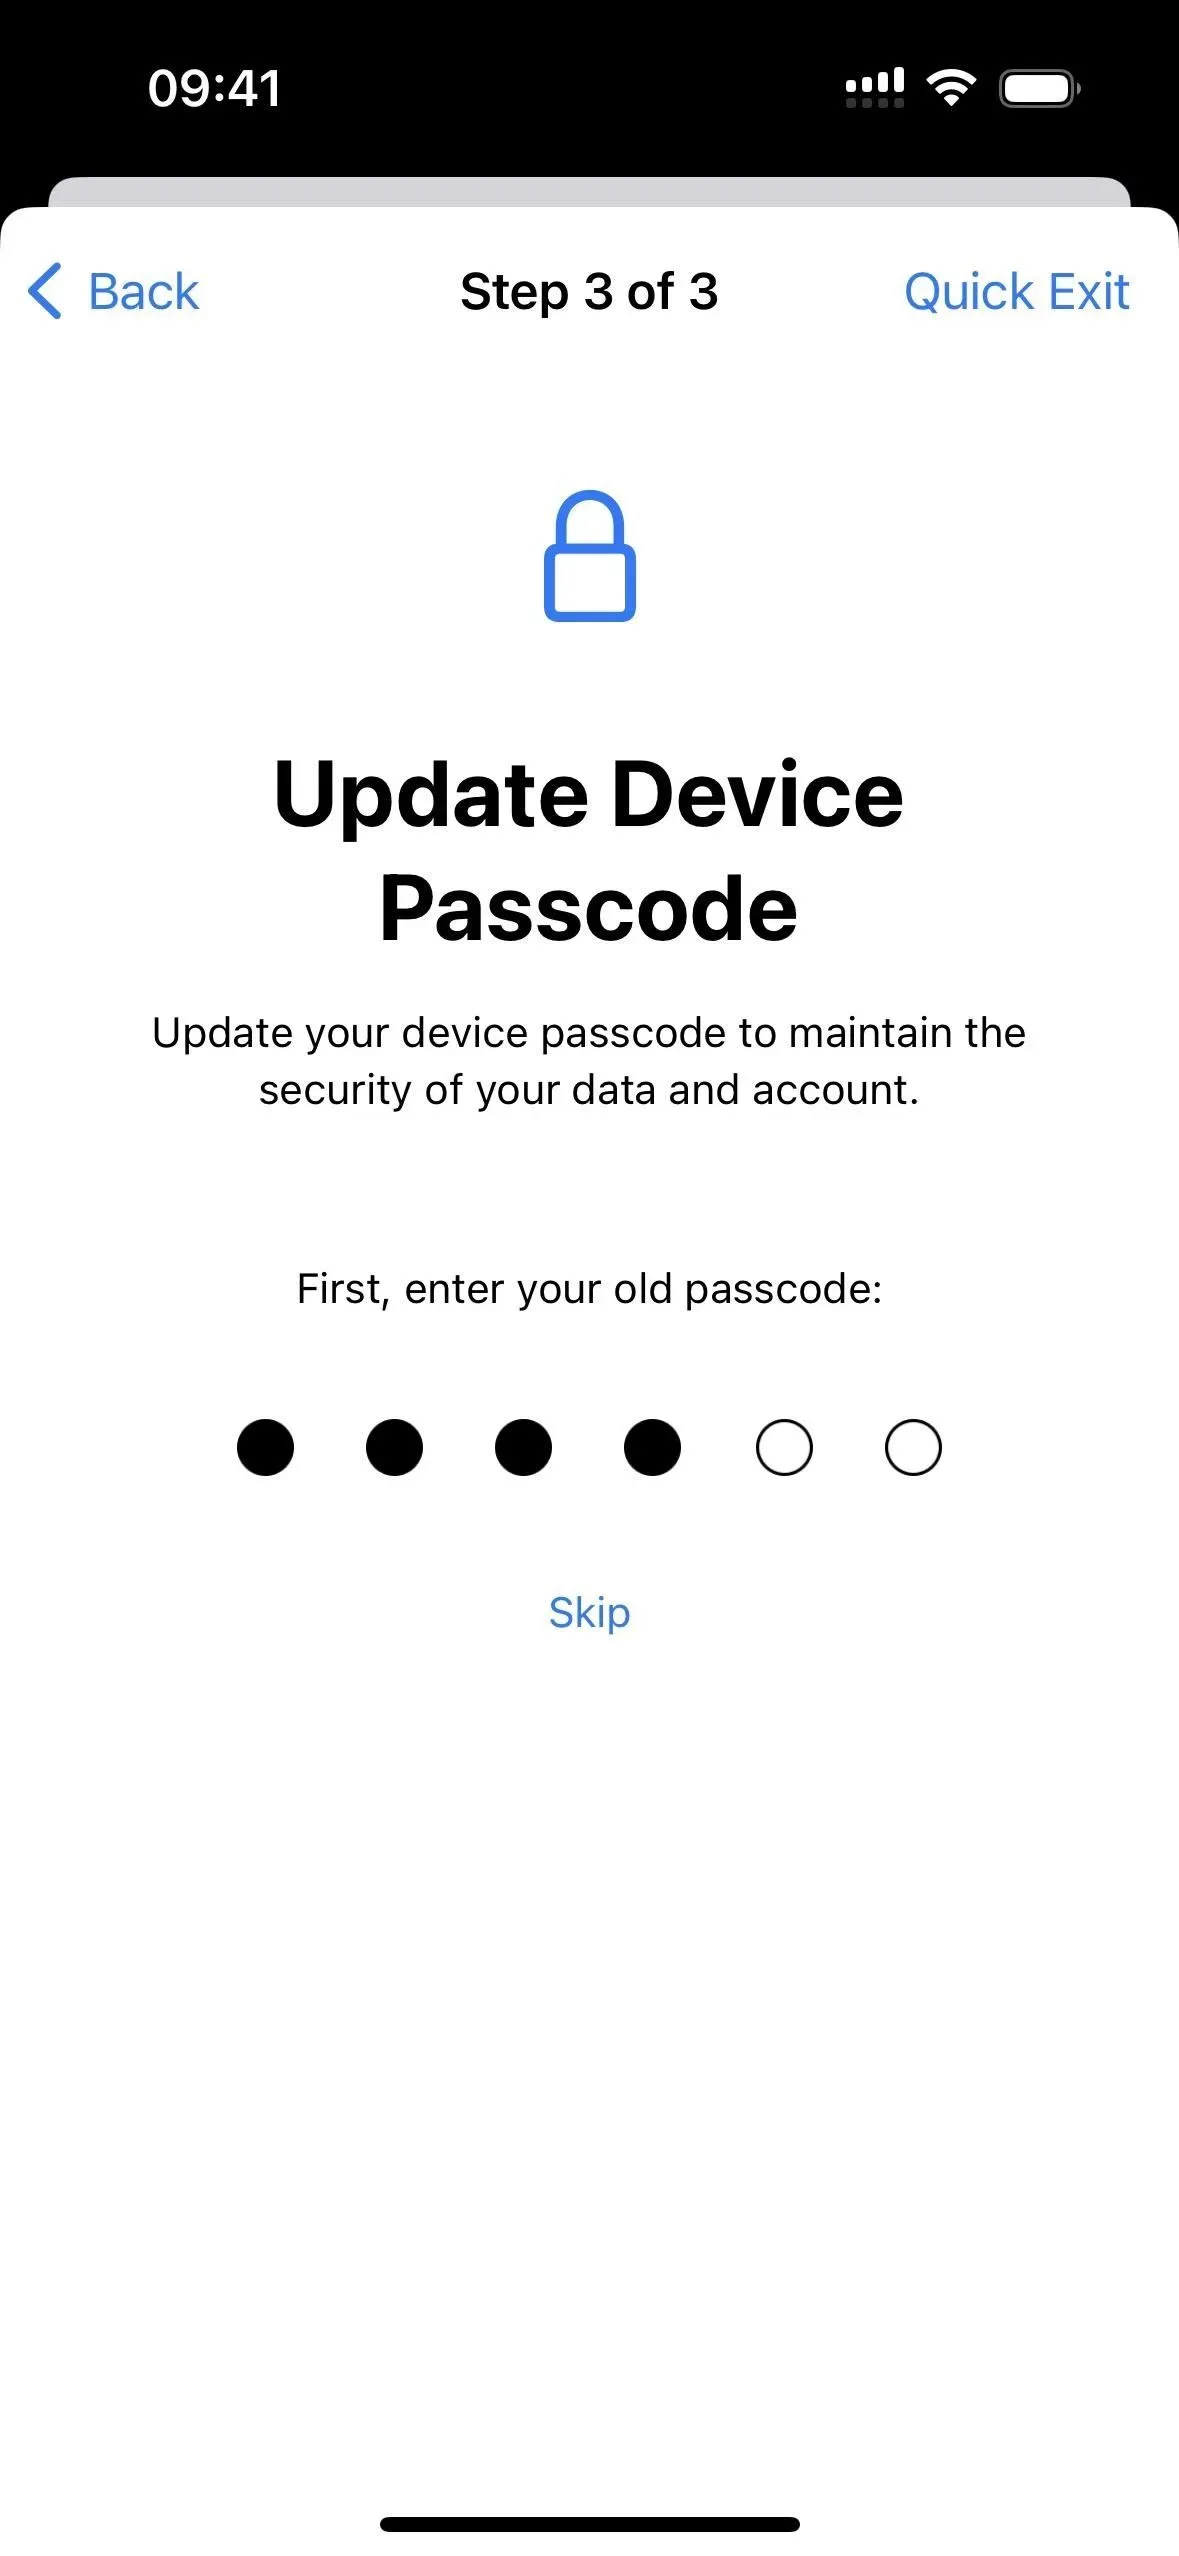
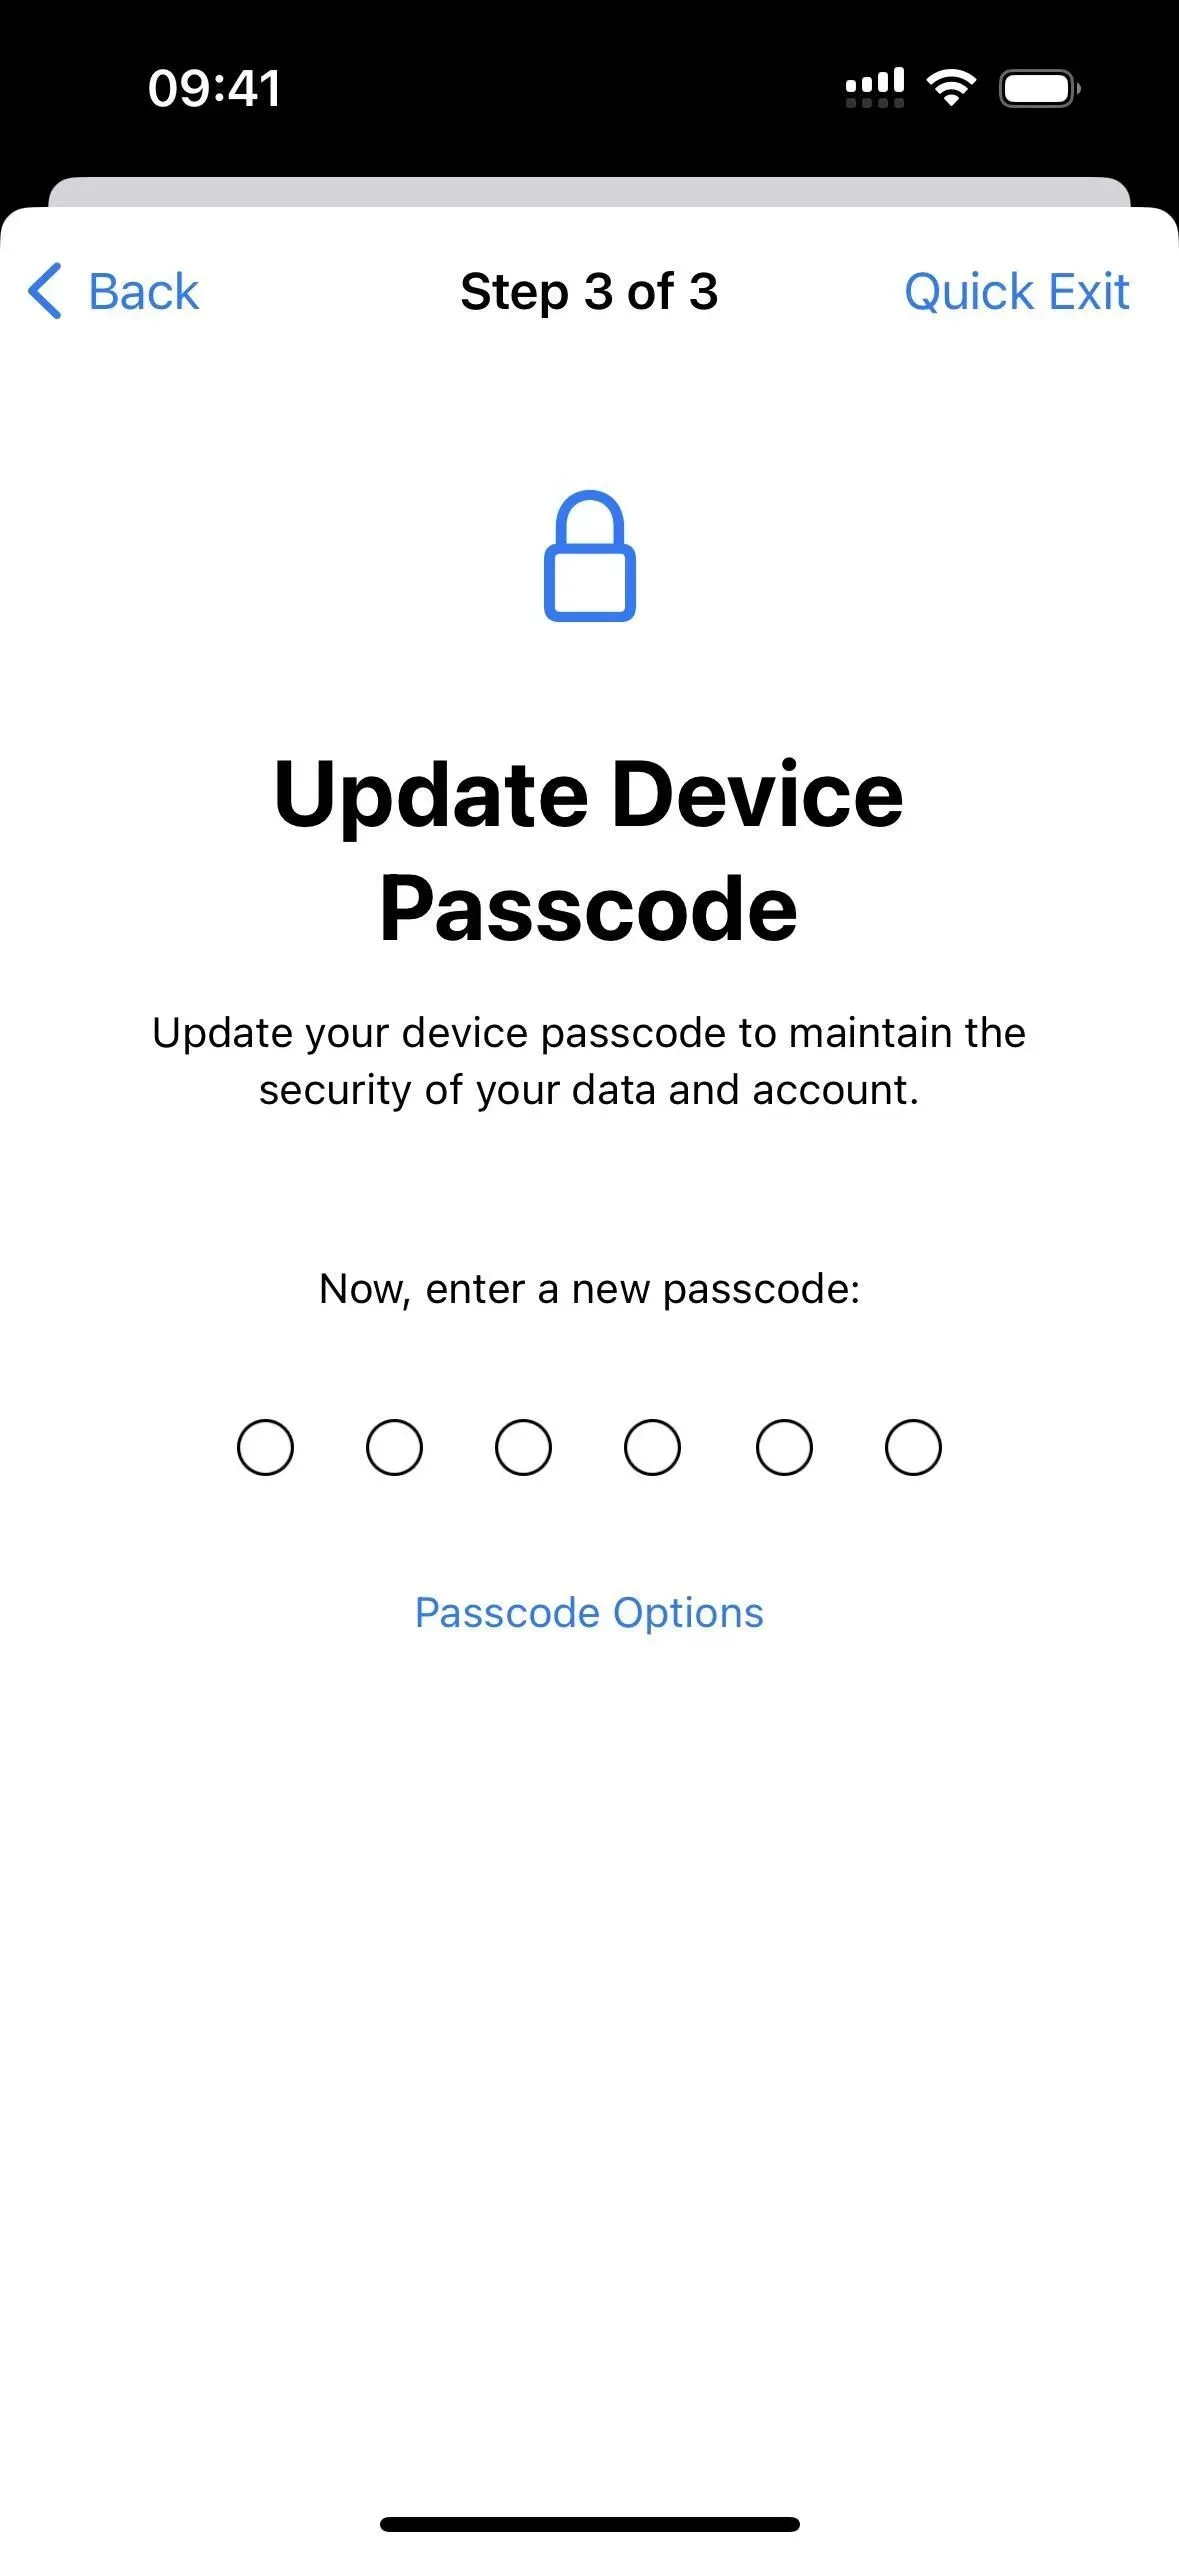
The other option you may see asks if you want to update your iPhone passcode. If you’re using a four-digit or six-digit numeric password, you might want to consider switching to a longer number, or better yet, an alphanumeric one that’s nearly impossible to crack.
If you don’t want to update it, click Skip. Otherwise, enter your current password, then enter a new password, or click Password Options to choose a longer number or alphanumeric code. Follow the instructions to continue changing it.
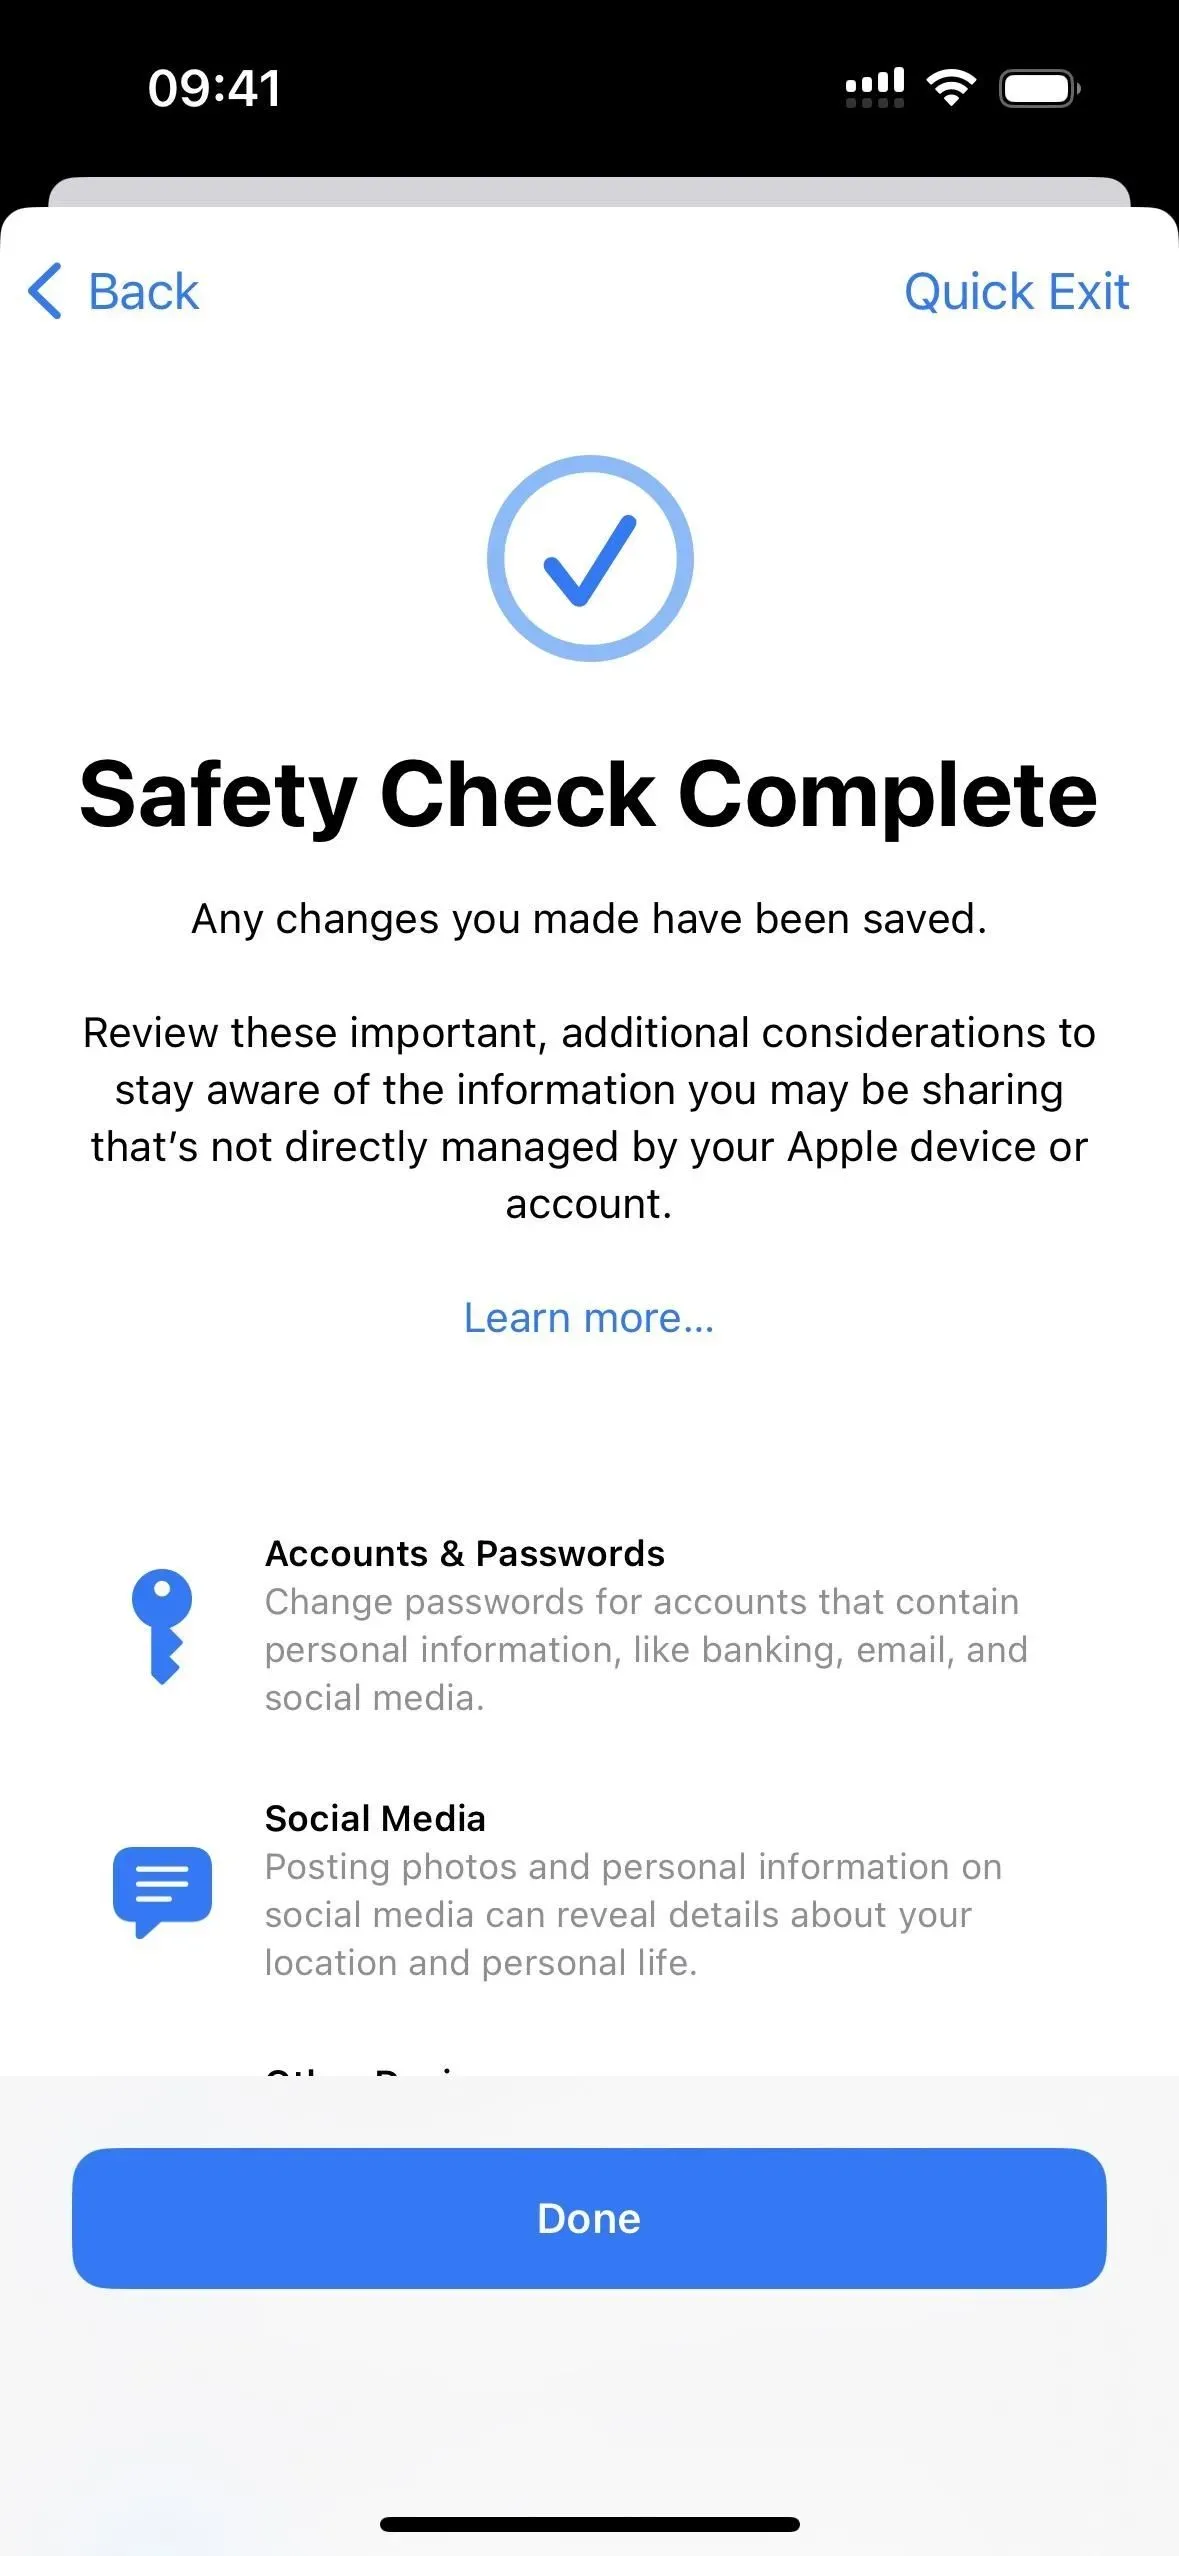
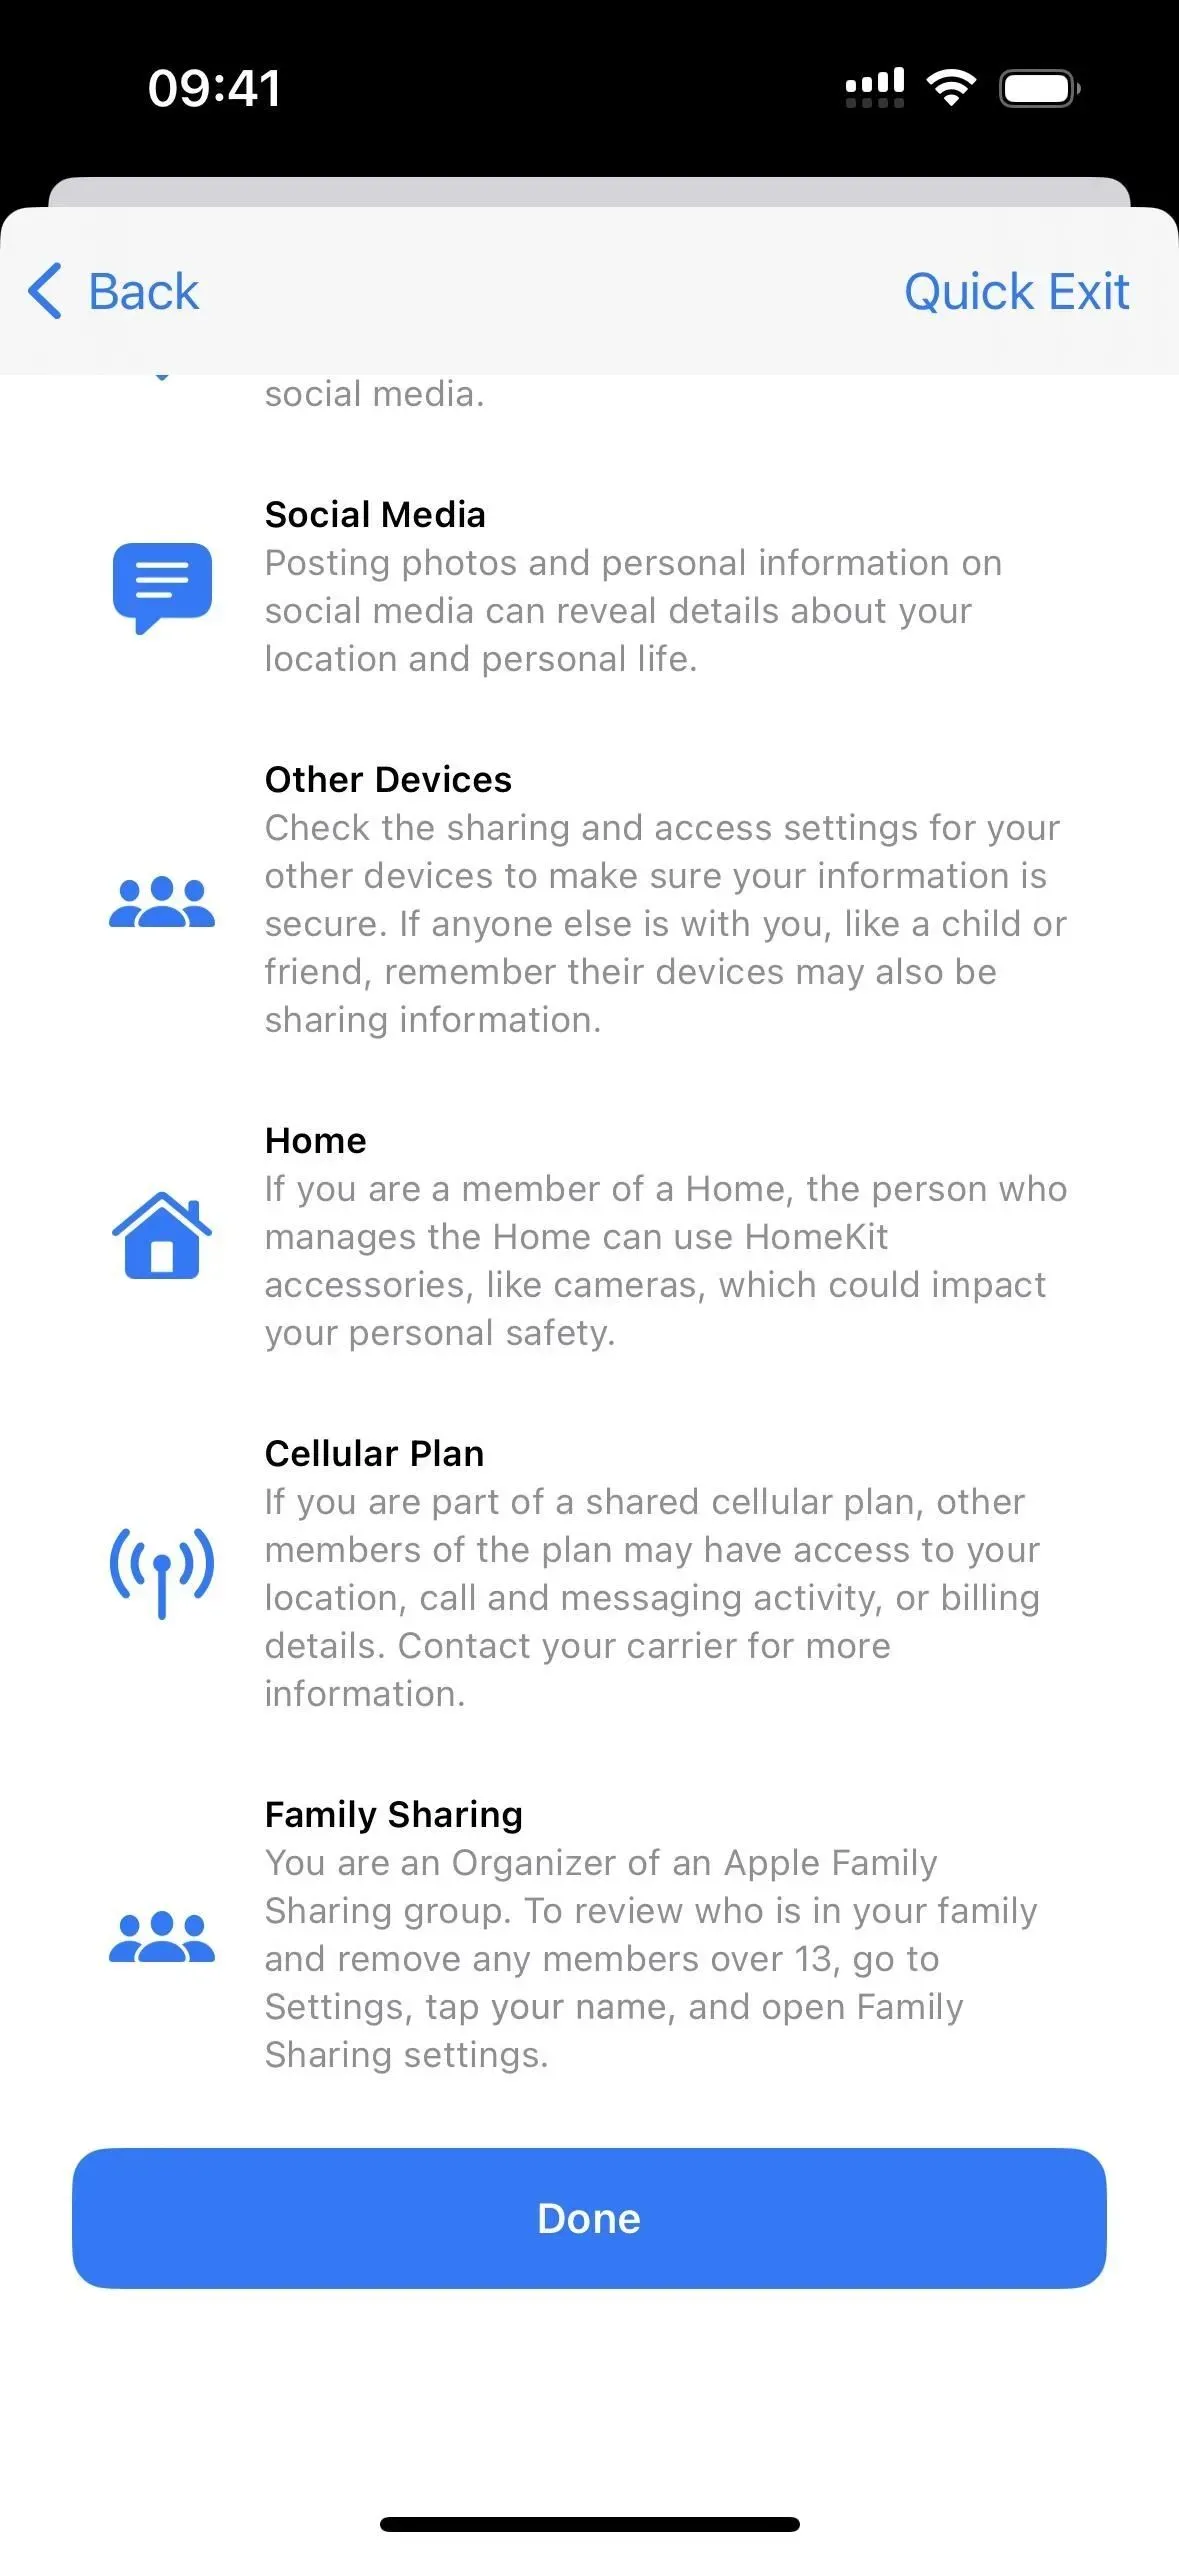
When it’s finished showing you all the recommended privacy and security settings to browse, it’ll provide tips for keeping your data safe in other situations, such as when posting to social media and sharing a cell phone plan. Click Done to exit.
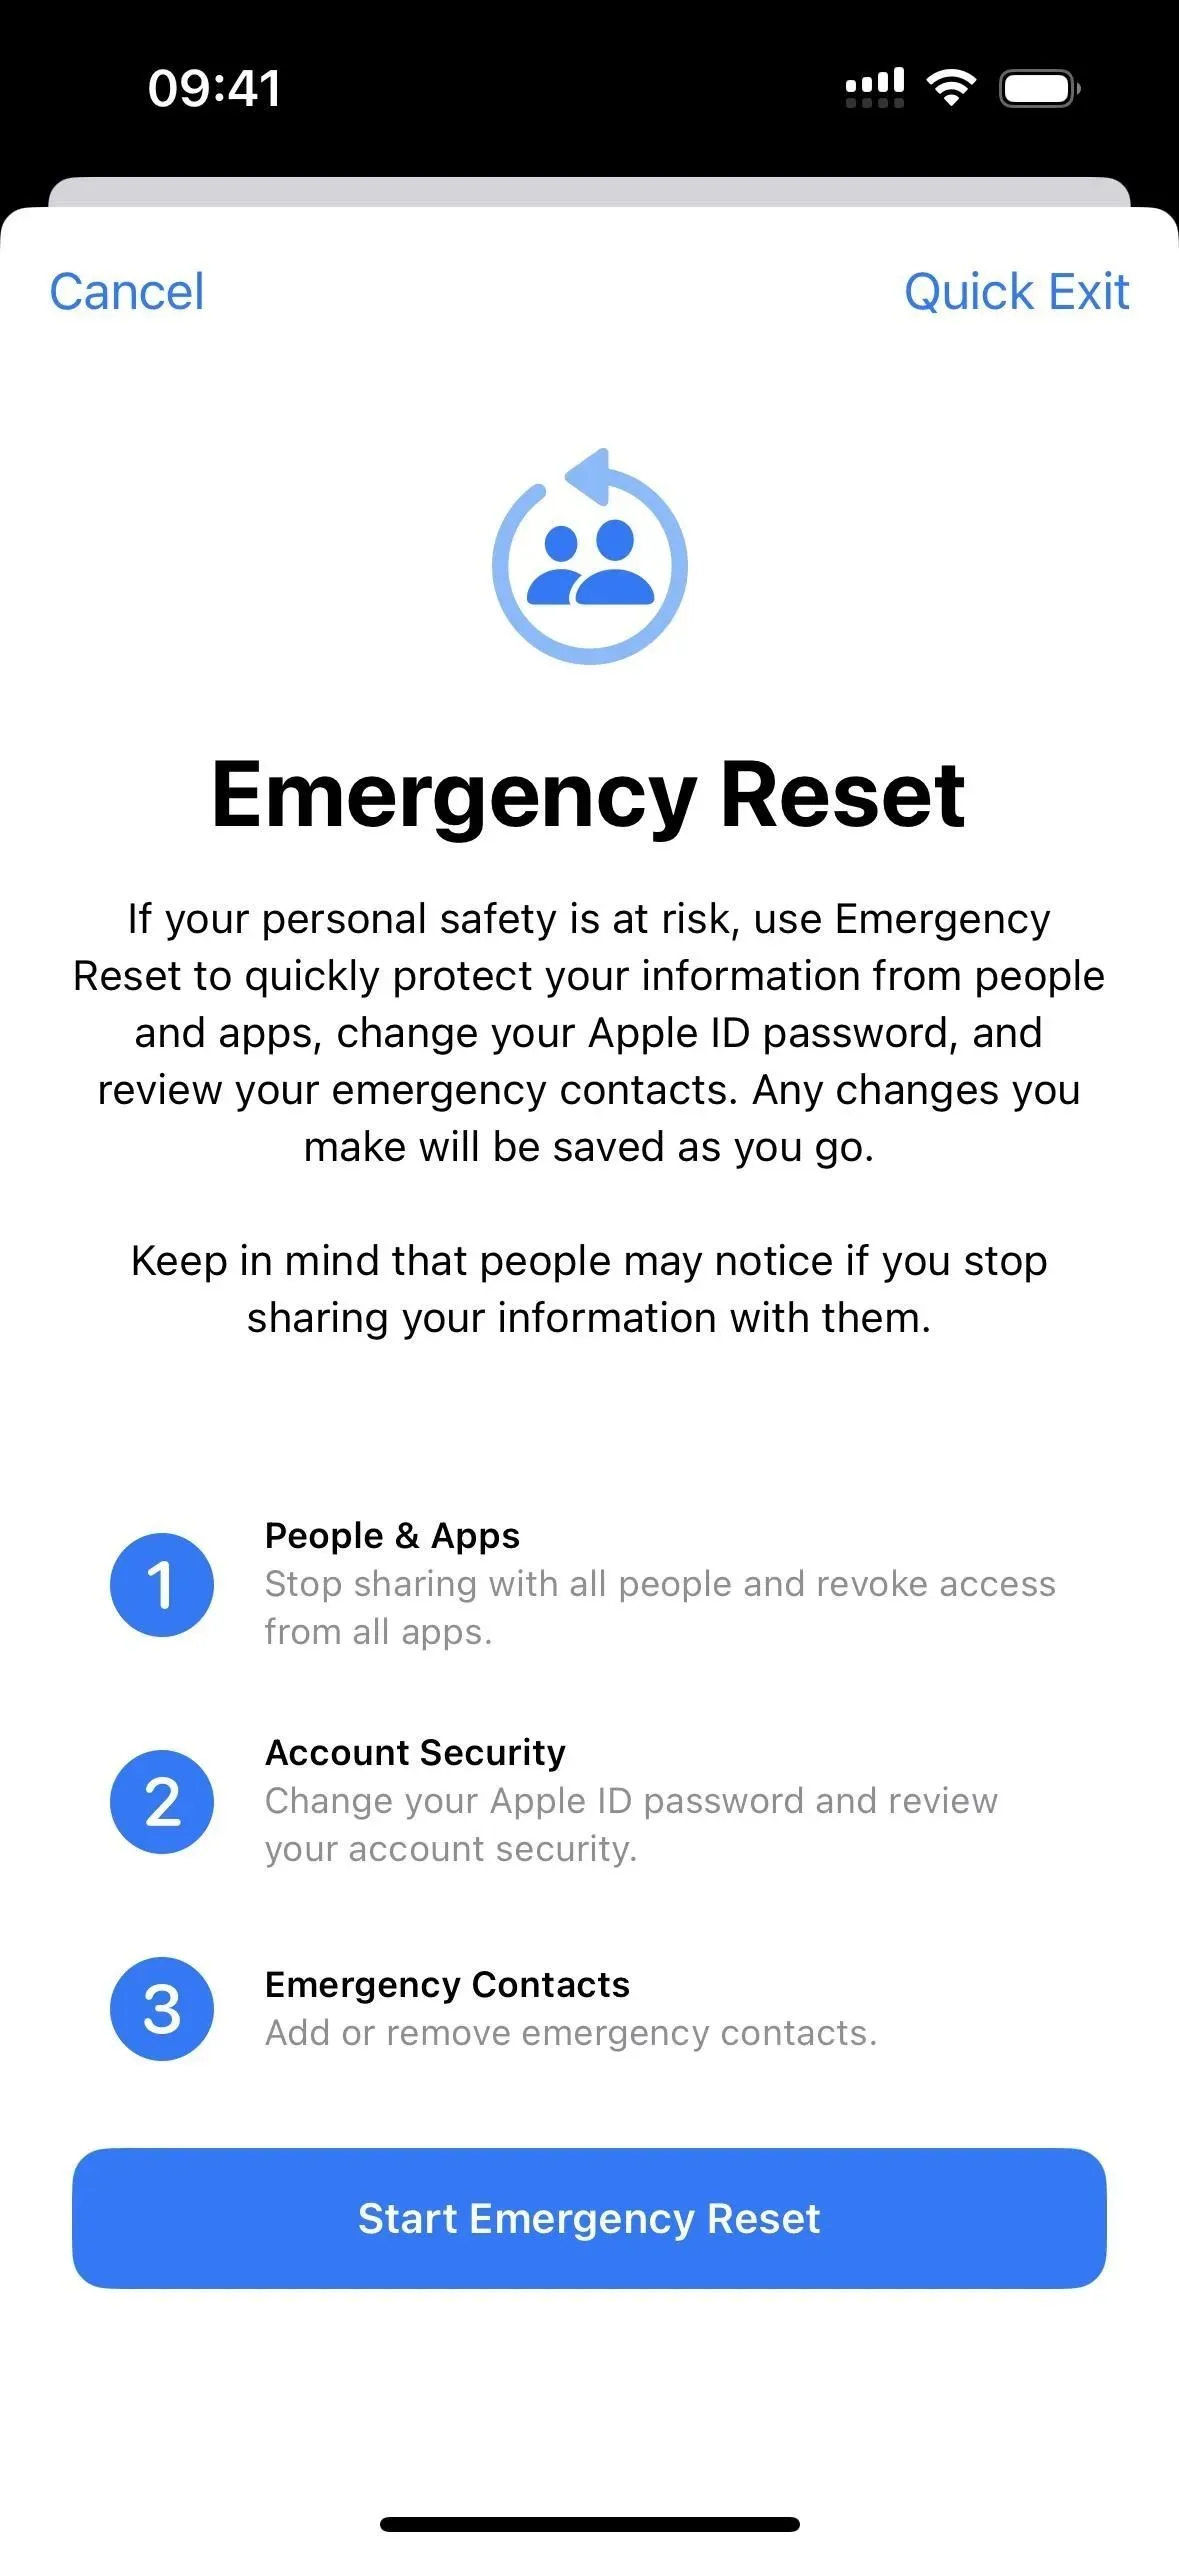
Option 2: Emergency reset
Select “Emergency reset”and then “Start emergency reset”and you will disable all sharing, permissions and access shown in option 1 above in steps 1 and 2. You will still go through step 3 above one by one. since all these things require manual checking. Apple recommends using this option only if your personal safety is at risk.
Leave a Reply